Tech Tuesday - Bleed RockShox Reverb Remote Lines
Two sounds reverberated around the world when RockShox announced that it was making a dropper post with a hydraulic remote control: the first was a round of applause in the great hope that someone would finally produce a reliable dropper post; the second sound was a great wailing and gnashing of teeth from riders who imagined yet another salad-oil wrestling match with an inanimate object when the time came to bleed the system. Pinkbike's forums and comments are peppered with both positive and negative experiences bleeding the Reverb seatpost control line, so I thought I give it a go and see for myself.
Turns out that the job is pretty easy, and quick too. After the first run-through, I can get 'er done in about 20 minutes. The instructions are available on SRAM's RockShox website as well. The only hassle is finding the 2.5-weight shock fluid required to make the remote work smoothly (RockShox sells it). In this Tech Tuesday, we go through the simple bleeding process. If you want to shorten or replace the hose, you'll need to buy Reverb-specific screw-on replacement hose fittings to finish the job. If you simply need to unhook one end of the hose to reroute it through the frame or linkage, then the following steps are all you need.
![What you ll need]()
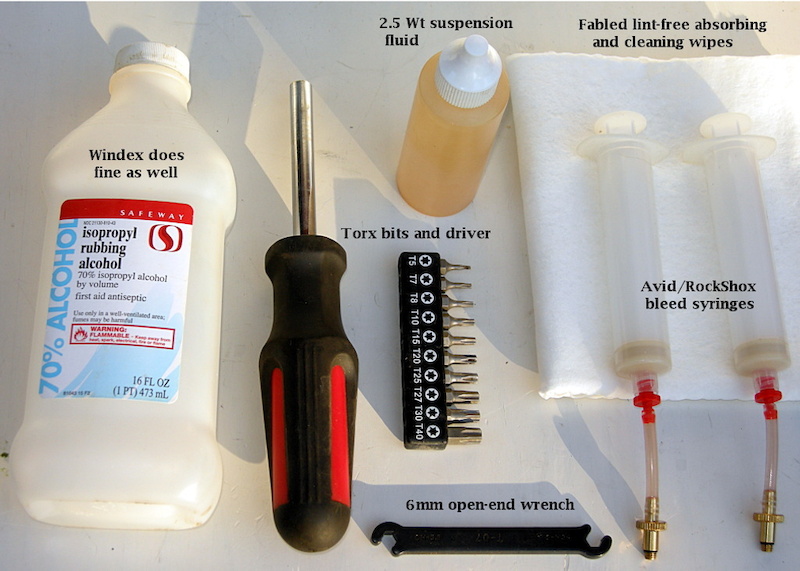
What You'll Need:
• 2.5-weight suspension fluid
• Avid/RockShox bleed kit
• Isopropyl alcohol (Windex or Simple Green)
• 6-millimeter open-end wrench
• Torx bits and driver (T10 and T20)
• lint-free rags
• Bike stand is a great help
• bungee or rope to keep front wheel straight
![Tips]()
How To Bleed a RockShox Reverb Seatpost Remote Control System
![If you are only going to remove one side of the hose unscrew the seatpost end because you won t have to mess with the speed control valve at the remote side.]()
![Loosen the remote control clamp with a T20 Torx wrench enough so it will slide around the handlebar.]()
![Level remote control so that the bleed port at the elbow is at a high point.]()
![Evacuate air from syringe by pushing the bubbles and fluid into an absorbent cloth. Wear eye protection to prevent fluid spew from ruining your day.]()
![Remove bleed plug from seatpost with a T10 Torx wrench.]()
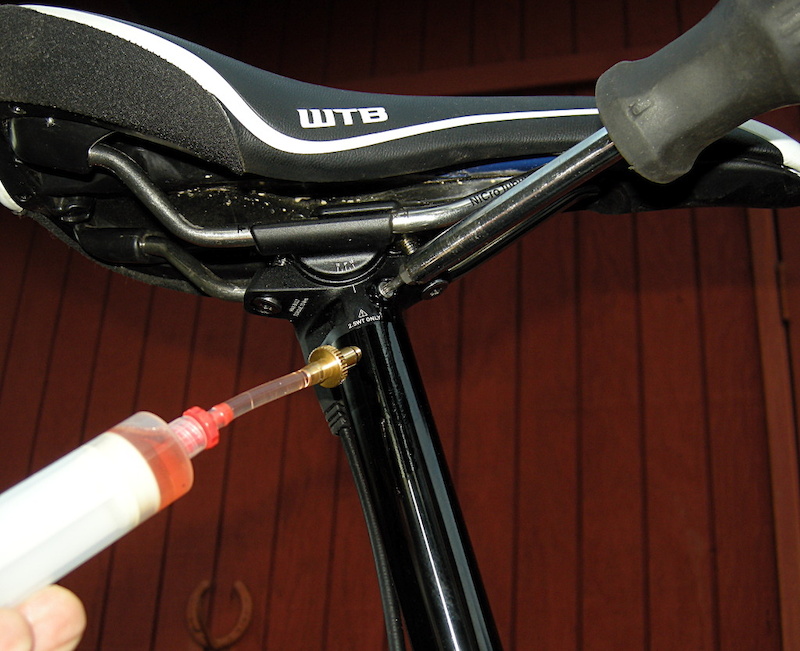
![Screw in empty syringe into seatpost bleed port.]()
![Remove remote control bleed plug]()
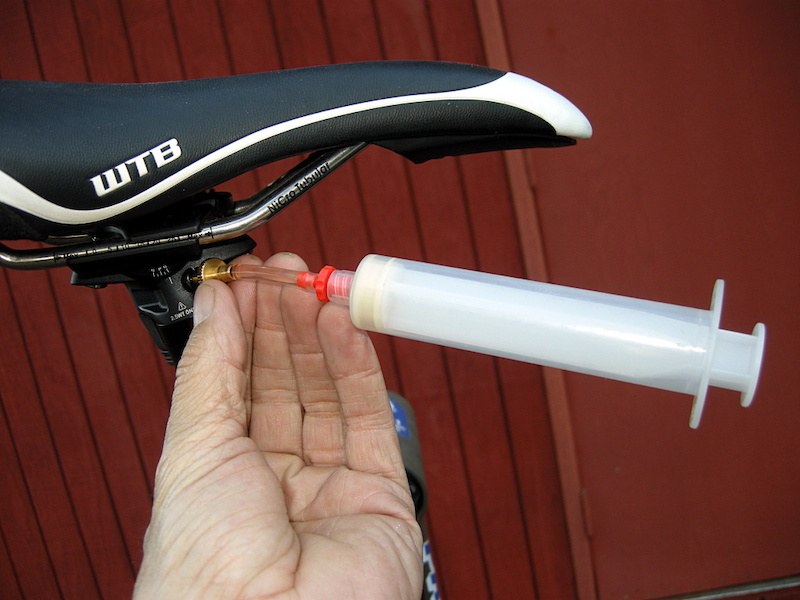
![Screw in full syringe to remote control bleed port]()
![The two bleed plugs are different the pointed one goes in the remote module and the one with the O-ring fits the seatpost bleed port.]()
![RockShox says to bleed the system with the speed control in the slow position. I found it works better to bleed the system turned in full fast.]()
![Be sure to keep the syringes upright so the air pockets stay above the fluid stream. Pull a vacuum on the seatpost side while pushing fluid into the remote control side. Watch for bubbles on the vacuum end. When the bubbles stop - or you get down to the last half an inch of fluid on the pressure side stop.]()
![Reverse the pressure vacuum cycle until you don t see bubbles evacuating from the system. This should only take a couple of sessions.]()
![Give the remote syringe a strong push and then unscrew the seatpost syringe and screw in the proper plug. It has an O-ring so the plug only needs to be tightened to a snug fit. A little fluid will escape.]()
![With the seatpost side buttoned up move to the remote control. Pull a vacuum while you push the button all the way in and then pressurize the button with the syringe to return it. Then use constant pressure and pump the button a handful of times. No bubbles Great]()
![photo]()
![Give the remote control syringe a hard pump and then remove it and screw in the proper bleed plug. It is pointed so it only takes a snug fit to seal. Wipe off the remote control and seatpost with a clean rag and some alcohol and give the post a test. It should react quickly to a push on the button. If you have to push the button all the way in or pump it to get the post to slide you ve got air in the line and it s probably in the button. Redo the vacuum pressure steps on the button and speed dial and try again. If all is well reset the angle of the remote tighten the clamp and then zip-tie your remote hose in place. Bam Job well done.]()
Past Tech Tuesdays:
Visit Parktool.com to see their entire lineup of tools and lubes
Turns out that the job is pretty easy, and quick too. After the first run-through, I can get 'er done in about 20 minutes. The instructions are available on SRAM's RockShox website as well. The only hassle is finding the 2.5-weight shock fluid required to make the remote work smoothly (RockShox sells it). In this Tech Tuesday, we go through the simple bleeding process. If you want to shorten or replace the hose, you'll need to buy Reverb-specific screw-on replacement hose fittings to finish the job. If you simply need to unhook one end of the hose to reroute it through the frame or linkage, then the following steps are all you need.
What You'll Need:
• 2.5-weight suspension fluid
• Avid/RockShox bleed kit
• Isopropyl alcohol (Windex or Simple Green)
• 6-millimeter open-end wrench
• Torx bits and driver (T10 and T20)
• lint-free rags
• Bike stand is a great help
• bungee or rope to keep front wheel straight
Tips that will make the job go smoothly:
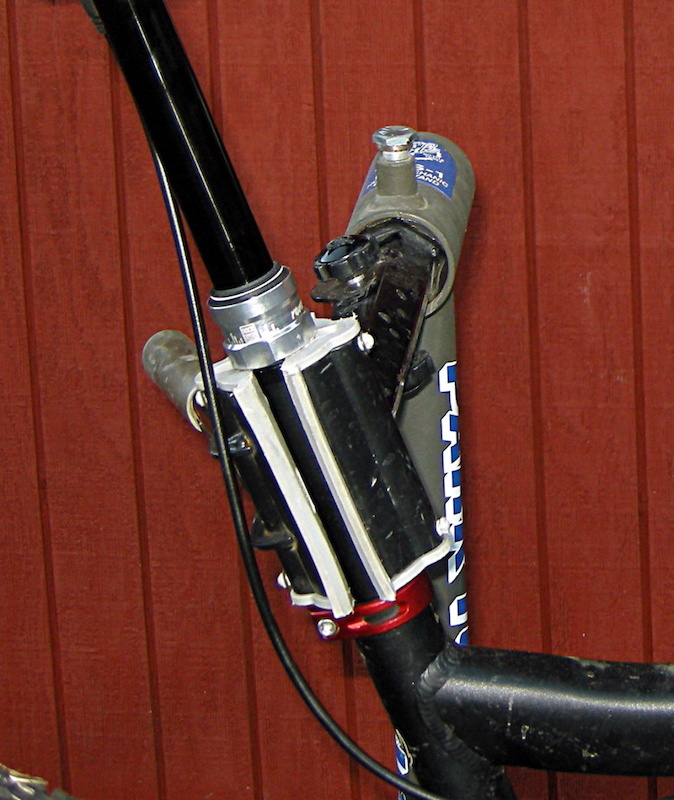
The first and most expensive mistake that most Reverb owners make is clamping the hose, hose fitting and upper slider part of the Reverb in the bike stand. If you've wrecked a Reverb post like this, you are a member of a sizable club. We'd advise the rest of you to loosen the frame clamp and slide the post up as high as you need to clamp the fat part of the Reverb below the seal-head in the bike stand. Also remember to move the hose from harm's way before you swing the clamp shut. You'll get best results with the bike angled so that the remote lever is higher or at least level with the bleed port on the seatpost. Keep the front wheel in place with a bungee cord or a length of rope between the rim and frame.
The first and most expensive mistake that most Reverb owners make is clamping the hose, hose fitting and upper slider part of the Reverb in the bike stand. If you've wrecked a Reverb post like this, you are a member of a sizable club. We'd advise the rest of you to loosen the frame clamp and slide the post up as high as you need to clamp the fat part of the Reverb below the seal-head in the bike stand. Also remember to move the hose from harm's way before you swing the clamp shut. You'll get best results with the bike angled so that the remote lever is higher or at least level with the bleed port on the seatpost. Keep the front wheel in place with a bungee cord or a length of rope between the rim and frame.
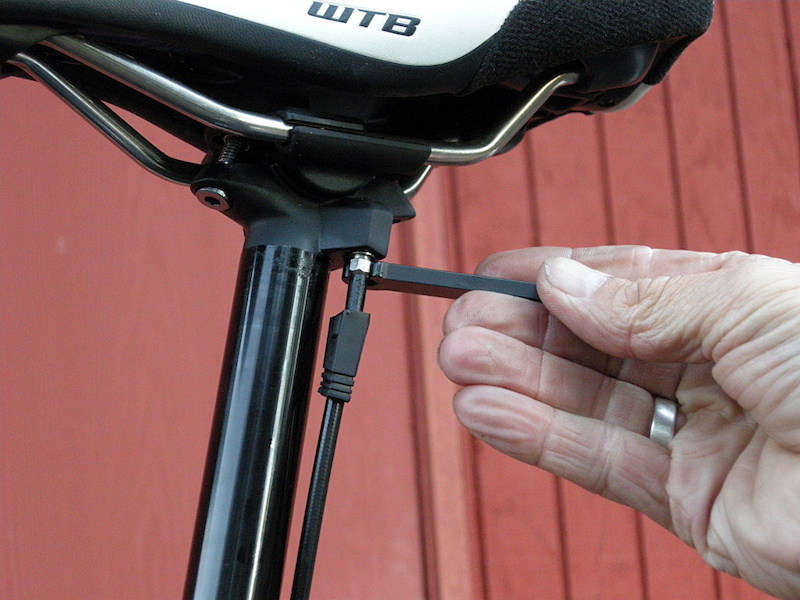
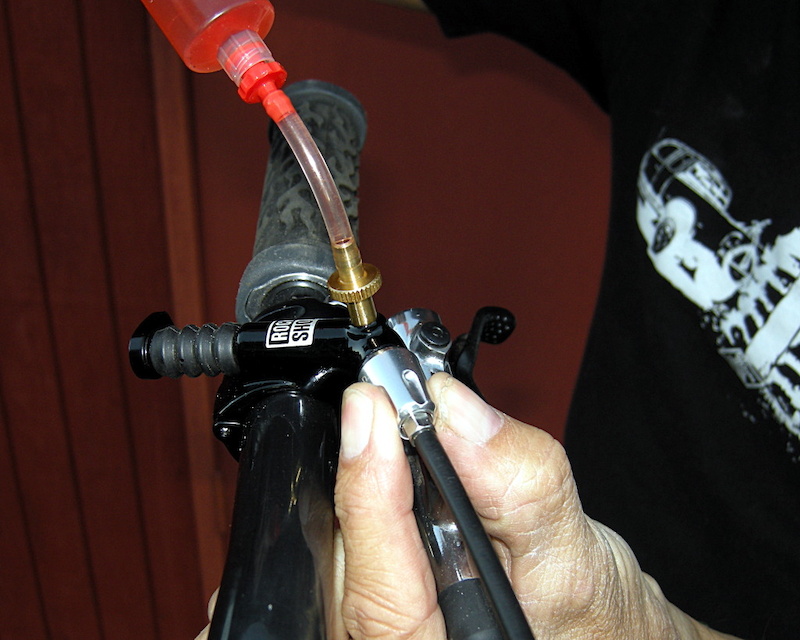
Step 1 - Begin with the post at full extension. If you are only going to remove one side of the hose, unscrew the seatpost end because you won't have to mess with the speed control valve at the remote side.

Step 2 - Loosen the remote control clamp with a T20 Torx wrench enough so it will slide around the handlebar.
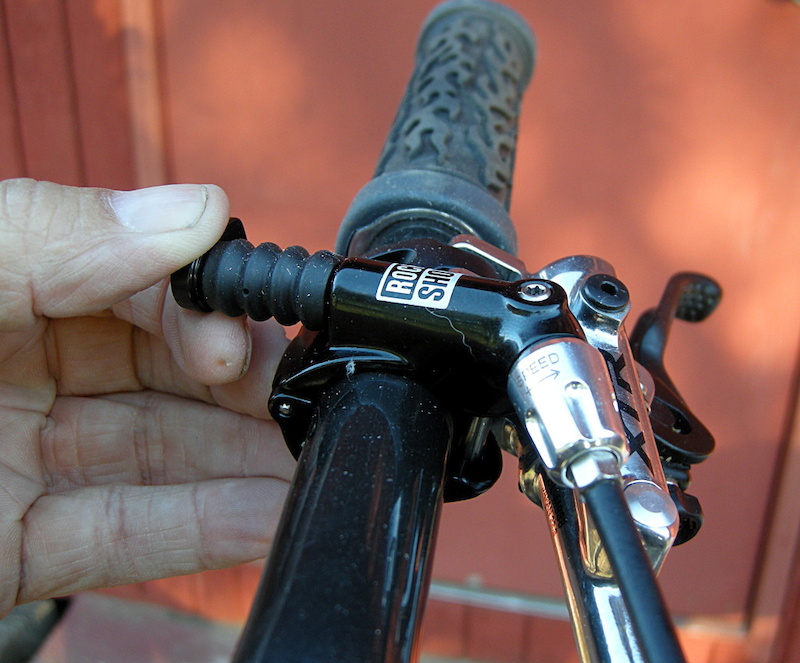
Step 3 - Level remote control so that the bleed port (at the elbow) is at a high point.

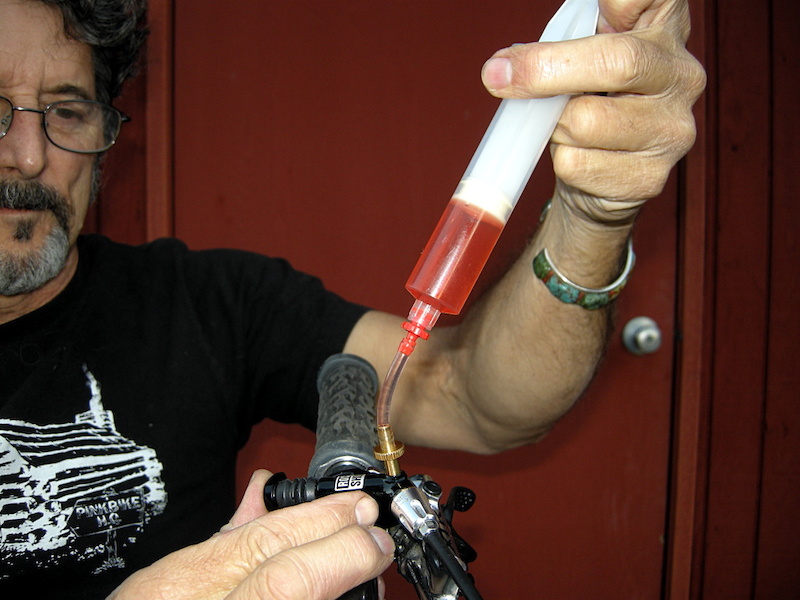
Step 4 - Fill one syringe about half to two-thirds full with fluid. Evacuate air from syringe by pushing the bubbles and fluid into an absorbent cloth. Wear eye protection to prevent fluid spew from ruining your day.

Step 5 - Remove bleed plug from seatpost with a T10 Torx wrench.
Step 6 - Screw in empty syringe into seatpost bleed port.

Step 7 - Remove remote control bleed plug.

Step 8 - Screw in full syringe to remote control bleed port.
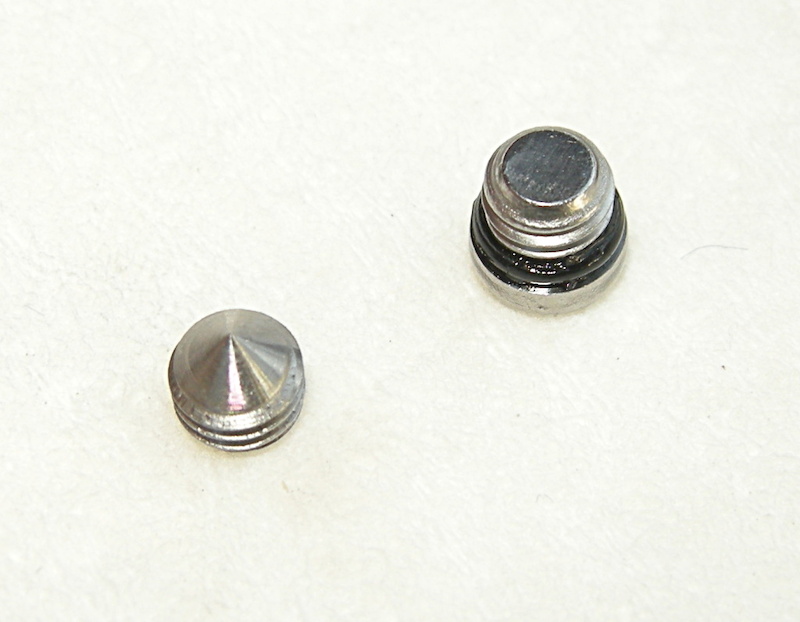
Step 9 - The two bleed plugs are different: the pointed one goes in the remote module and the one with the O-ring fits the seatpost bleed port.
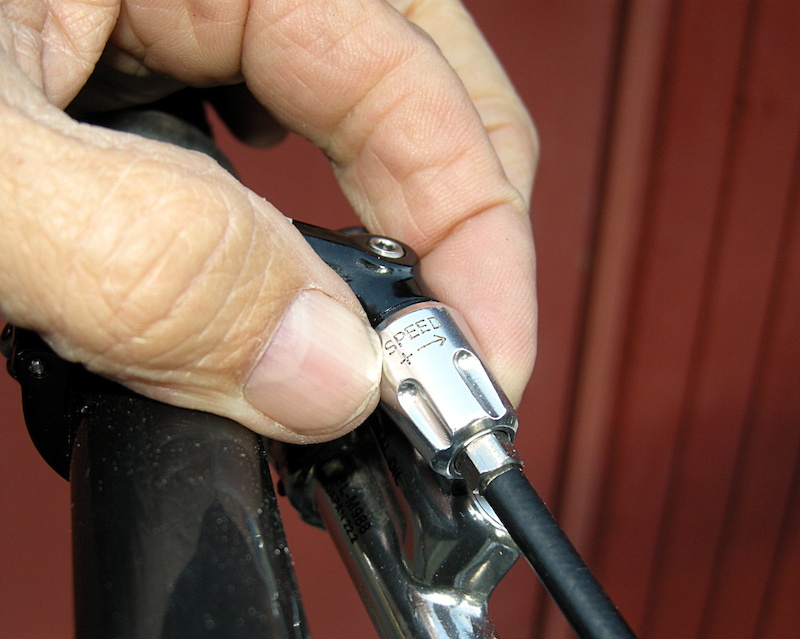
Step 10 - RockShox says to bleed the system with the speed control in the slow position. I found it works better to bleed the system turned in full fast.

Step 11 - Be sure to keep the syringes upright so the air pockets stay above the fluid stream. Pull a vacuum on the seatpost side while pushing fluid into the remote control side. Watch for bubbles on the vacuum end. When the bubbles stop - or you get down to the last half an inch of fluid on the pressure side, stop.

Step 12 - Reverse the pressure/vacuum cycle until you don't see bubbles evacuating from the system. This should only take a couple of sessions.
Step 13 - Give the remote syringe a strong push and then unscrew the seatpost syringe and screw in the proper plug. It has an O-ring, so the plug only needs to be tightened to a snug fit. A little fluid will escape.
Step 14 - With the seatpost side buttoned up, move to the remote control. Pull a vacuum while you push the button all the way in and then pressurize the button with the syringe to return it. Then use constant pressure and pump the button a handful of times. No bubbles? Great!
Step 15 - Pull a vacuum with the syringe while you cycle the speed control from fast to slow a few times to get any trapped air from that little space. Now, pressurize the syringe and unscrew the dial to full slow. While you have the pressure on, push the control button a couple of times just for good luck.

Step 16 - Give the remote control syringe a hard pump and then remove it and screw in the proper bleed plug. It is pointed, so it only takes a snug fit to seal. Wipe off the remote control and seatpost with a clean rag and some alcohol and give the post a test. It should react quickly to a push on the button. If you have to push the button all the way in or pump it to get the post to slide, you've got air in the line and it's probably in the button. Redo the vacuum/pressure steps on the button and speed dial and try again. If all is well, reset the angle of the remote, tighten the clamp and then zip-tie your remote hose in place. Bam! Job well done.
Past Tech Tuesdays:
Visit Parktool.com to see their entire lineup of tools and lubes
Author Info:
 Member since Mar 23, 2011
Must Read This Week
[UPDATED] Final Elite XC Results & Overall Standings from the Mairiporã XC World Cup 2024
41684 views
41684 views
Sign Up for the Pinkbike Newsletter - All the Biggest, Most Interesting Stories in your Inbox
PB Newsletter Signup
can I add to this information:- its important to wear PPE (personal protective equipment) i.e. gloves (you did mention glasses in the article) when working with substances like suspension fluids and DOT brake fluids
these substances do your skin no end of harm, especially if regularly working on bikes
you can easily get good thin latex or butyl gloves from a local drugstore (chemist for UK reader), on-line tool suppliers or companies like Park Tools through your local bike shop
You're welcome.
With every successive bleed the post moved slower and slower and I tried to bleed it more frequently to achieve the same speeds that I was getting before. I tried twice this morning, certain that I was doing something wrong. I saw superbikes comment and did a quick re-bleed with the system on full slow without all those steps at the remote end and now my post is lightning fast again, I will have to turn the speed down a bit when I go ride because it's so damn fast.
Someone should move superbikes' note to the top so that other users can save some trouble and stress.
1. It helps to have syringe tubing locks (like the type found on brake bleed kits) to keep that elusive 2.5 wt fluid from dribbling out.
2. Lube the seals of the syringe plunger (w/ a wipe of 2.5 wt) to get smoother action and less resistance
Reverb Troubleshooting tips from Ted
1. Check the seat clamp (some people say over-tightened clamps keep the post from coming up)
2. Check the air pressure in the cartridge (Again, Rock Shox said not to mess with it, but whatever)
3. Bleed the system.
I am going to put this out there, if the cartridge is getting soft, you may need to replace the seals.
Thanks for all the tech tuesdays BTW; they're great!
I suggest most of you guys reading this try this first, if it works, don`t fix it.
Otherwise, nicely done.
Bear in mind that if there's any reason that you could have caused the fault then obviously the distributor is fully within their rights to turn you away for a free repair or replacement - that reminds me if they can fix the problem as opposed to replacing the unit they almost always will; but for that reason you should keep hold of ALL of your receipts and records of repair; i.e. if the problem persists you will be able to return with a record to say that they've already tried to fix the problem and it has not been sorted.
I snapped the remote trigger on my Reverb in November (completely my fault), posted it to Fishers and it was replaced FOC and back in my bike shop in 3 DAYS = awesome service