5 Exercises to Improve Your Core Strength & Stability

Your torso is your powerhouse! You can have the strongest legs in the world, but if you have a weak core, you'll notice you won't be able to use that leg power as well or as effectively as if you had a strong torso: chances are technical climbs are pretty difficult for you, and long days out on the bike leave you hurting in more ways than one. If your core is weak, your spine and legs have less support and what were little aches and pains throughout your body, specifically your low back, will become more prominent.
Not only is a strong core vital to preventing injury, when it is conditioned and well trained, your performance, coordination and balance will also improve.
What is your core?
Your “core” encompasses your abdominal and mid to low back muscles (rectus abdominus, transverses abdominus, obliques, erector spinae, mulitifidi, latissimus dorsi & more). These muscles provide stability to both the upper and lower body in all activities: walking, sitting, skipping, cycling, etc., as well as protect your spine.
Below are some cycling-specific core exercises to strengthen your powerhouse, prevent injury, and improve your cycling. Whenever possible, start basic with some "bracing" exercises and progress as your strength and stamina improve!
*These exercises may not be suitable for some individuals. Consult your physician before trying any of these movements.*

1. High Plank: The plank is the most basic of core bracing exercises.
Place your hands on the floor, wrists aligned with shoulders, as though you're about to do a pushup. Feet are shoulder-width apart, toes grounded to the floor and your neck, as well as spine, are neutral (Avoid dipping at your hips or hyperextending at your knees). Engage your core, squeeze your glutes and hold the position until you can no longer maintain a neutral spine. Be sure to focus your gaze at a spot on the floor about a foot in front of your hands, and keep a nice neutral spine/neck as you plank - Don't forget to breathe! Complete 3 rounds.

Want more of a challenge? Only progress as you are able to keep your hips level and core braced.
+ High plank on a BOSU.
+ Foot taps: From a high plank, move your right foot outward, then return to the original position. Move your left foot outward, then return to the original position. Alternating sides, repeat for x 10 each.
+ Shoulder Taps: From a high plank, tap your left shoulder with your right hand, then return to high plank. Tap your right shoulder with your left hand, and return to high plank. Alternating sides, repeat for 10 each. Do this on the flat side of a BOSU for even more of a challenge!
+ Up-downs: From a high plank, lower yourself to your forearms, then push yourself back up, one hand at a time to a high plank. Repeat for x 5 each side.
+ Single-arm high plank.
+ Single-arm high plank on the flat side of a BOSU ball.
+ Extra credit: From a high plank, jump your feet forward to just behind your hands, knees slightly bent. Jump back to plank, then forward again, but this time with straight legs. Continue alternating "tuck" movements for a full core workout!

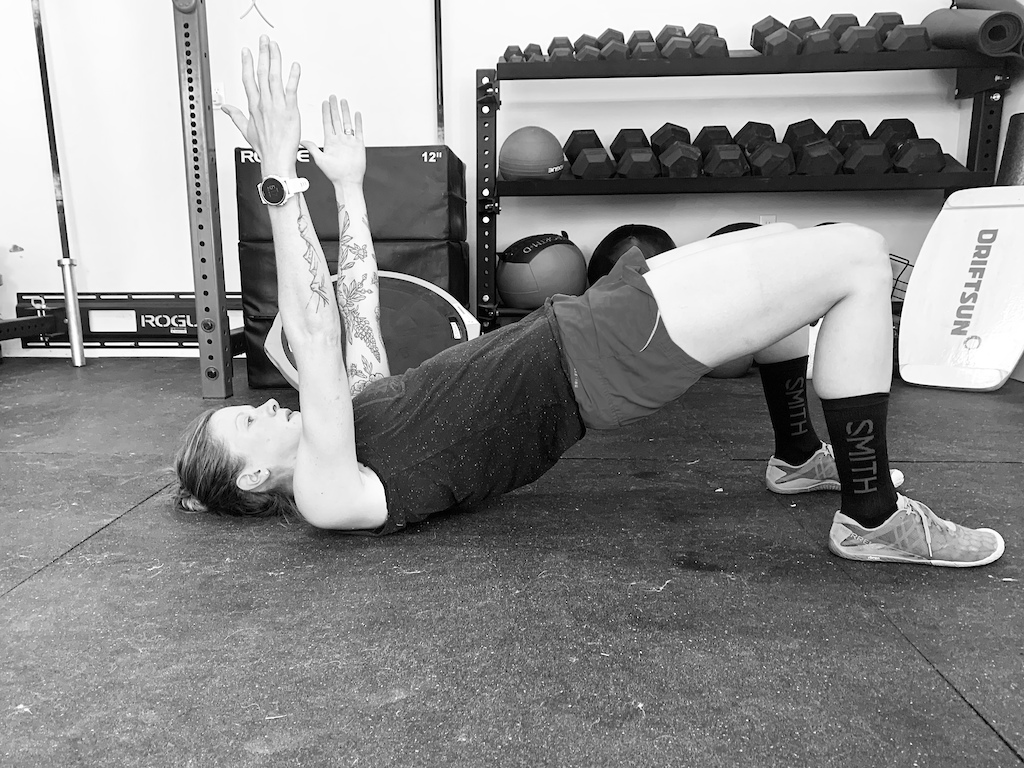
2. Bridges: Bridges are another form of core-bracing, but begins adding in basic movements to address muscles deep in your low back and pelvis to address pelvic stability.
To perform a bridge, start on your back in a hook-lying position, knees bent, feet shoulder-width apart, arms at your sides (palms down). Place your feet at a comfortable distance from your body - the further your feet are from your body, the more your hamstrings are engaged. The closer your feet are to your body, the more your glutes are engaged. Perform a "kegel", bracing your core and while keeping your hips level, squeeze your glutes, bringing your hips upward towards the ceiling until your torso is in line. Hold until your hips begin to drop or perform a series of 10 reps. Complete 3 rounds.
Tip: Drive through your heels (literally lift your toes off the ground) to better engage the hamstrings and glutes! Hold for time or perform a series of reps.


Want more of a challenge? Only progress as you are able while keeping your hips level and core braced. If you find your hips dropping on one side or the other, go back a step.
+ Add weight: Hold a dumbbell, phonebook or your best friend's dog over your pelvis, and bridge away!
+ Add in the arms: Prior to lifting your hips upward, hold your arms out in front of you so your wrists are directly over your shoulders. Keep them here and bridge upward.
+ One leg at a time: If you're able to perform a standard bridge, and keep your hips level, give this a try! From the hook-lying position, bring your left leg towards your chest. Keep your right foot on the floor, drive through your heel, and while keeping your hips level, lift them up towards the ceiling. Perform a series of reps, while actively keeping your left leg as close to the body as possible, then switch legs. Tip: Try holding a tennis ball in the leg folded up to your chest for the entirety of the exercise.
+ Marching: From the hooklying starting position, perform a "kegel", and bridge upward through both feet. Stabilize yourself, and proceed to slowly lift your right foot off the ground. Return your right foot to the ground, then lift the left foot off the ground in a marching motion. Returning the left foot to the ground, and repeat. This is a stability exercise and is to be done slowly -- repeat the exercise, alternating legs, for a total of 10 each side. Complete 3 rounds. If you're comfortable here, add in the arms!
By now you're probably ready for some active core work...
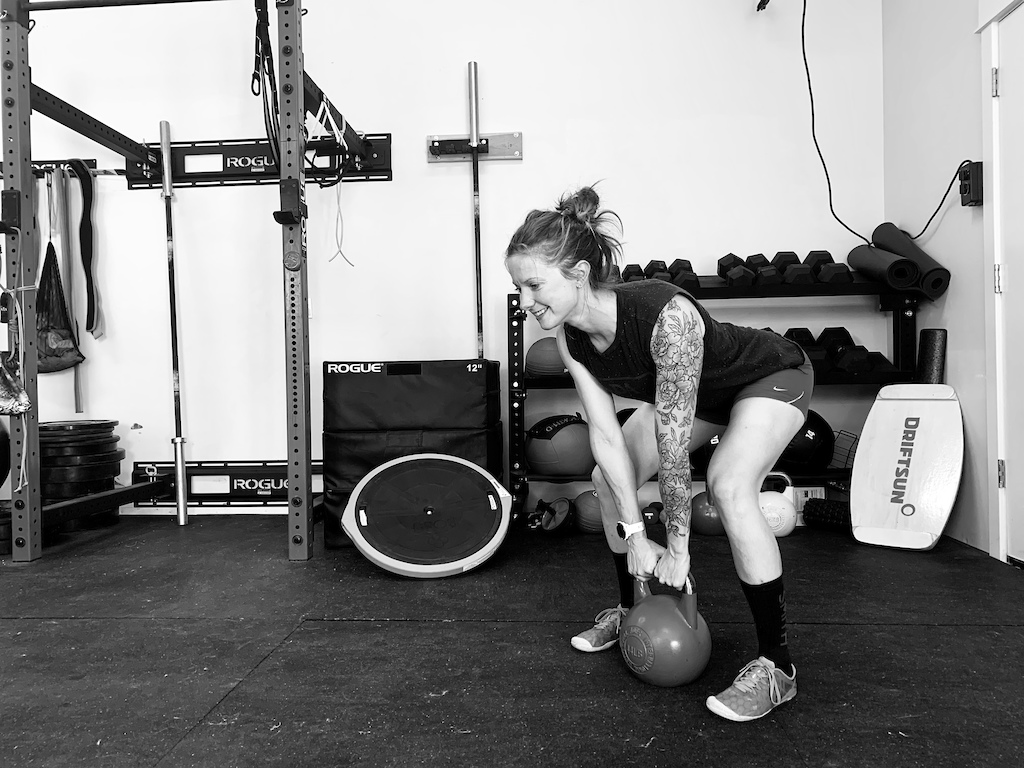
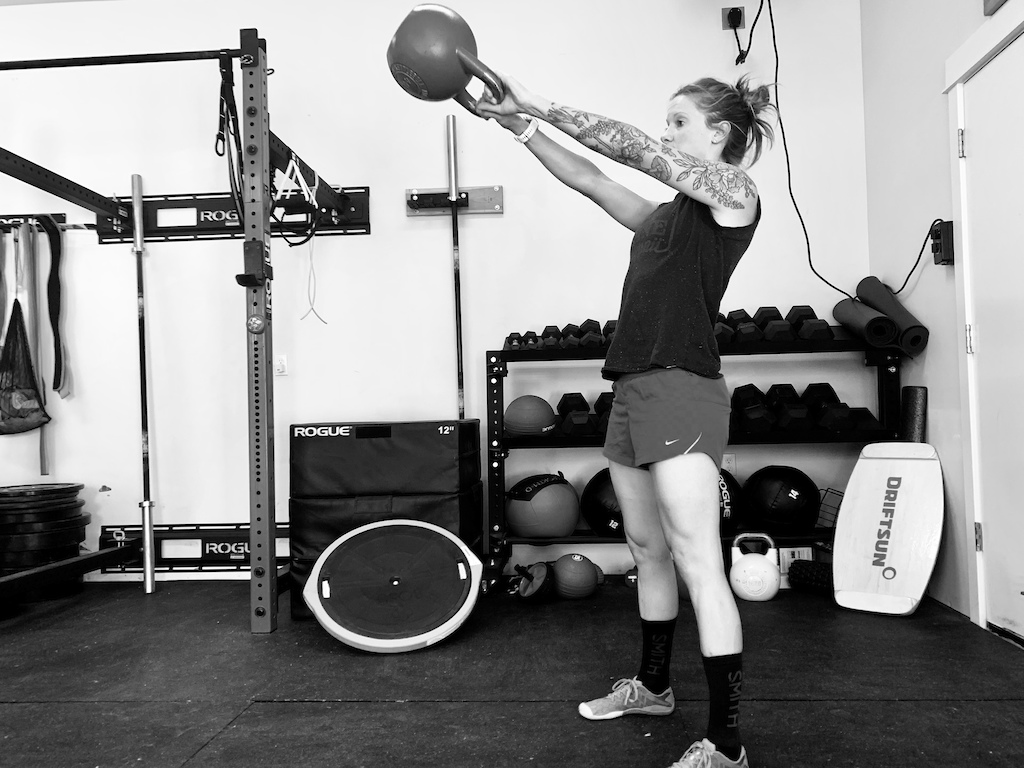
3. Kettlebell (KB) Swing: The swing is an active movement that addresses the posterior chain by driving a kettlebell (KB) in a pendulum motion from between the knees to anywhere eye level to overhead.
To properly perform a KB swing, you are swinging the kettlebell via your hips and legs, NOT your arms, "It's all in the hips"!
To start the swing, while standing upright, hold a KB with both hands between your legs via straight arms. From here, soften the knees, and hinge at the hips, letting your butt descend down and backward. Brace with your core and quickly stand, driving your hips forward via one big "thrust" - you'll feel the KB swing forward and up. The bigger the thrust, the higher the end elevation of the KB. For those with a shoulder history, aim to swing no higher than eye level. As the KB descends, shift your weight back into your heels, and allow yourself to hinge forward at the hips, receiving the KB as it swings back in between your legs. Once the KB reaches its most backward trajectory, drive through your heels and hips to bring the KB into the upward part of the swing. Repeat for 3 rounds of 10 -12 reps.
TIPS: Work to keep your feet flat on the floor for the entirety of the movement. There is a tendency to roll your feet outward at the bottom of the movement to give the KB space - resist this! This is an ongoing challenge for me too!


Want more of a challenge?
+ Single arm swings: Try the swing only holding the KB in one hand - you may need a lighter KB for this one.
+ Alternating single arm swings: While performing a single arm swing, at the bottom of the swing, pass the KB from right hand to left, then swing! At the bottom of the next swing, pass the KB from left hand to right.
+ Add in a balance challenge by performing a KB swing (using both hands) while standing on the flat side of a BOSU ball.
4. Exercise Ball Sit-Up: Simple, but effective.
Sitting upright on a large exercise ball, brace your core, and slowly lower your torso backwards on the ball. Keep your torso straight, and avoid tucking your chin. Once your torso is parallel to the floor, avoid tucking your chin, and sit upward using your abdominals, while still holding that original abdominal "brace/kegel". Repeat for 3 rounds of 10-20 reps depending on fatigue.
Tip: Its common for the exercise ball to roll slightly as you situp, however, root through your feet and actively avoid the ball's roll as you sit up.


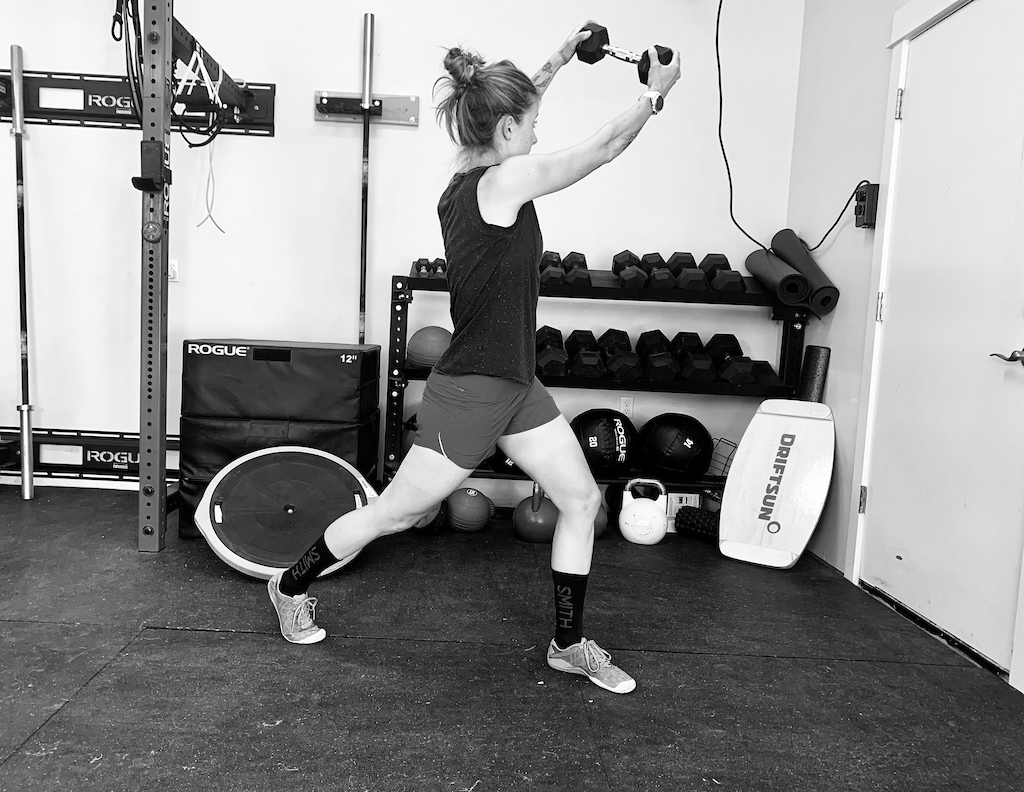
5. Static Lunge Reverse Wood Chop
Assume a high lunge position with your left foot forward and right foot back. You should be up on your toes on your back foot, and hips square to the front. Facing forward, hold a dumbbell at hip level at your right hip. Brace at your core and with straight arms, reach the dumbbell up and across your body to the left, performing a reverse wood-chop motion. Slowly return the dumbbell to the original position at your right hip, allowing full rotation at the torso, while maintaining your hips square to the front. Repeat for 10 reps on each side x 3 rounds.
Tip: Increase weight to increase difficulty.

Want more of a challenge?
+ Perform the reverse wood chop with your front foot on the flat side of a BOSU ball, a balance board, or half round for both a strength and balance challenge!
+ Make it even more difficult, and place each foot on a half round, foam roller or other balance challenging device.
These 5 exercises serve as a simple introduction to Core strength and stability. Complete them together as a circuit, or in addition to your workout for a full body challenge. There are thousands of core exercises, and many many variations, however, it's important to start basic, and progress as you gain strength and stability. What's most important is to be consistent with your workouts - you'll notice as you do so, your aches and pains will be less, your technical climbing will improve, and your lengthy rides will seem easier!

See you on the trail,
Kim Hardin
ACE Certified Personal Trainer
@kimannhardin
@meetthehardins
www.meetthehardins.com
Big thanks to EVIL, Chris King Precision Components, Race Face, Schwalbe Tires, Dakine, SMITH, PUSH, Dumonde Tech and KickStand Coffee & Kitchen for their support.
Author Info:

Must Read This Week
Sign Up for the Pinkbike Newsletter - All the Biggest, Most Interesting Stories in your Inbox
PB Newsletter Signup
Kim
also I run into similar issues with my SLDLs, even though ive done probably thousands of them. I always tend to supinate at some point in the motion.
I use a weighted plank in my workouts - it makes the standard plank more difficult, and am a fan, as long as proper technique is being used. No dipping at the hips, no butt in the air, etc.
With this specific "Chop" variation, the goal is to keep the hips oriented forward, while actively moving the dumbbell in a chop motion -- it is more a stabilizing exercise at the core than an active "twist", so you should feel it in your obliques relative to resisting the rotation, if that makes sense rather than a "twist". Otherwise, rotational exercises can be tricky - they need to be done with the correct back position in mind so as not to cause injury.
Kim
Kim
Or @meetthehardins
BeNdrew is spot on
Picked up a new Following and although deemed a little bike at 120mm its so light and snappy- a little beast!
Let me know what you think of the new version wrecker!
Kim