Technical Tuesday: Shimano XT Crank And Bottom Bracket Installation
Although installing a new crank and bottom bracket can look overwhelming, it's actually an easier job than you may expect. While the video below shows you how to install Shimano's new XT cranks, the process shares many of the same steps with other models and brands. There are actually only a few pieces to the system and it's pretty hard to get it wrong, but it's worth noting that other makes may require different assembly steps and different torque numbers. Before starting it is important to be sure that your bottom bracket threads are in excellent shape, if they're not you'll likely struggle to turn the cups in and there is a good chance that you will damage the threads on either the frame or the cups. Likewise, if your bottom bracket shell is not faced smoothly and evenly, your bearings may wear out prematurely. A lot of frames come faced from the factory, but if you are not sure it is worth taking your bike to your local shop for them to have a closer look. If you are hesitant to do this job on your own be sure to have your shop do it instead.
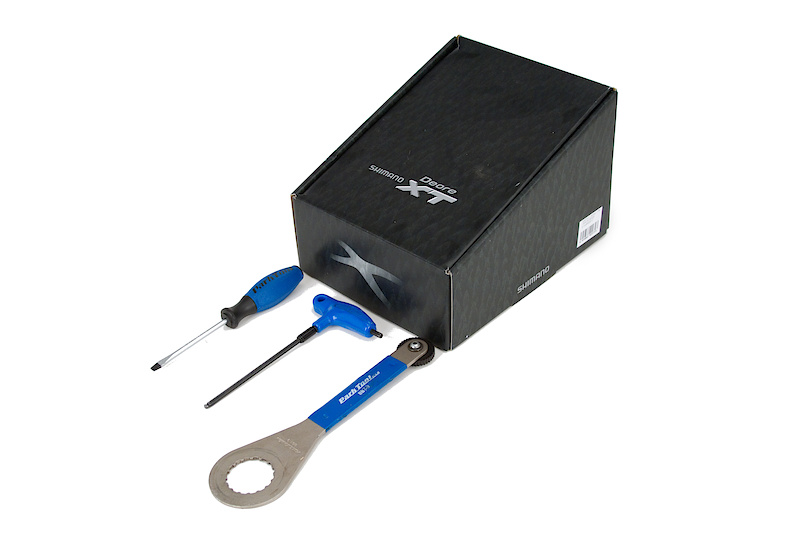
Tools needed: 5 mm allen key, flathead screwdriver, bottom bracket tool, and grease.
![photo]()
Watch the video to learn how to install Shimano's crank and bottom bracket:
A note on torque...
It is recommended to use a torque wrench on the majority of repairs, especially jobs like this, but the reality is that most home mechanics do not own one. If you are not using a torque wrench, use common sense when tightening anything. Shimano gives torque measurements for the bottom bracket cups, crank preload cap, and the left crankarm's pinch bolts that you can find in the video below. But don't fret if you lack a torque wrench, there is a simple method to estimate torque. Bicycles usually use in/lb (inch/pounds) when measuring torque, but I find it easier to convert this to ft/lb (foot/pounds) as it is simpler to estimate. The conversion is 12 in/lb = 1 ft/lb. This means that there is one pound of force at the end of a foot long bar. Now that we know this it becomes easier to estimate torque values. For example, Shimano recommends tightening this crankset's bottom bracket cups to 300 - 435 in/lb.. Do the math and you'll discover that this equals 25 - 36 ft/lb, meaning 25 - 36 pounds of force at the end of a foot long bar. Now that you know this, you can do the conversion for the rest of the torque values given in the video below. Happy math!
Shimano also has a great technical page with further instructions on any and all parts that they make.
Past Tech Tuesdays:
Technical Tuesday #1 - How to change a tube.
Technical Tuesday #2 - How to set up your SRAM rear derailleur
Technical Tuesday #3 - How to remove and install pedals
Technical Tuesday #4 - How To Bleed Your Avid Elixir Brakes
Technical Tuesday #5 - How To Check And Adjust Your Headset
Technical Tuesday #6 - How To Fix A Broken Chain
Technical Tuesday #7 - Tubeless Conversion
Technical Tuesday #8 - Chain Wear
Technical Tuesday #9 - SRAM Shift Cable Replacement
Technical Tuesday #10 - Removing And Installing a Headset
Technical Tuesday #11 - Chain Lube Explained
Technical Tuesday #12 - RockShox Totem and Lyric Mission Control Damper Mod
Have you found this tutorial helpful? Share any of your hints or tips below!
Visit Parktool.com to see their entire lineup of tools and lubes.
Tools needed: 5 mm allen key, flathead screwdriver, bottom bracket tool, and grease.

A note on torque...
It is recommended to use a torque wrench on the majority of repairs, especially jobs like this, but the reality is that most home mechanics do not own one. If you are not using a torque wrench, use common sense when tightening anything. Shimano gives torque measurements for the bottom bracket cups, crank preload cap, and the left crankarm's pinch bolts that you can find in the video below. But don't fret if you lack a torque wrench, there is a simple method to estimate torque. Bicycles usually use in/lb (inch/pounds) when measuring torque, but I find it easier to convert this to ft/lb (foot/pounds) as it is simpler to estimate. The conversion is 12 in/lb = 1 ft/lb. This means that there is one pound of force at the end of a foot long bar. Now that we know this it becomes easier to estimate torque values. For example, Shimano recommends tightening this crankset's bottom bracket cups to 300 - 435 in/lb.. Do the math and you'll discover that this equals 25 - 36 ft/lb, meaning 25 - 36 pounds of force at the end of a foot long bar. Now that you know this, you can do the conversion for the rest of the torque values given in the video below. Happy math!
Shimano also has a great technical page with further instructions on any and all parts that they make.
Past Tech Tuesdays:
Technical Tuesday #1 - How to change a tube.
Technical Tuesday #2 - How to set up your SRAM rear derailleur
Technical Tuesday #3 - How to remove and install pedals
Technical Tuesday #4 - How To Bleed Your Avid Elixir Brakes
Technical Tuesday #5 - How To Check And Adjust Your Headset
Technical Tuesday #6 - How To Fix A Broken Chain
Technical Tuesday #7 - Tubeless Conversion
Technical Tuesday #8 - Chain Wear
Technical Tuesday #9 - SRAM Shift Cable Replacement
Technical Tuesday #10 - Removing And Installing a Headset
Technical Tuesday #11 - Chain Lube Explained
Technical Tuesday #12 - RockShox Totem and Lyric Mission Control Damper Mod
Have you found this tutorial helpful? Share any of your hints or tips below!
Visit Parktool.com to see their entire lineup of tools and lubes.
Author Info:

Must Read This Week
Sign Up for the Pinkbike Newsletter - All the Biggest, Most Interesting Stories in your Inbox
PB Newsletter Signup
If you are not sure what I mean, get any screw-top jar and practice with that. These days I automatically turn every lid the wrong way until it clicks and then I start tightening.
BB cups take 40nm, which for a weakling computer nerd like me and using a similar length tool as in the video, is all the force I can muster and when I hear my ligaments get tweaked I know I'm done.
The plastic cap takes barely anything - once the cranks have no lateral play give the cap a 1/8 to 1/4 turn and you'll be golden. Don't do it up tight.
The crank pinch bolts take 15nm(?) which is enough to start to bend a very long allen key or enough to put a serious dent in your thumb with a short allen ket. Make sue you swap back and forth between the two bolts until neither move. I use TWO allen keeys at the same time that are the same length, but that's just me.
On a little side note its not a 10 speed set of cranks, comes with triple rings and shimano list no 10 speed xt cranks and my xt's came in the same box as the xt's shown lol.
ive read in other forums of people modifying their front derailleurs to run a 10sp rear and a normal 3x crank
you could do what you said you read about the 10speed rear with the triple ring front. its just unless you buy road rings that will fit your cranks or get a some of the new mtb 10 speed rings that are slowing coming out from different companies you will be going through chains and chain rings pretty quick cause of the extra play on the front. they would still have a good life span but if you used a chain stretch gauge you would find it wearing out probably as much as 25% to 35% percent faster depending on the rider.
Mechanics can be a bit intimidating simply because of the way ones temperament thinks..
Therefore, good, simple , to the point instructional videos can take the pain away and bring back the reality. This is one of those video's.
Im so glad for tech Tuesdays... I hate having someone else work on my bike... I HATE IT.......!!!!
Great Stuff... I love seeing a site like this take care of its own...
Torque wrench is usefull anyway, one for shimano non-drive crank arm can be pretty small and fairly universal (up to 25Nm will do
You can use a torque wrench. With the appropriate bottom bracket tool.
www.parktool.com/products/detail.asp?cat=25&item=BBT-19
Is Tech Tuesday sponsored by them or not?