Staff Rides: Matt Beer's Commencal Supreme 29/27
STAFF RIDES
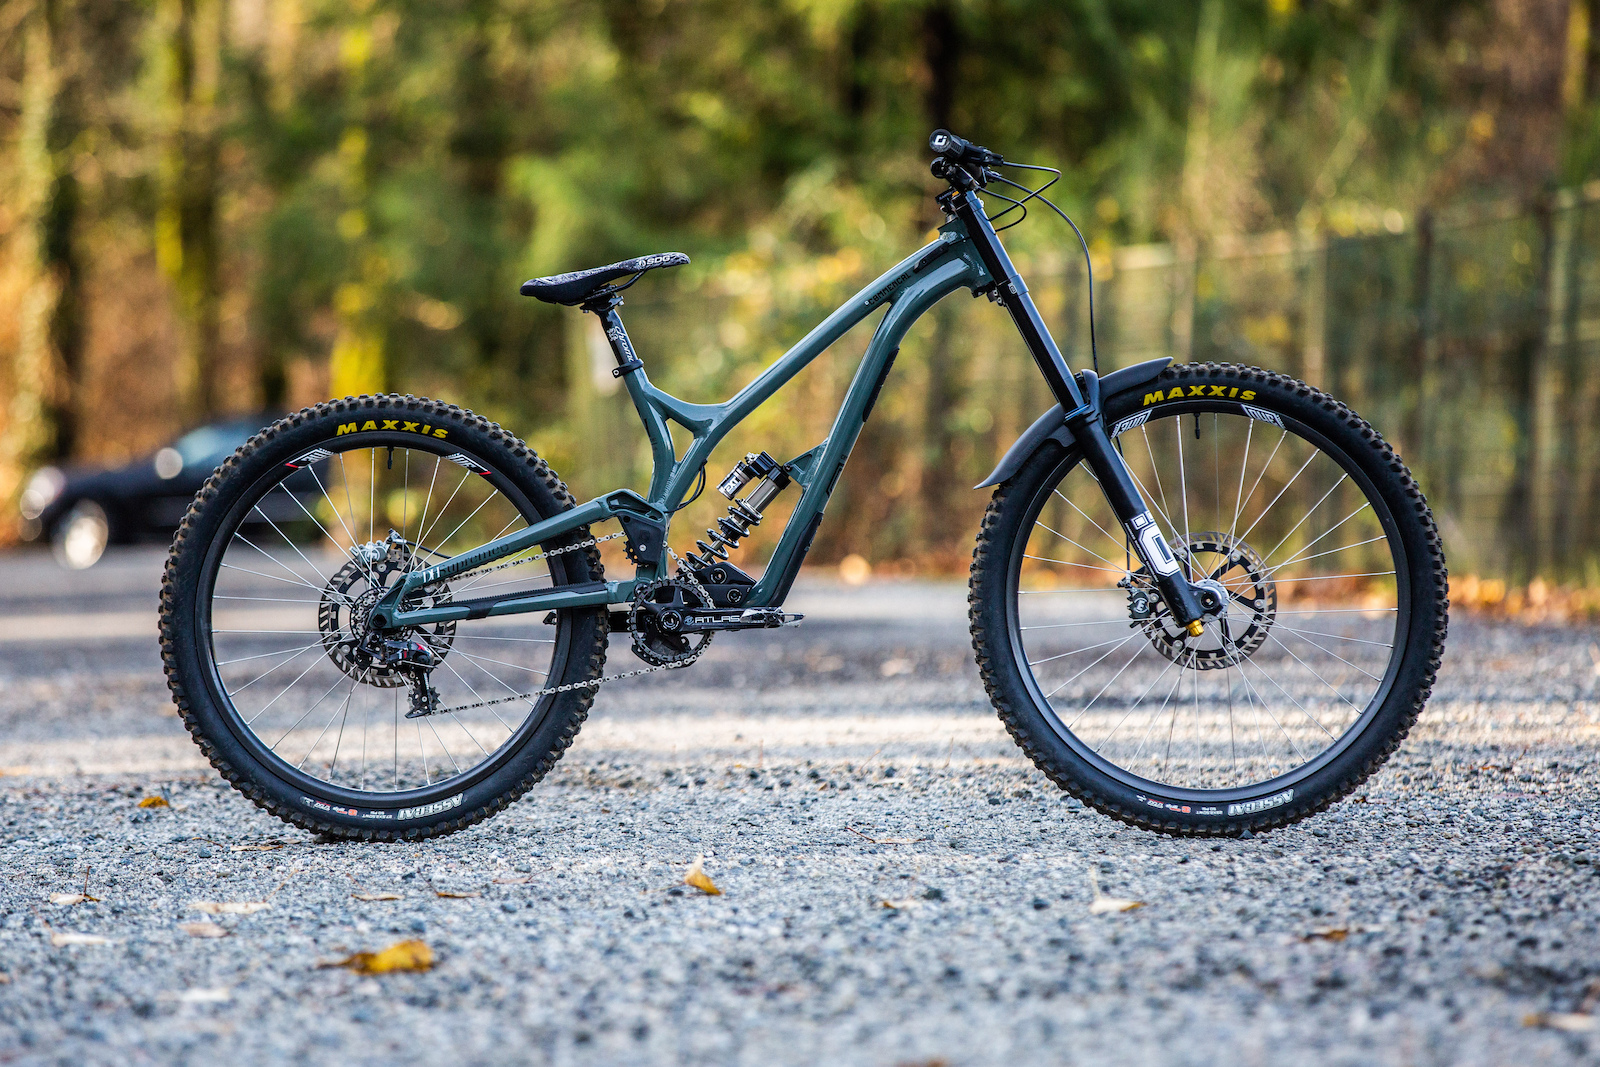
Matt Beer's Commencal Supreme 29/27
Matt Beer's Commencal Supreme 29/27
I've vowed to myself a few years ago that I would always have a downhill bike in the fleet because they are the pinnacle of off-road bicycle performance. Downhill laps might be short and require more setup time, but the speeds that these bikes can reach over the rawest terrain is untouchable by almost every enduro sled. There's a spark inside of me that still wants to go as charge sections at race speed, get scared, and go for lines that smaller bikes would cringe at.
Supreme 29/27 Details
• Intended use: Downhill
• Travel: 200 mm front / 200 mm rear
• Wheel size: Mixed
• Frame construction: aluminum
• 62.2° head angle, 456 mm chainstays
• Weight: 17.6 kg / 39 lb
• commencal.com
• Intended use: Downhill
• Travel: 200 mm front / 200 mm rear
• Wheel size: Mixed
• Frame construction: aluminum
• 62.2° head angle, 456 mm chainstays
• Weight: 17.6 kg / 39 lb
• commencal.com
Over the years, I was intrigued and also reserved to move from 26" wheels to 27.5", but that transition wasn't as drastic as the next jump up to 29ers. Reluctantly, I moved up to a purpose-built Wilson 29 with its huge wheelbase. That bike was eye-opening, but I had to change my riding style massively. Commitment and planning were needed to wield this beast. The centripetal force of dual 29" wheels on a DH bike caught me out, which I attributed the to the lower leverage of my 178cm height and rearward rider weight bias.
Reaction times to feel the tires sliding with the 29" contact patch were slowed down. I loved the benefits of the big wheel up front and toyed with ways to retrofit a 27.5" rear wheel to correct my lack of ability to adapt to this new breed of race bikes. When the opportunity came up to jump on the high pivot train with an MX wheel setup, the Commencal Supreme, a privateer special, I couldn't resist.
Frame

DH tracks have become wider, frame reaches have grown longer, and those 29" wheels are reaching higher speeds, so why downsize? I chose to step back to a size medium with a 445mm reach and add a 10 mm offset headset in the forward position because downhill bikes have more travel than their enduro wannabes and require greater weight shifts to counteract massive compressions. It also helps to compensate for the completely rearward axle path. I haven't been the only rider to downsize on the Supreme. Forrest Riesco, who is around 182 cm, also experimented between frame and wheel sizes and settled on a large frame with a 6 mm reach extending headset.
The high single pivot layout looks complex, but the rear axle moves in a simple rearward arc throughout the 200 mm of travel. Diving deeper on the weight transfer subject, this shorter reach allows me to stay neutral as the rear center grows through its travel. Opting for an aluminum chassis hasn't held me back the slightest as the frame flex matches the characteristics of the wheels; stiff, but not overbearing.
I've added a Ride Wrap kit and downtube shuttle guard to preserve the paint on gritty and cluttered tailgate pads. Further along the tube, a plastic shield protects the linkage from projectiles, which hasn't posed any longevity or mud-clearance concerns yet, nor has the idler guide. Other finishing touches, like the internal cable routing and integrated fork bumpers, aren't exclusive to this bike, but are well executed.
Suspension

I've been a long-time fan of Fox suspension, but ever since I got taste of the Swedish gold it was hard to turn back. This particular DH38 is the original damper design, but I haven't found a fault yet. I will admit, I haven't been riding as much downhill as in the past, but the DH38 is still going strong after two seasons with just some simple lower services. The damper is incredibly buttery for the small chatter and almost feels unsupportive in the parking lot, but has a vastly different character on the trail. Of course, the support is also a result of the dual air spring which allows for fine tuning of the main and ramp chamber.
Once I learned how the separate springs interacted through trials, I now have a good base setting to play with depending on what shuttle zone or bike park is on the menu. There are less clicks on the adjusters than some other brands, which makes the initial setup a breeze. The changes are very apparent on the trail. As for the settings, I've settled for 130 PSI in the fork's main air spring and 220 in the ramp chamber with the rebound 8 clicks from closed, 10 out on the low speed compression, and one on the high speed. Sometimes I may back off the high speed a click further if the trails are slower and more techincal. The crowns are the 54 mm offset right now, but I would be to try the 50mm to mimic the feedback I've been fond of on enduro forks with a lesser number. The final touch is the RRP bolt on fender to keep the spray down and it doesn't require single-use zip ties to hold it in place.
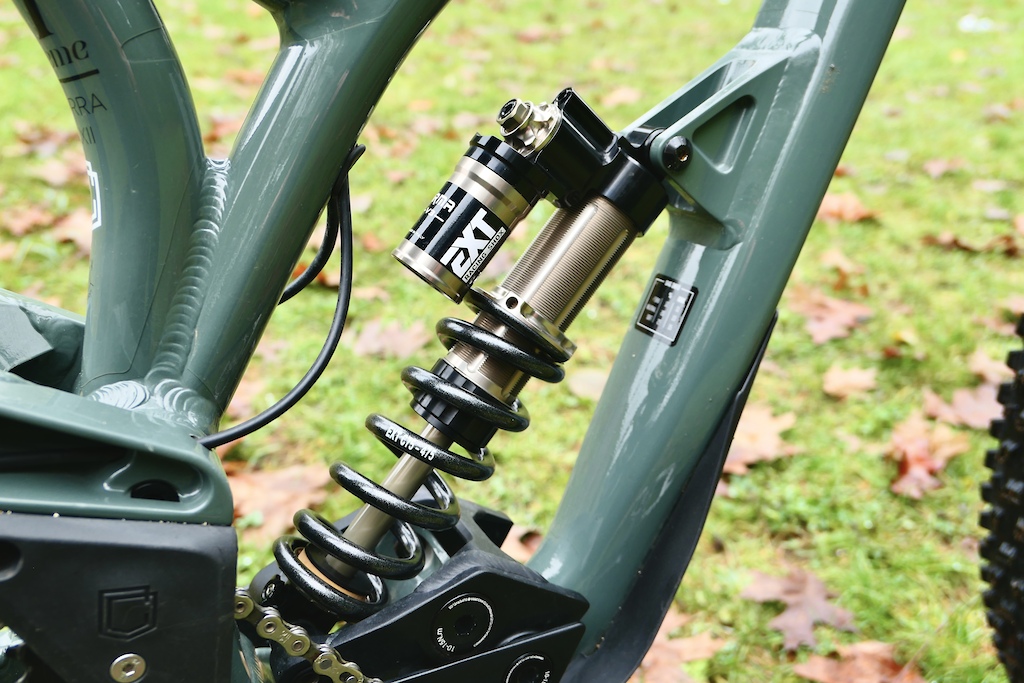
Handling the rear suspension duties is a shiny EXT Arma shock that has had a couple of solid days on it. Loaded up with a 475-pound spring, it has a firmer compression tune than the Ohlins TTX22 that I originally built the bike with. Both shocks are superb and it feels like the bike can do no wrong even if there was an elastomer back there. Out of the box I was up to speed quickly on local Cypress laps because this shock has been tuned specifically for the Supreme. Right now, the Arma has more of a race feel while still tracking extremely well, but does require a bit more muscle to hold onto the bike. The clickers lie at eight out on the HSC, seven on LSC, seven on rebound, and five out of eleven on the hydraulic bottom out.
The Supreme isn't an overly progressive in terms of the leverage ratio, but the coil shock still meshes well to provide great small bump control and I prefer linear suspension over progressive as it's more intuitive on the trail. I do see the Commencal Muc-Off team riders all using the Fox Float X2, which makes me curious to have a go with an air shock.
Tires / Wheels

I've tried inserts, but found they send a harsh feeling through the bike at high speeds. They also add significantly to the rotation forces, which was one of the reasons I sized down to the 27.5" rear wheel.
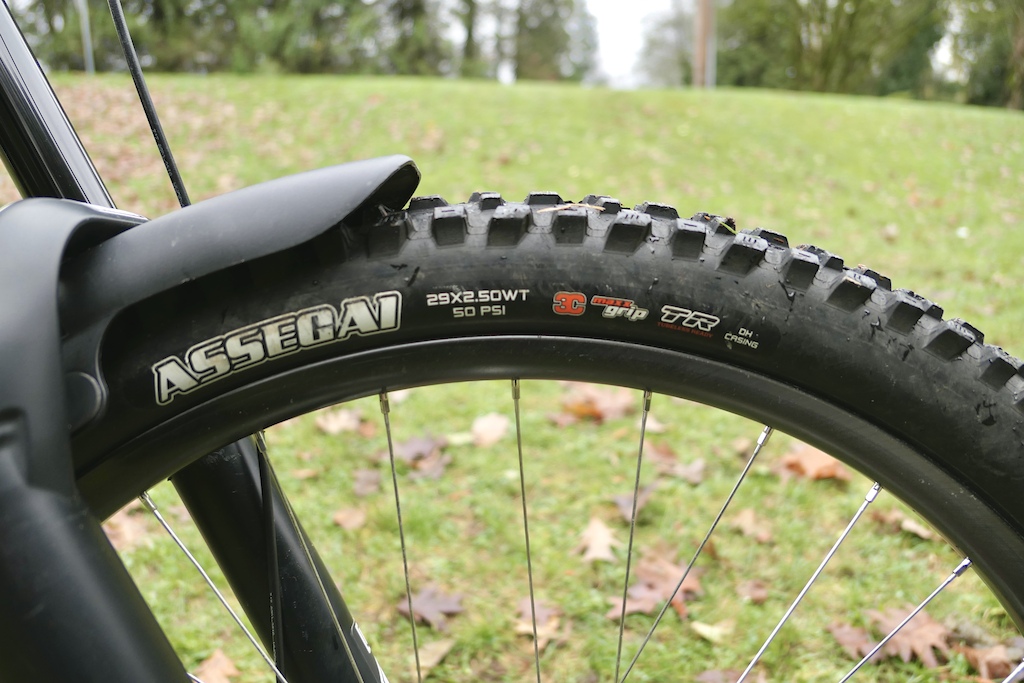
My go-to tire brand has been Maxxis for a long time for a number of reasons. For me, the Assegai tread has unsurpassed traction and consistent grip from side to side, especially across the dry marbles in the bike parks. Typically I would run a Minion DHR II on the back with its anchor like qualities, but supply made it tough to find one when I built the bike. Through the winter months, the Schwalbe Magic Mary Super DH is a recent favorite for the mixed conditions of slick roots and saturated organics on the North Shore. It clears like a mud spike, but still has enough contact to dance across polished, wet rocks.
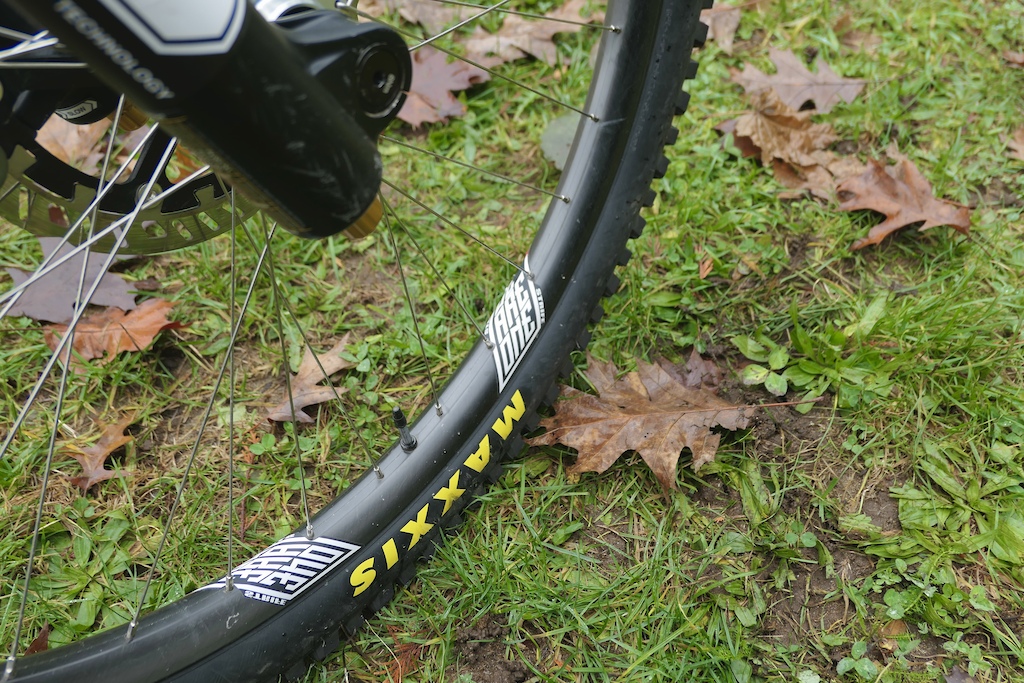
I have a soft spot for local businesses and We Are One Composites have been pumping out impressive rims for almost five years now. Onboard, you'll find a mix of their burliest rims; the Strife up front and an older Outlier model out back. They're aimed at downhill and enduro smashing, but don't possess bone-jarring levels of stiffness. They also make setting up tubeless tires a snap since they don't dent and when tensioned properly are extremely tough.
As recommended by We Are One, the spokes are double butted Sapim Race in silver, which some mechanics believe to be slightly stronger, since they aren't anodized. It's common for black spokes of all brands to fail near the thread. Keeping up with the bulletproof theme, no-fuss Hope hubs are great bang for your buck with quick engagement, tough seals, and flanges that are designed to use equal spoke lengths.
Brakes

Spotted on an old Cube DH bike check, I added thread locker to the reach adjuster dials and the zip-ties to plunger to keep the levers from dancing loose. I also removed the decals and colored piston caps for less flash.
Love 'em or hate 'em, Magura has been accumulating a fan base with their MT7s and have been on all of my personal bikes for the past five years. Their power delivery is quick to engage, yet easy to modulate. I prefer the stock one finger lever at a higher than average angle and place the clamp about 15 mm in from the grip clamp. I've heard complaints about the system being difficult to bleed, but like any brake, air wants to rise, so as long as the syringes run from the lowest to highest points, there shouldn't be any issues. Removing the caliper and master cylinder from their perches helps to achieve this. Chris Kovarik also showed me his trick to finish the bleed at the master cylinder with the caliper and pads installed to give the firmest and shortest lever engagement - it's the thing I am most particular about.
The two-piece rotors have an aluminum spider to dissipate heat more effectively and are 220 mm at each end. Your tires can only do one job at a time, so trying to brake while you are turning won't give you optimal grip and will upset your weight bias going into a corner. The majority of braking power comes from the front wheel, so I like to reef on the brakes in a straight line and trust the tires to hook up in turns when they are rolling free. I've been using the cheaper Kool-Stop sintered pads that have a slightly less grabby feel than the Magura Race pads. They run tight to the rotors with the special bleed technique and can rub at the slightest whisper of a bent rotor, but I'm willing to deal with that for the best brake performance.
Drivetrain

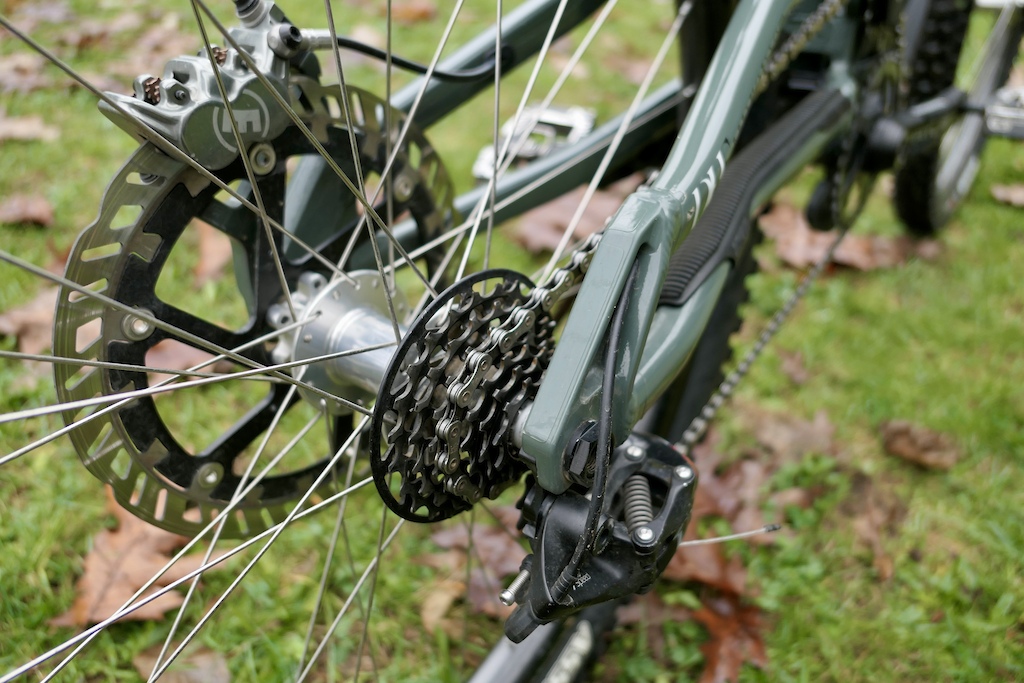
The high pivot suspension design negates the need for a top chain guide or lower roller, which also decreases the tension on the chain and reduces small bump feedback. The amount of chain wrap is less than a traditional layout, but I haven't dropped a chain from the 34-tooth ring yet. The nifty thing about the Race Face Cinch system is that you can rotate the ring as the 6-o'clock position wears. You won't find carbon cranks on my bikes after too many sour experiences. The 165 mm Race Face Atlas setup will last through the war and a OneUp Underbash protects against rocks flying off of the front wheel or low-speed, janky hang ups. I run one on all my bikes, including test bikes, because it takes two seconds to bolt on and is such an elegant and cheap solution. It's not worth ruining a day out over a broken chain.
On shifting duties is the tried and true SRAM XO1 DH 7-speed kit. The SRAM DH derailleurs don't have the extra B-knucle pivot that the Shimano Saint does, so I find it tends to run quieter. You could save some cash with the GX derailleur and non-XD cassette, but I could swap this wheel over to a SuperBoost trail worthy bike quickly and prefer the snap and articulation of the XO1 shifter thumb paddle.
Contact Points


ODI Elite Pro grips - need I say more? You'll find these on a lot of pros bikes, even if ODI isn't their main sponsor. Paying homage to the retro ODI Intense grips with a raised center pad, they offer some cushion without being too thick and also have a waffle pattern on the underside, but a smaller flange and hook up when wet or muddy. Their durable plastic end caps are surrounded by rubber built to survive multiple diggers and sit on a 20 mm rise OneUp carbon bar cut to 775 mm in width. Ever swing an aluminum baseball bat? The resonating ring runs through your hands, similar to some aluminum bars, so this is another place I can justify carbon components. Sitting on 5mm risers, a 45 mm long Santa Cruz stem feels fairly natural with the fork offset and head angle. An external lower headset cup meant I had to slam the crowns to the minimum stanchion length and work backwards from there. The 35 mm rise bar was too high which resulted in slow transitions when leaning the bike from side to side.
The SDG Radar Oso saddle styling caught the lone wolf in me and continued the white accents. A Chromag Dolomite isn't the lightest post, but the seat tube is hella short anyways. It's never creaked either, even after multiple years on a mix of bikes.
As a flat pedal rider at heart, the Crank Brothers Mallet DH were an easy transition to the dark side for me. You can clip into the eggbeater design in either direction; sliding your foot forward or backward on the platform. Like the brakes, they have their quirks and aren't the most water resilient. It's all about function on the downhill bike.
How does it ride?

On the first fifty meters of track I started laughing to myself. The ease of ploughing through successive bomb holes on the infamous and newly sanctioned Cypress downhill tracks above West Vancouver was laughable. All of the compressions were mellowed and the reactions of the bike were slowed - more time to for the body to understand what was happening underneath my feet.
However, leaving the ground wasn't as natural as a bike with a more vertical axle path. After a few laps of A-line, that first impression was forgotten and I haven't found a distaste for the anti-rise traits in the single high pivot that some riders say firms up the suspension. In fact, it's nice to have the bike's pitch stay more neutral as you brake and the bike settles equally into the travel. That EXT rear shock keeps the tire glued to the ground with an ability to absorb the chatter.
Although the chainstay and reach both measure nearly as long as a size large Devinci Wilson 29, the Supreme is much more manageable for me personally. I'd put that down to the ability to articulate the front wheel by turning the handlebars, whereas the rear is fixed. You need to lean the bike over to change direction and anyone who has tried to turn a spinning wheel in their hands understands the physics at work. Without a doubt a full 29er rolls over things easier. An MX wheel setup allows shorter riders take advantage of the stability and high traction of a 29" front wheel, but keep the agility of the 27.5" out back. It's a tradeoff I'm willing to make and my hunch was confirmed after back-to-back laps on a burly bike built to accept both wheel sizes.
There is no doubt that the bike works well for the majority of riders and it's interesting to see other brands race towards their own take on the high pivot bandwagon. After spending a lot of time on the Norco Range, which uses a virtual high pivot with more anti-rise, I'm curious to see how Commencal evolves the Supreme to the next level since the prototype has already won World Cup races.
Author Info:

 Member since Mar 16, 2001
Must Read This Week
Sign Up for the Pinkbike Newsletter - All the Biggest, Most Interesting Stories in your Inbox
PB Newsletter Signup
Most popular spokes are made from steel wire (Swedish Sandvik steel or similar). The black ones go through an chemical oxidization process
That’s why i9 use thicker bar to machine their aluminium spokes, cut the thread in, then machine the rest of the spoke back.
It's not true.
The rotor should be dead straight and the pistons should be moving equal distances. If these two factors are out, the brake pressure will not feel firm. As a consequence of over filling the system, the pads do run tight, so you may experience some rubbing, but it's a trade off I deal with for the best lever feel.
I first remove the pads and insert the bleed blocks. Then, rotate the bike so the caliper is higher than the master cylinder (MC) and remove the caliper from the mount. Fit the syringe and gently pull to see if any air is in the caliper. Having the bleed port at the highest point of the caliper will promote air out of the system.
One thing to note for the next step is that I don't drill a hole in the MC syringe. I like to keep the system pressurized.
Next, rotate the bike so the MC is highest, fit the syringe in there and then push the fluid from low to high (caliper to MC without the brake line dipping to a negative angle). You can push the MC syringe to move fluid back in the system and repeat this cycle a few times. I also remove the MC from the bar and on the last low to high push and roll the lever around at all angles.
With both syringes still attached, rotate the bike so the caliper is higher than the MC. Remove the caliper syringe, install the bleed screw, clean all the surfaces and reinstall the pads and caliper (centered - not just the pads - manipulate those to center if necessary). You can still expect a tiny bit of build loss, but it will be less severe.
Now that the caliper is positioned as it will be used, I push and pull gently on the MC syringe as I continue to roll it around. You can pull the lever and then gently push the syringe again to fill the diaphragm and repeat this cycle until the lever feels firm. You don't want to totally drain the diaphragm when pull out on the syringe. Install the lever to the bar and expect a good amount of fluid loss from the pressurized system as you remove the syringe and install the bleed screw.
The basics of any bleed is that air is easiest to remove if you give it the chance to rise.
So sorry, lots of words here but basically saying that you can get a properly bled brake if you just follow the regular instructions.
Julie 2001
Louise 2006
Louise 2007
Louise 2008
Julie HP 2008
Marta 2007
Marta 2009
Gustav M
HS11
HS33
It is just that the only hydraulic brake I've bled other than Magura was Shimano Saint 2004.
After I used some of the techniques that Jude mentioned in the video and Matt also described it definitely helped to get bubbles out
The power is difficult to manage. I’m not a fan of the Shimano Servo-wave actuation. Like suspension that is too progressive, I find it less intuitive.
to the reach/chainstay number
Can you go into more detail on this statement? @mattbeer @weareonecomposites
I can’t speak to why I’ve seen more black spokes fail at the thread, but I have yet to have a silver spokes of the same brand fail there. I will dive deeper into this to see if there is a reason.
And……if you can live with the looks shiny spokes are where it’s at. More durable? Maybe. Cheaper for good, butted spokes? Always.
"here, hold my Matt"...
“DH tracks have gotten wider.” Is a phrase that I have long suspected is the reason that 29”ers are now faster: They’ve changed designs and layouts of the tracks to benefit one wheel size over another.
The amount of detail in the write up is next level. Thanks!
You said the bike nearly went with you to the “Enduro Bike” shootout for comparison. Have you timed any back to back runs on different tracks to compare with the shorter travel bikes?
@mattbeer Thatd be cool so see an article on that. Is there anything in modern geometry that you absolutely love or dislike? You ride a lot of bikes! Wondering where geometry goes from here.
Reach is fixed on most frames. Adjustable headsets can provide some change, but it’s a compromise solution to a bike that doesn’t fit the rider.
Banshee has actual STA and STA "at height" since the higher you go the effective STA changes.....too many variables on stem/bars for manuf to do this.
I discovered his methode of sizing a couple of years ago and sized my last bike on my supposed RAD reach number as initially I thought it made sense. But it turned out to be too short and felt sketchy. Now I'm on a bike that has a 35mm longer reach and it feels a lot better.
Do you watch Friday Fails? Any time there's a kid on a frame that's too large, they have no control of the bike (RAD++) and get tossed off the bike.
Reach only tells you the horizontal distance from the bottom bracket to the top of your headset. You can shift reach significantly just from component selection, not to mention stack. I lowered the RAD on a bike from 34" to 33" by only switching stems. The bike felt much better once it was in my RAD range.
If Matt is 6' and I'm 6' tall, our RADs can be inches apart. My same-height friends ride 33.5-34", whereas I ride 32-32.5" (long arms).