ZEP's How-To Mythbusters - Climbing Technical Terrain
As we discussed in the first article of our ZEP Mountain Bike Camps Mythbuster Series, it's generally best to view techniques in mountain biking as 'cause and effect,' rather than 'right or wrong.' Understanding this is key if you wish to truly progress your skills as a rider and/or instructor. The idea of this series of articles is to highlight certain technique 'myths' and then explain what the actual, modern, up-to-date riding techniques are; based on physics, biomechanics and nearly two decades of teaching mountain biking and training mountain bike instructors. These articles are therefore intended for riders interested in learning some core techniques to progress their skills, or for those instructors/coaches who are looking to improve the quality, relevance and consistency of their lessons.
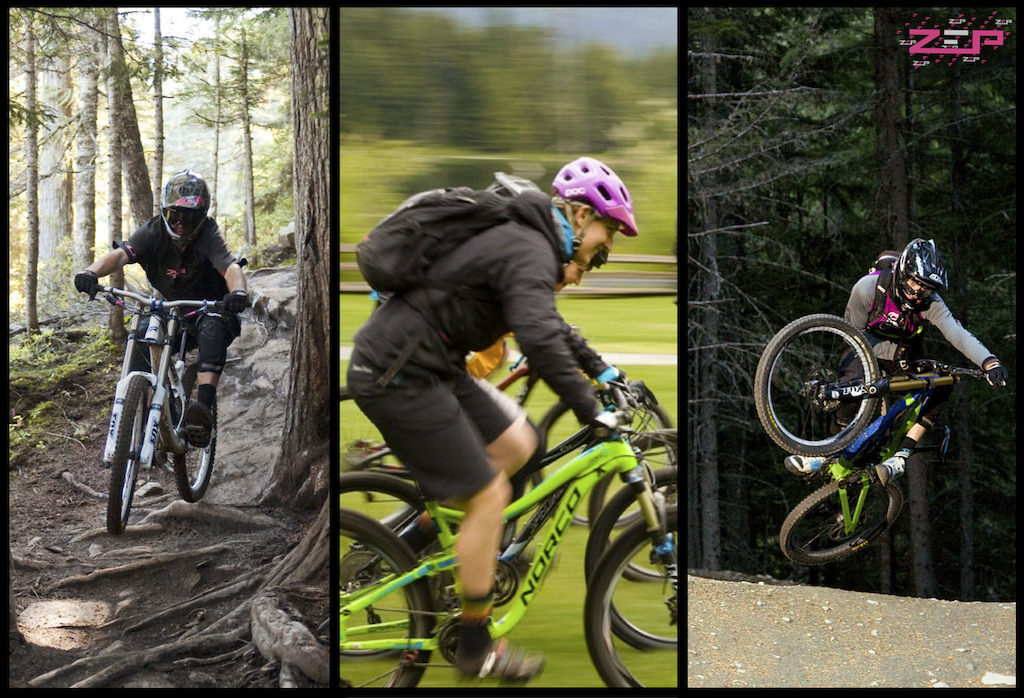
In our second article, we discussed braking in downhill corners, but this week we're getting on the pedals and looking at some ways to improve your efficiency and success on steeper, more technical climbs.
![ZEP Techniques]()
The Myth
When it comes to seated climbing on a mountain bike, the common technique we hear is, 'tuck your elbows in and pull back on the bars.' Only last week, I heard someone teaching this technique. Today we're going to dissect this myth and hopefully highlight a more efficient way of climbing, that also allows for a greater range and freedom of movement to negotiate technical sections. So, let's take a look at the two key points: elbows in and pulling back on the bars.
Elbows In
The disadvantage of this technique is that is restricts a rider's ability to move freely when climbing, which is particularly important for steering the handlebars and balancing on the bike. While this doesn't matter too much on smooth, road-like climbs, it does become an issue on anything technical where riders have to negotiate turns, roots or rocks, as they climb. This technique is really a myth that comes from road biking, since it helps keep the upper body still, saving energy... so like all techniques, it has a pro and con. And for technical climbing, the pro of saving energy is outweighed by the fact that riders need to move their bike and body to stay balanced.
Pull on the Bars
Most riders pull back on the handlebars in an attempt to keep their weight over the middle of the bike, so they're balanced on a climb. This goal makes sense. However, it's how they are trying to stay over the middle of the bike, that's the key. Continuously pulling on the bars takes upper body and hand strength, using energy, but also isn't very effective at moving the rider's centre of mass forward, over the middle of the bike. It also limits mobility, as the arms are tense from pulling, rather than keeping them relaxed to move the rider or bike, as needed. Again, not ideal for technical climbs.
The Solution
Being in a position on the bike to give the best stability and therefore balance, is key to mountain biking. So, when climbing, the best thing to first try (before pulling on the bars) is to move the body into a better position. The best way to do this is to move the parts of the body that will make the biggest difference - the hips and torso.
- Slide the hips forward on the seat to find a balance point where you are centred on the bike without having to continuously pull on the bars. If you do this enough, you'll be amazed at just how steep of a climb you can ride up without doing anything else. Some people avoid this technique, as sitting on the nose of the seat can be uncomfortable. Try adjusting the seat (lowering the nose helps for steep climbs), or finding a better seat that provides more support and comfort on the front section. Either way, moving the hips forward is important for a more stable riding position and its also provides better pedalling efficiency by placing the riders' hips more directly over the bottom bracket.
![Zep s How-To Mythbusters - Climbing Technical Terrain]()
Why else is being centred so important? Moving the hips forward helps keep the rider centred over the bike, keeping even weight on both wheels. This provides good traction on the rear, while keeping the front wheel weighted, preventing it from lifting up and 'wandering,' as you climb. Another advantage is that in a centred, stable position on the bike, the riders' arms and upper body can be relaxed and therefore ready to move and react to the terrain... which is perfect on steeper, technical climbs when you may need to steer the bike around an obstacle, or unweight the front wheel, to maintain the bike's momentum.
You can test this by trying to climb with a very light grip on the handlebars, or even climbing with open fingers... or even one arm! This will force you to move your hips so you move into a stable, balanced position on the bike first, helping you realize that for many climbs, moving your hips forward on the seat is the fundamental technique to start with, and sometimes is the only thing you'll need to do.
![Zep s How-To Mythbusters - Climbing Technical Terrain]()
- Chest and wrists low. If the climb gets steeper, riders can move their hips further forward and also lower their chests to the handlebars. Lowering the chest (by hinging at the waist and using the core muscles to bring the chest towards the bars) helps move the centre of mass of the rider closer to the middle of the bike, further improving stability. Rolling the wrists down, also helps you lower your chest. Try and you'll see... as you roll your wrists down slightly, your chest will naturally want to move towards the handlebars.
Why else does this help? By simply talking about the chest and wrists, we naturally avoid mentioning the elbows and therefore allow them to do whatever they need... which on technical climbs, is to move freely. As soon as we say "elbows in", riders tend to lock themselves into a rigid position, losing the ability to move their bike, and to balance and adjust with the technical terrain.
To Summarize:
When you're climbing technical terrain, be sure to focus on moving your hips and chest as the primary technique to maintain balance and control on the bike. And remember, if you're balanced into and up the climb, you can better move the bike, pick a line, pedal more smoothly, pedal harder, change gear... and generally do all the other things you need, to climb successfully! The key points of the seated climbing position, are:
- Hips Forward
- Chest and wrists low
When it gets really steep
There are, of course, times when just moving your hips forward and chest down aren't enough, and the rider will still feel a need to gradually pull on the bars to stay over the middle of the bike and keep the wheels evenly weighted. This is also where rolling the wrists down can help. In doing so, this helps riders to pull the bike "back" underneath them, rather than pulling "up", and lifting the front wheel off the ground. The key is to use this technique as a last resort, as opposed to it being the first thing to do. If you keep this in mind, you'll make most of your climbs without having to continuously pull on the bars at all. Save this technique for only the steepest of climbs.
When the going gets rough
The other myth that we hear in technical climbing comes from people being told to "stand up when it's rough, to unweight the bike". As ever, the language we use when teaching and how we define and explain things, is so important. In this case, the terminology of 'stand up' often causes an undesired affect - people, literally, stand up. In doing so, their hips move forward (away from the rear wheel), while their shoulders move back and up (away from the front wheel). Their centre of mass is now high, causing stability issues, and they lack weight over the rear wheel, often causing the rear wheel to slip when they put the power down. Instead, think of 'hovering' or 'crouching', rather than 'standing up.'
![Zep s How-To Mythbusters - Climbing Technical Terrain]()
This position should look similar to the seated climbing position above, except the hips are about 1-2 inches above the seat... they are "hovering." It does take some core strength to balance on the bike and hinge at the waist to bring the chest low, towards the bars, while keeping the hips above the seat (and not in front, which is a common issue). It's useful to practice this on easier sections of trail so you can get a feel for what it's like and how to balance and move in this position, before you try it for real. The three bullet points for a hovering climbing position can be summarized as:
- Chest Low and Forward
- Hips Hovering - just above the seat
- Harder gear - to avoid spinning out
For short, steeper and/or rougher sections of trail, this hovering position is a great way to maintain stability and traction, while finding some extra power and momentum from pedalling out of the seat. Riders can also use their arms and legs as suspension to help the wheels roll over rougher terrain more easily, preventing the bike from stalling at the first sign of a root or bump on the climb. Allowing the bike to move underneath and adjust to the changes in terrain, is a key advantage to moving out of the seat. This being said, because the rider is out of the seat, it's not a position that can be sustained for long periods of time.
Efficient climbing should naturally involve constant adjustments from the rider, based on the pitch and surface of terrain. Try not to get into a 'climbing position,' and stay there. If it gets steeper, move forward and lower; if it eases off, you can relax and sit farther back on the seat. If there's some roots, you'll need to slightly raise your hips off the seat for a brief moment, as the rear wheel rolls over. Scan the terrain and decide on a plan of action ahead of time. With plenty of practice, these tips should get you climbing higher, farther and faster, with less effort.
So, next time you're tackling a technical climb remember that moving your hips is the most effective place to start, to maintain a stable, balanced position. And try to focus on one thing at a time... there are a million tips we could give you on "how to climb," but most riders (in any sport) can only properly think about and work on one technique at a time.
Happy Climbing people... I hope these ideas help.
Paul
![credit www.timhailwoodphotography.com]()
About the Authour
Paul Howard is the Owner-Director and Head Coach of ZEPtechniques, Technical Director of the Professional Mountain Bike Instructor Association, Head Snowboard Trainer for Whistler Blackcomb SnowSchool, Technical Education Committee and 2015 Interski Team Member for the Canadian Association of Snowboard Instructors, and has been teaching mountain biking and training mountain bike instructors around the world, since the late 90's.
About ZEP
ZEPtechniques is a Whistler-based mountain bike camps and instructor training company. Established in 2006, ZEP offers single and multi-week, adult specific rider improvement camps, as well as weekly clinics, private lessons and tours. ZEP's Instructor Training services include the industry's original, multi-week mountain bike instructor training camps; training riders four days per week with evening seminars on suspension set up, bike mechanics, nutrition, as well as strength and conditioning sessions, all with industry experts. As developers of the internationally available Professional Mountain Bike Instructor (PMBI) Certifications and Directors of the PMBI Association, ZEP has long played a key role in establishing and improving the finest teaching practices and instructor certifications, within mountain biking.
ZEP is proudly supported by
Transition Bikes
ANVL Components
Fox Racing Shox
Troy Lee Designs
Five Ten
MRP
EVOC
Evolution Whistler
Vorsprung Suspension
Reel Cameras
Spun Studios
Photos
Bike Park Photos
Tim Hailwood Photography
Upcoming articles...
Body Position for Riding Downhill
Speed Control on Steeps and Rock Rolls
Techniques for Flats vs. Bermed Corners
Jumping Part 1 - Myths vs. Facts
Jumping Part 2 - The 3 Components of Air
MENTIONS: @TransitionBikeCompany / @foxracingshox / @troyleedesigns / @evocsports / @zeptechniques
In our second article, we discussed braking in downhill corners, but this week we're getting on the pedals and looking at some ways to improve your efficiency and success on steeper, more technical climbs.
The Myth
When it comes to seated climbing on a mountain bike, the common technique we hear is, 'tuck your elbows in and pull back on the bars.' Only last week, I heard someone teaching this technique. Today we're going to dissect this myth and hopefully highlight a more efficient way of climbing, that also allows for a greater range and freedom of movement to negotiate technical sections. So, let's take a look at the two key points: elbows in and pulling back on the bars.
Elbows In
The disadvantage of this technique is that is restricts a rider's ability to move freely when climbing, which is particularly important for steering the handlebars and balancing on the bike. While this doesn't matter too much on smooth, road-like climbs, it does become an issue on anything technical where riders have to negotiate turns, roots or rocks, as they climb. This technique is really a myth that comes from road biking, since it helps keep the upper body still, saving energy... so like all techniques, it has a pro and con. And for technical climbing, the pro of saving energy is outweighed by the fact that riders need to move their bike and body to stay balanced.
Pull on the Bars
Most riders pull back on the handlebars in an attempt to keep their weight over the middle of the bike, so they're balanced on a climb. This goal makes sense. However, it's how they are trying to stay over the middle of the bike, that's the key. Continuously pulling on the bars takes upper body and hand strength, using energy, but also isn't very effective at moving the rider's centre of mass forward, over the middle of the bike. It also limits mobility, as the arms are tense from pulling, rather than keeping them relaxed to move the rider or bike, as needed. Again, not ideal for technical climbs.
The Solution
Being in a position on the bike to give the best stability and therefore balance, is key to mountain biking. So, when climbing, the best thing to first try (before pulling on the bars) is to move the body into a better position. The best way to do this is to move the parts of the body that will make the biggest difference - the hips and torso.
- Slide the hips forward on the seat to find a balance point where you are centred on the bike without having to continuously pull on the bars. If you do this enough, you'll be amazed at just how steep of a climb you can ride up without doing anything else. Some people avoid this technique, as sitting on the nose of the seat can be uncomfortable. Try adjusting the seat (lowering the nose helps for steep climbs), or finding a better seat that provides more support and comfort on the front section. Either way, moving the hips forward is important for a more stable riding position and its also provides better pedalling efficiency by placing the riders' hips more directly over the bottom bracket.

You can tell this rider has moved his hips forward because there is space on the back of the seat, his chin is over the stem and his arms are relaxed; all because he is centred and balanced.
Why else is being centred so important? Moving the hips forward helps keep the rider centred over the bike, keeping even weight on both wheels. This provides good traction on the rear, while keeping the front wheel weighted, preventing it from lifting up and 'wandering,' as you climb. Another advantage is that in a centred, stable position on the bike, the riders' arms and upper body can be relaxed and therefore ready to move and react to the terrain... which is perfect on steeper, technical climbs when you may need to steer the bike around an obstacle, or unweight the front wheel, to maintain the bike's momentum.
You can test this by trying to climb with a very light grip on the handlebars, or even climbing with open fingers... or even one arm! This will force you to move your hips so you move into a stable, balanced position on the bike first, helping you realize that for many climbs, moving your hips forward on the seat is the fundamental technique to start with, and sometimes is the only thing you'll need to do.
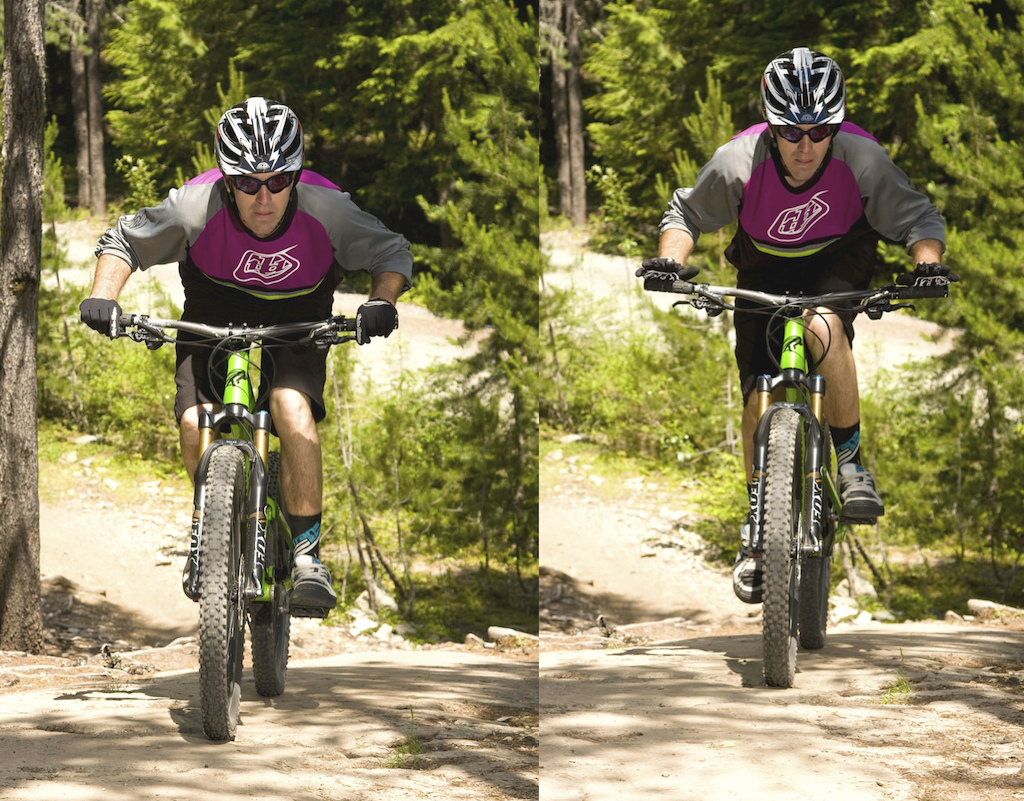
Trying to climb with your fingers open is a great way of finding out if you've moved your hips enough, and therefore, if you're centred and stable on the bike.
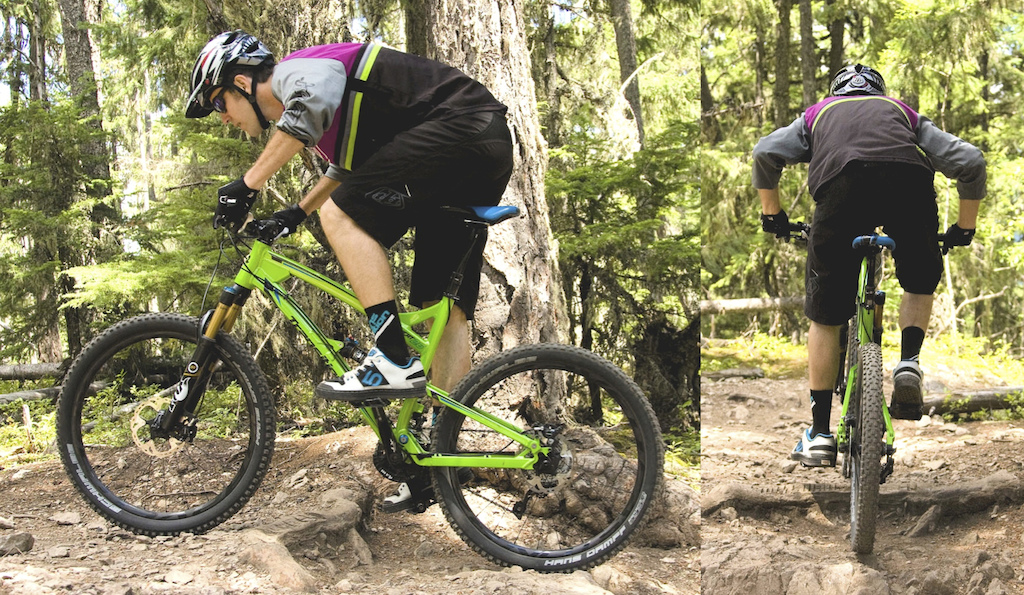
- Chest and wrists low. If the climb gets steeper, riders can move their hips further forward and also lower their chests to the handlebars. Lowering the chest (by hinging at the waist and using the core muscles to bring the chest towards the bars) helps move the centre of mass of the rider closer to the middle of the bike, further improving stability. Rolling the wrists down, also helps you lower your chest. Try and you'll see... as you roll your wrists down slightly, your chest will naturally want to move towards the handlebars.
Why else does this help? By simply talking about the chest and wrists, we naturally avoid mentioning the elbows and therefore allow them to do whatever they need... which on technical climbs, is to move freely. As soon as we say "elbows in", riders tend to lock themselves into a rigid position, losing the ability to move their bike, and to balance and adjust with the technical terrain.
To Summarize:
When you're climbing technical terrain, be sure to focus on moving your hips and chest as the primary technique to maintain balance and control on the bike. And remember, if you're balanced into and up the climb, you can better move the bike, pick a line, pedal more smoothly, pedal harder, change gear... and generally do all the other things you need, to climb successfully! The key points of the seated climbing position, are:
- Hips Forward
- Chest and wrists low
When it gets really steep
There are, of course, times when just moving your hips forward and chest down aren't enough, and the rider will still feel a need to gradually pull on the bars to stay over the middle of the bike and keep the wheels evenly weighted. This is also where rolling the wrists down can help. In doing so, this helps riders to pull the bike "back" underneath them, rather than pulling "up", and lifting the front wheel off the ground. The key is to use this technique as a last resort, as opposed to it being the first thing to do. If you keep this in mind, you'll make most of your climbs without having to continuously pull on the bars at all. Save this technique for only the steepest of climbs.
When the going gets rough
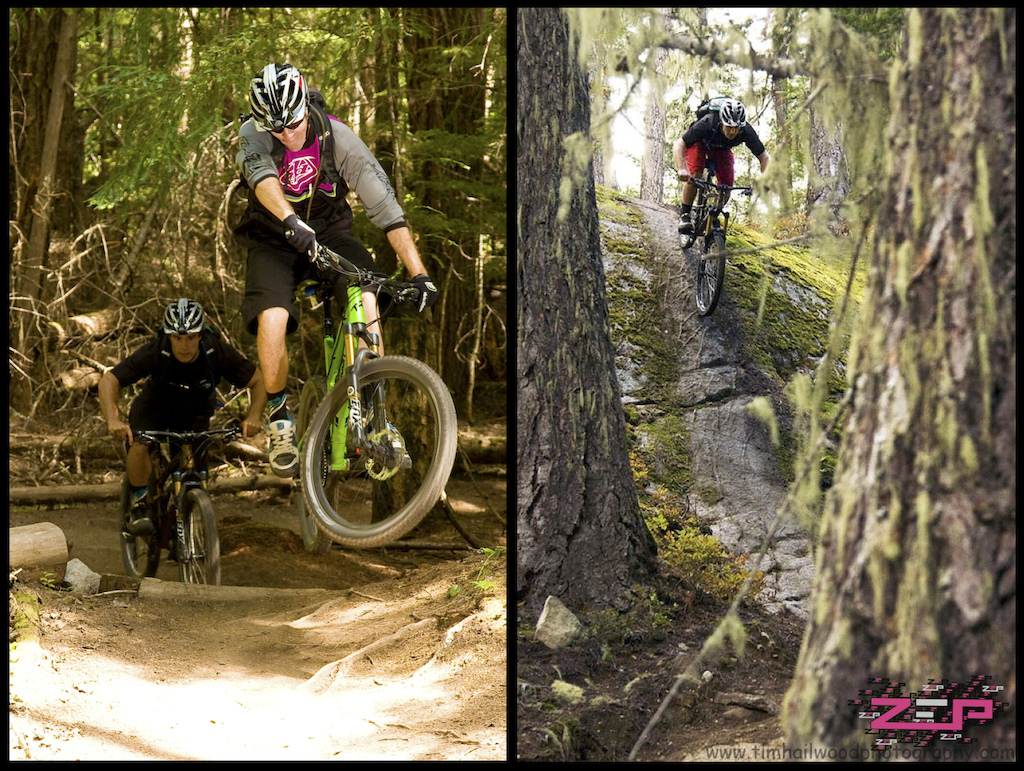
The other myth that we hear in technical climbing comes from people being told to "stand up when it's rough, to unweight the bike". As ever, the language we use when teaching and how we define and explain things, is so important. In this case, the terminology of 'stand up' often causes an undesired affect - people, literally, stand up. In doing so, their hips move forward (away from the rear wheel), while their shoulders move back and up (away from the front wheel). Their centre of mass is now high, causing stability issues, and they lack weight over the rear wheel, often causing the rear wheel to slip when they put the power down. Instead, think of 'hovering' or 'crouching', rather than 'standing up.'
Try not to think, "stand up," if there's an obstacle such as a root on the climb. Instead, keep the chest low and forward and "hover" the hips over the seat, keeping weight over the rear wheel for traction, while allowing the bike to move underneath the rider, up and over the obstacle.
This position should look similar to the seated climbing position above, except the hips are about 1-2 inches above the seat... they are "hovering." It does take some core strength to balance on the bike and hinge at the waist to bring the chest low, towards the bars, while keeping the hips above the seat (and not in front, which is a common issue). It's useful to practice this on easier sections of trail so you can get a feel for what it's like and how to balance and move in this position, before you try it for real. The three bullet points for a hovering climbing position can be summarized as:
- Chest Low and Forward
- Hips Hovering - just above the seat
- Harder gear - to avoid spinning out
For short, steeper and/or rougher sections of trail, this hovering position is a great way to maintain stability and traction, while finding some extra power and momentum from pedalling out of the seat. Riders can also use their arms and legs as suspension to help the wheels roll over rougher terrain more easily, preventing the bike from stalling at the first sign of a root or bump on the climb. Allowing the bike to move underneath and adjust to the changes in terrain, is a key advantage to moving out of the seat. This being said, because the rider is out of the seat, it's not a position that can be sustained for long periods of time.
Efficient climbing should naturally involve constant adjustments from the rider, based on the pitch and surface of terrain. Try not to get into a 'climbing position,' and stay there. If it gets steeper, move forward and lower; if it eases off, you can relax and sit farther back on the seat. If there's some roots, you'll need to slightly raise your hips off the seat for a brief moment, as the rear wheel rolls over. Scan the terrain and decide on a plan of action ahead of time. With plenty of practice, these tips should get you climbing higher, farther and faster, with less effort.
So, next time you're tackling a technical climb remember that moving your hips is the most effective place to start, to maintain a stable, balanced position. And try to focus on one thing at a time... there are a million tips we could give you on "how to climb," but most riders (in any sport) can only properly think about and work on one technique at a time.
Happy Climbing people... I hope these ideas help.
Paul
About the Authour
Paul Howard is the Owner-Director and Head Coach of ZEPtechniques, Technical Director of the Professional Mountain Bike Instructor Association, Head Snowboard Trainer for Whistler Blackcomb SnowSchool, Technical Education Committee and 2015 Interski Team Member for the Canadian Association of Snowboard Instructors, and has been teaching mountain biking and training mountain bike instructors around the world, since the late 90's.
About ZEP
ZEPtechniques is a Whistler-based mountain bike camps and instructor training company. Established in 2006, ZEP offers single and multi-week, adult specific rider improvement camps, as well as weekly clinics, private lessons and tours. ZEP's Instructor Training services include the industry's original, multi-week mountain bike instructor training camps; training riders four days per week with evening seminars on suspension set up, bike mechanics, nutrition, as well as strength and conditioning sessions, all with industry experts. As developers of the internationally available Professional Mountain Bike Instructor (PMBI) Certifications and Directors of the PMBI Association, ZEP has long played a key role in establishing and improving the finest teaching practices and instructor certifications, within mountain biking.
ZEP is proudly supported by
Transition Bikes
ANVL Components
Fox Racing Shox
Troy Lee Designs
Five Ten
MRP
EVOC
Evolution Whistler
Vorsprung Suspension
Reel Cameras
Spun Studios
Photos
Bike Park Photos
Tim Hailwood Photography
Upcoming articles...
Body Position for Riding Downhill
Speed Control on Steeps and Rock Rolls
Techniques for Flats vs. Bermed Corners
Jumping Part 1 - Myths vs. Facts
Jumping Part 2 - The 3 Components of Air
MENTIONS: @TransitionBikeCompany / @foxracingshox / @troyleedesigns / @evocsports / @zeptechniques
Author Info:

 Member since Mar 24, 2006
Must Read This Week
Sign Up for the Pinkbike Newsletter - All the Biggest, Most Interesting Stories in your Inbox
PB Newsletter Signup
For those ones where your front hits before the rear clears, you're kind of forced to bunnyhop rather than wheelie and clear both at once. Judging whether you have to hop or wheelie is the hard part.
Another great resource is www.dirtsmartmtb.com - (I'm partial to Andy's instruction)
Usually they're anything but smooth in my experience. Whistler has really steep technical climbs which, if you're in the mood, can be a lot of fun. I suspect they've just chosen photos where it's easy to see the body positions rather than anything particularly technical.
Where is all the Enduro(tm)?
I think these articles are great, and I really appreciate the authors using their free time to write them for us. I think that if we, as a community, are going to criticise the advice, which granted we have every right to do, we should at least make our criticisms valid.
Hovering over the bike works for the really rough stuff but you have to do it right. I believe the crucial point is to keep your bike weighted equally through the entire process. The problem with standing up and pulling on the handlebars is that it will have you "pedal in squares" so each pedal strikes will compress the suspension and crush your rear wheel into the terrain which will help at first but after the initial power strike, when you hit the deadzone of the pedal cycle, the shock will decompress and take the weight off the rear wheel and have you skid instantly. It is very important to keep the bike weighted equally through the entire process and hovering over the bike helps keeping the pedaling smooth.
I am in no way a coach or a professional so I might be wrong but this is what I have observed over time, being a fan of trying to climb the most nasty stuff I can find.
This is simply a discussion of riding techniques and why sometimes various techniques are necessary.
I don't climb hills
I only ride downhill
I only ride park
@mattdennison