Long-term test: Kool-Stop Replacement Pads for Hayes
After a season of riding my original Hayes hydraulic rear brake linings were at their end, it was time to replace them. Knowing the cost of OEM pads, I wasn’t looking forward to shelling out fifty bucks (Canadian) for the micro sized friction linings when I can buy two sets of OEM brake pads for my pick-up truck for half the price.
That’s when I heard about Kool-Stop replacement pads for the Hayes hydraulic brake system. Competitively priced at sixteen dollars a set at Mountain Equipment Co-op in Vancouver B.C., I picked up a set and installed the pads in rear caliper of my rig. Here’s my initial impression and how to install them…
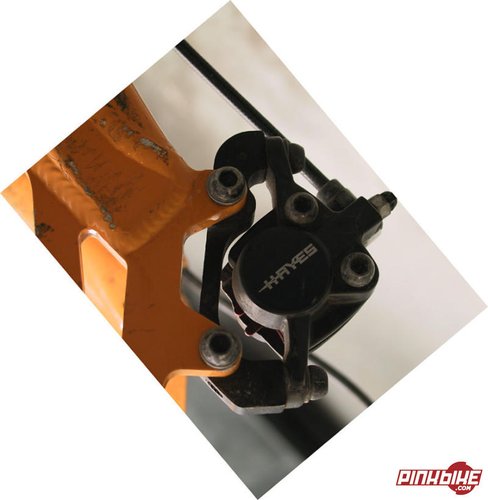
I had heard numerous stories about the durability of aftermarket friction linings for the Hayes hydraulic brake. Some riders claim that some brands don’t last for any longer than two rides, so I had prepared myself for the cost of OEM pads. However, when I heard from a few riders out on the trail that the reasonably priced Kool-Stop linings were holding up, I decided to give them a try. I had to make several trips to Mountain Equipment Co-Op in Vancouver B.C. before I could even purchase a set, due to their price they sell out as fast as they are put on the shelf. When I finally did manage to pick some up I looked forward to installing them and seeing how they lasted.
Changing the brake pads in your caliper is a simple process that anyone can perform, it requires no tools other that what it takes to remove the wheel from your ride. Here is the procedure:
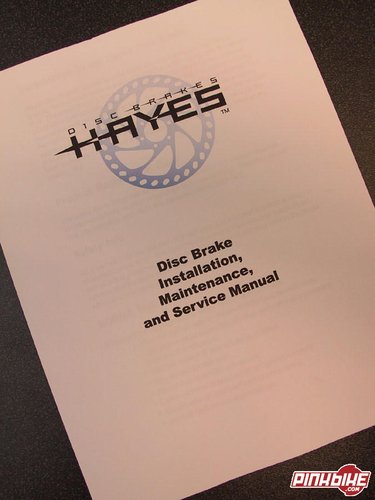
1- Download the Hayes Hydraulic Brake Manual from the technical section of their website, it makes for good reference and will help you in all aspects of brake system maintenance and repair.
2- Flip the bike upside down so it rests on the seat and handle bars and remove the wheel and rotor assembly for the caliper that you want to change the pads on. Most often this is just a matter of releasing the quick release, for thru-axle wheels you need to remove the axle.
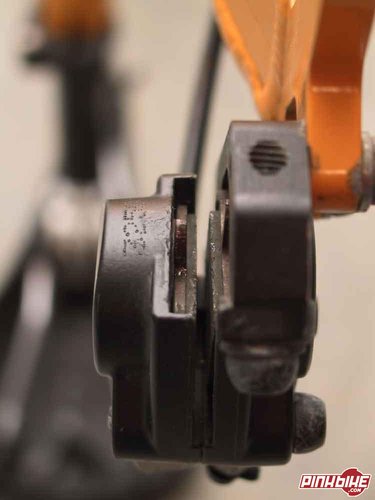
3- Once the wheel/rotor assembly is out do not to squeeze the brake lever, the pistons can be forced out of their bores, and can push the brake pads together. You won’t be able to retract the pistons without forcing something between the brake pads. (The Hayes manual mentions the use of cards if there isn’t enough gap between the pads, a flat screwdriver works best though the friction material will be damaged and the pads will need replacing).
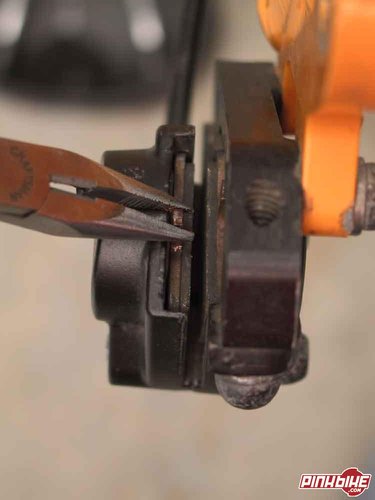
4- Remove one of the brake pads by grasping the tab located in the middle of the pad with your fingers and pulling up and toward the centre of the caliper. The pad should slide out with a gentle pull, there is an inside and outside pad so note which one you took from which side. Remove the pad opposite in the same manner. A pair of needle-nose pliers makes this easier.
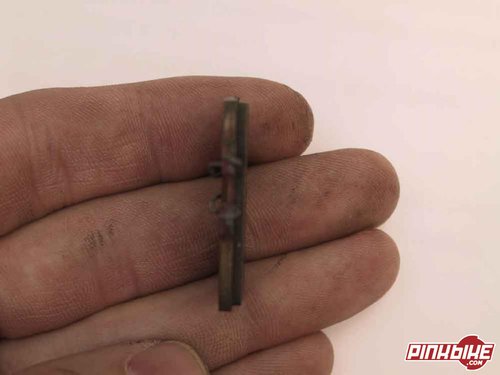
5- Inspect the pads for lining wear. Check to see that it is even across it’s thickness and not approaching the metal backing plate of the pad. If both or either of the pads are worn, replace them both.
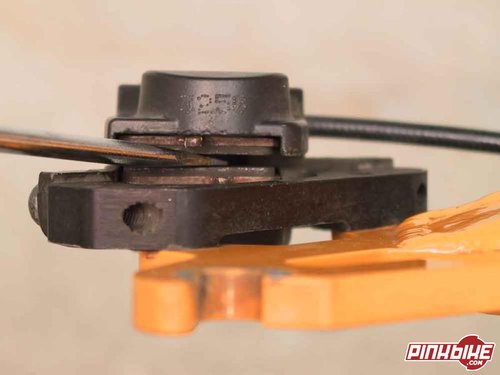
6- Reinstall the old pads the same way they came out, the correct way round and make sure the spring clip catches the post in the centre of the piston. If the friction material on the pads is fine and they don’t need replacing, reinstall the wheel/rotor assembly as per step 1. If the pads need replacing gently push the pistons back into their bores until they are seated by prying between the old brake pads with a flat screwdriver. Make sure the pistons travel back into their bores evenly by prying at each end of the brake pads alternately. (The Hayes manual suggests the use of a 10mm boxed end wrench for this if the pads are removed, though it may be difficult to get the wrench in between the pistons and you risk damaging the posts in the centre of pistons this way).
7- Remove the old pads again and take the spring clips off the back of them. This is done by squeezing the clip together at its centre.
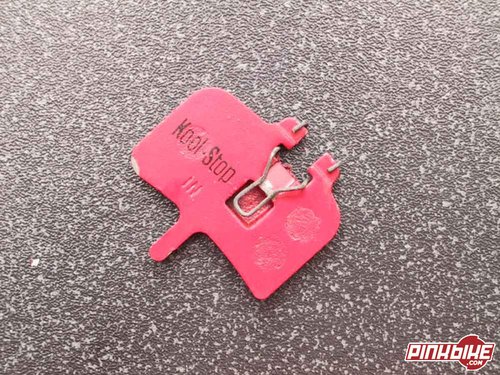
8- Put the spring clips on the replacement pads so that the ends of the clip face the piston side of the pad.
9- Install the new pads in the caliper as in step 6. (Kool-Stop pads have “in” and “out” stamped on the piston side of the pad to aid in correct installation).
10- Reinstall the wheel/rotor assembly as per step 1. If the rotor won’t slide in between the pads then the pistons are most likely not seated and will have to be before you will be able to put the wheel/rotor back on. If this is the case go back to step 6 and seat them.
Remember to take it easy the first ride with your new pads, they will have to wear into the grooves and break the glaze on the rotor. Brake performance may not be what you expect for the first dozen or so hard applications.
I've had the Kool-Stop pads on my rig for about a month now and they seem to perform as well as the original Hayes at a fraction of the cost, and so far expedited wear has not been an issue. Stay tuned for a long-term update.
For other Kool-Stop accessories and brake applications check out their website, www.koolstop.com.
And for all of you home bike mechanics out there - we have the interactive CD-ROM repair manual.
Waiting eagerly to hear how the pads have worked.
Just bought a few pairs myself, will soon bee trying them out ...