Stories posted under Pinkbike Community blogs are not edited, vetted, or approved by the Pinkbike editorial team. These are stories from Pinkbike users.
If a blog post is offensive or violates the Terms of Services, please report the blog to Community moderators.
Pink Bike Blog Tutorial
A quick screenshot tutorial on how to add images to Blogs.Adding images uploaded to Pink Bike:
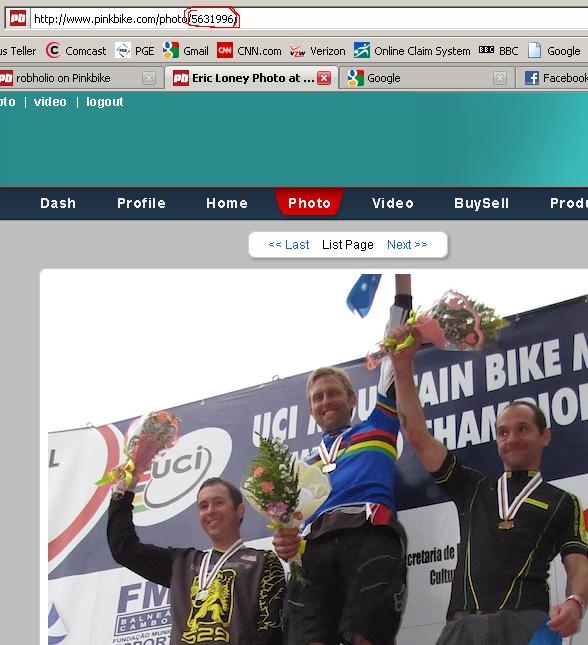
The first thing you need to do is identify the uploaded image you want to use. Pinkbike automatically names uploaded images with numbers, so all you need is that number to add a picture:
![photo]()
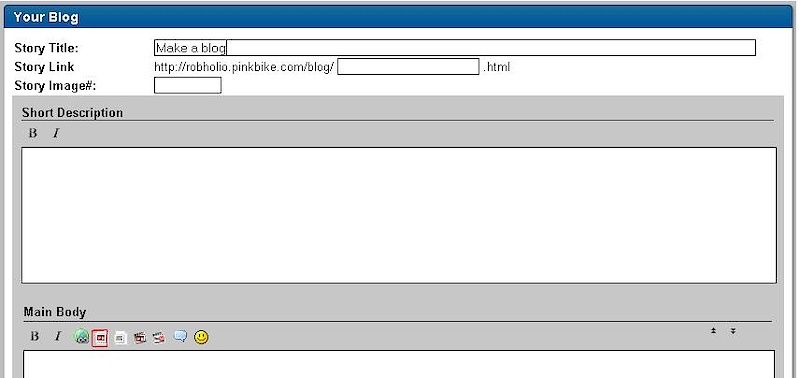
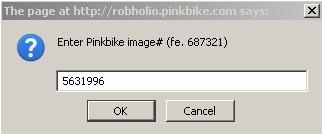
Once you have the image number, click on the PB Image button on the blog toolbar, then enter the number:
![photo]()
![photo]()
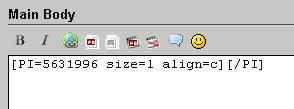
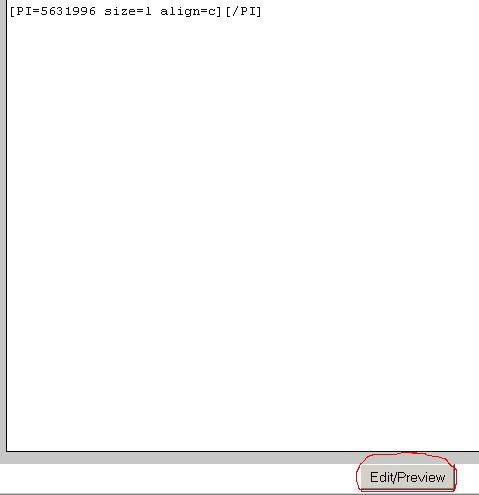
You will then see the HTML code where your picture will be in the blog article:
![photo]()
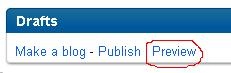
Write your article as you normally would in Word or any word processing program, and simply use the previous steps to add the images where you want them in the article. When you are ready to review your work, click the Save Draft button at the bottom of the editor:
![photo]()
Then click Preview:
![photo]()
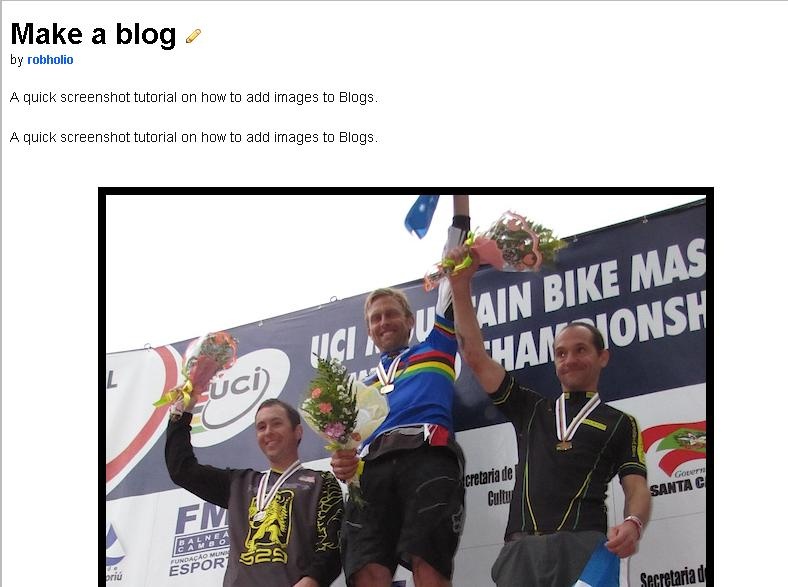
And voila! You have a blog with pictures. It's pretty much that easy!
![photo]()
Adding captions to images:
Simply type the caption between the brackets in the image code:
![photo]()
![photo]()
The first thing you need to do is identify the uploaded image you want to use. Pinkbike automatically names uploaded images with numbers, so all you need is that number to add a picture:
Once you have the image number, click on the PB Image button on the blog toolbar, then enter the number:
You will then see the HTML code where your picture will be in the blog article:
Write your article as you normally would in Word or any word processing program, and simply use the previous steps to add the images where you want them in the article. When you are ready to review your work, click the Save Draft button at the bottom of the editor:
Then click Preview:
And voila! You have a blog with pictures. It's pretty much that easy!
Get some!!!
Adding captions to images:
Simply type the caption between the brackets in the image code:


GET SOME!!!
Author Info:

Must Read This Week
2 Comments
- 10
Ha ha ha ha... Blogging For Dummies!!! Perfect for me! Thanx Rob! 
- 10
Bravo'holio.
Login or Sign Up