Building a home bikeshop. Part 1
The last few years have been a struggle, trying to set up a space to store and work on my bikes. Constantly moving around from basement suite, to basement suite, nothing quite worked. So in 2009 my girlfriend and I stepped up to the plate and bought a house. A big step financially and in our relationship.
But it also means I finally get to build a shop just for my bikes.Back when I was living at home, everything was easy. Had a huge garage to keep bikes, and My Dad had built a massive workbench that I could use when I was working on bikes and my vehicle. When I finally moved out, basement suites didn't quite give me that luxury, bikes where usually stuffed in the corner, leaning against a wall or upside down while I worked on them.
Before we moved into our house Odrey and I were living in her 550 sq. ft studio apartment. Cramped was an understatement, we hardly had room to breathe once my bikes were in there:
![photo]()
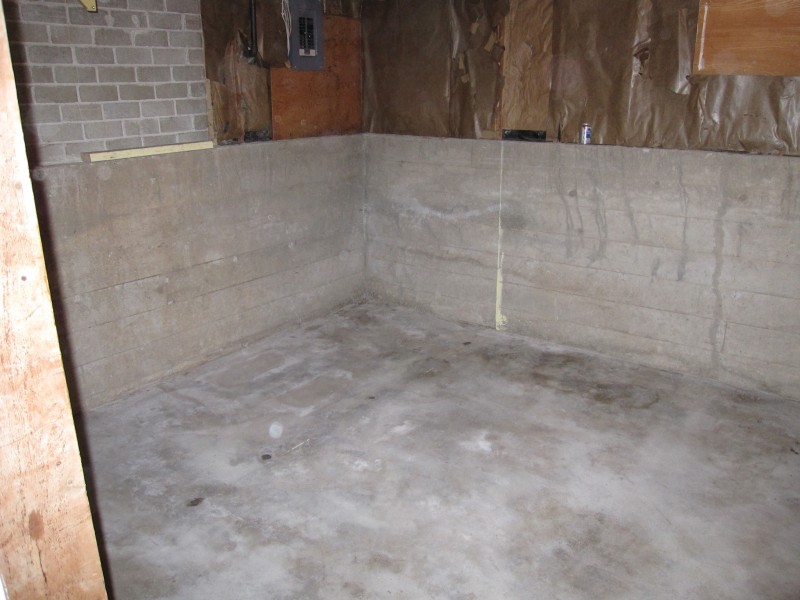
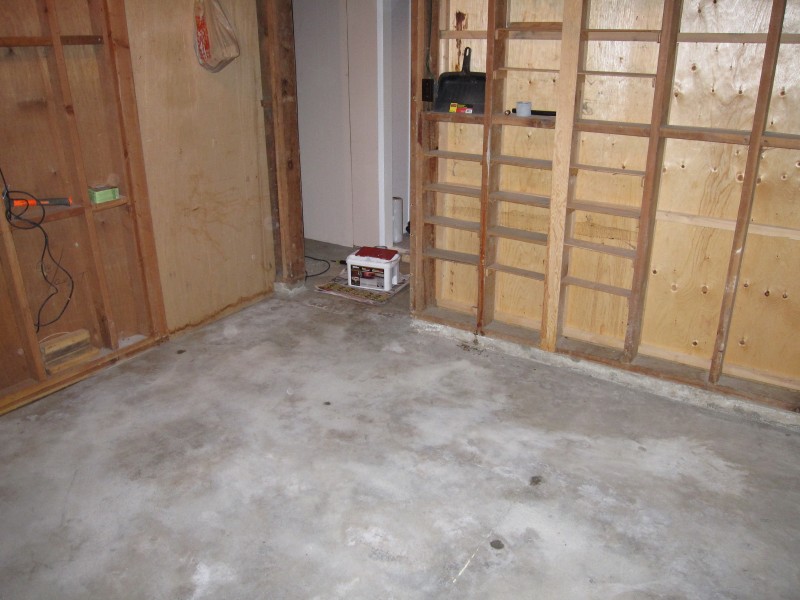
February 28th we took possession of our 2100 sq. ft house. The basement was mostly unfinished, so I had lots to chose from when it came to building a shop.
![photo]()
![photo]()
First step was to get the flooring down, I wanted something smoother and easier to clean than a cold concrete floor. I bought some garage coating 2 part epoxy to put down, this would seal the floor and make cleanup a lot easier. It took about 10 hours total including drying time, the process was fairly easy, and I'm pretty stoked with the outcome.
![photo]()
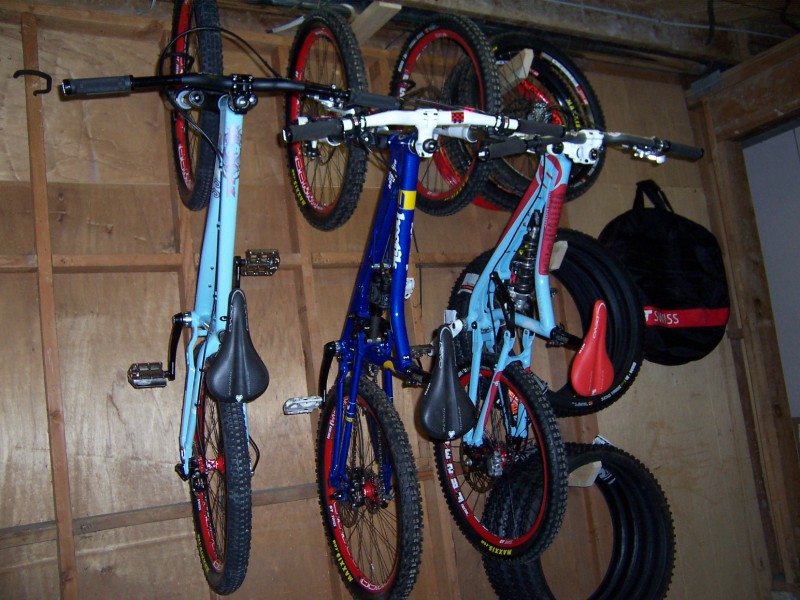
Now that the floor was down I can start working on the shop itself. I needed to get a lot into this room so a bit of careful planning was required. I wanted a full 8 ft. workbench as well as a pegboard wall, shelves for gear, a full stand up toolbox, 4 bikes, and a bunch of tires.
This is gonna be awesome.
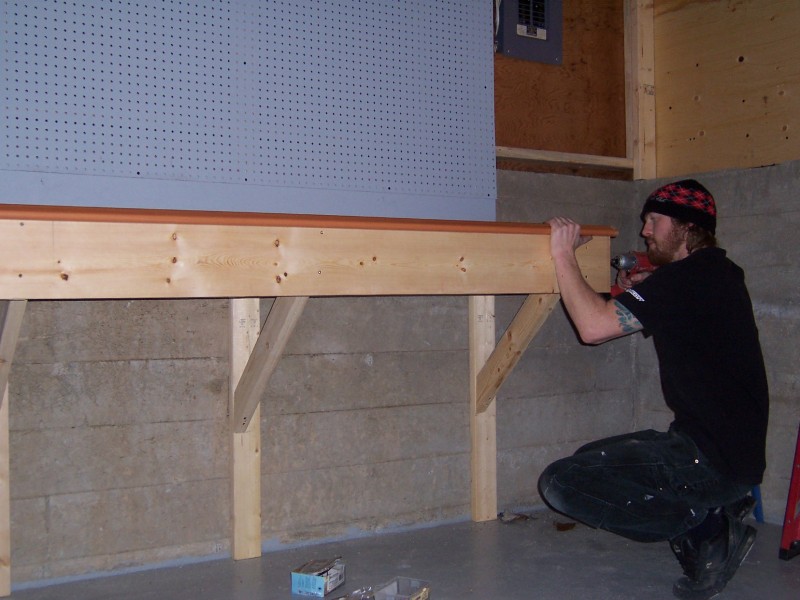
So now I can get started framing the wall out to start on the bench and pegboard section of the shop. I decided to build the wall off the existing outside wall, and foundation. This way I can build the bench off a wood structure rather than try to Hilti into 50 year old concrete.
![photo]()
Once the wall was up, the pegboard and shelves got a coat of paint the room was starting to come together. I got the countertop from a used building supply store called ReStore for $40. I added a strip of Plywood just below the pegboard so I would have something to attach the electrical to.
![photo]()
![photo]()
Next I will start getting the tools on the peg board, bikes on the wall, shelving for gear, and I have a little bit of electrical work to do.
Check out the forum thread on home workshops here too.
Total cost so far:
Floor Epoxy $100
Lumber $100
Pegboard $18
Countertop $40
Darryl Bartlett is proudly supported by:
Devinci Bikes
Pinkbike.com
SRAM
Truvativ
Avid
RockShox
DT Swiss
ODI
WTB
Troy Lee Designs
Straitline Components
Gamut USA
Checkers or wreckers!
-Stay tuned for part 2 in the coming weeks.
But it also means I finally get to build a shop just for my bikes.Back when I was living at home, everything was easy. Had a huge garage to keep bikes, and My Dad had built a massive workbench that I could use when I was working on bikes and my vehicle. When I finally moved out, basement suites didn't quite give me that luxury, bikes where usually stuffed in the corner, leaning against a wall or upside down while I worked on them.
Before we moved into our house Odrey and I were living in her 550 sq. ft studio apartment. Cramped was an understatement, we hardly had room to breathe once my bikes were in there:
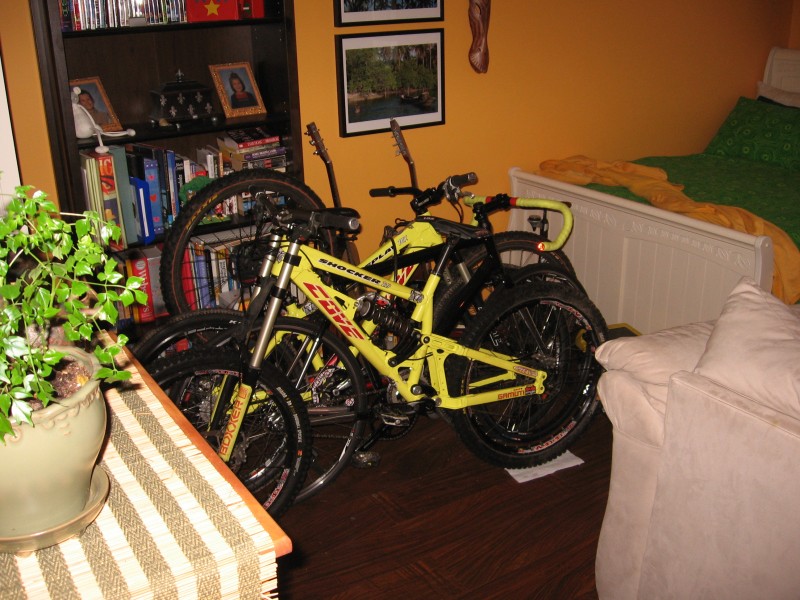
Old condo set up and old bikes
February 28th we took possession of our 2100 sq. ft house. The basement was mostly unfinished, so I had lots to chose from when it came to building a shop.
First step was to get the flooring down, I wanted something smoother and easier to clean than a cold concrete floor. I bought some garage coating 2 part epoxy to put down, this would seal the floor and make cleanup a lot easier. It took about 10 hours total including drying time, the process was fairly easy, and I'm pretty stoked with the outcome.

My beverage was painted into a corner and lost for 10 hrs
Now that the floor was down I can start working on the shop itself. I needed to get a lot into this room so a bit of careful planning was required. I wanted a full 8 ft. workbench as well as a pegboard wall, shelves for gear, a full stand up toolbox, 4 bikes, and a bunch of tires.
This is gonna be awesome.
So now I can get started framing the wall out to start on the bench and pegboard section of the shop. I decided to build the wall off the existing outside wall, and foundation. This way I can build the bench off a wood structure rather than try to Hilti into 50 year old concrete.
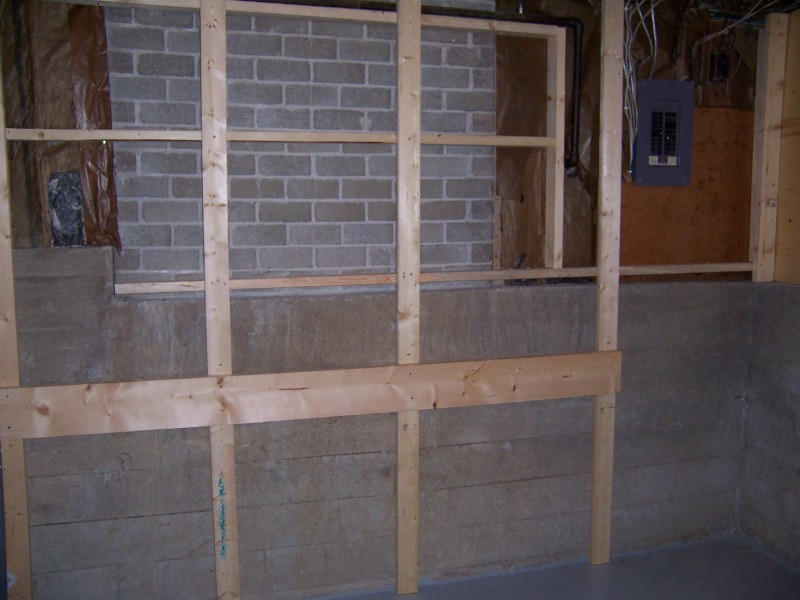
Not bad for a commercial Electrician eh?
Once the wall was up, the pegboard and shelves got a coat of paint the room was starting to come together. I got the countertop from a used building supply store called ReStore for $40. I added a strip of Plywood just below the pegboard so I would have something to attach the electrical to.
Things are looking up, literally!
Next I will start getting the tools on the peg board, bikes on the wall, shelving for gear, and I have a little bit of electrical work to do.
Check out the forum thread on home workshops here too.
Floor Epoxy $100
Lumber $100
Pegboard $18
Countertop $40
Darryl Bartlett is proudly supported by:
Devinci Bikes
Pinkbike.com
SRAM
Truvativ
Avid
RockShox
DT Swiss
ODI
WTB
Troy Lee Designs
Straitline Components
Gamut USA
Checkers or wreckers!
-Stay tuned for part 2 in the coming weeks.
Author Info:

Must Read This Week
Sign Up for the Pinkbike Newsletter - All the Biggest, Most Interesting Stories in your Inbox
PB Newsletter Signup
I have to ask, is it a walk - out basement or a bulkhead? Because bulkheads are a pain to get bikes out of.
hmmmm mabey you should go watch holmes on holmes
Can't say I disapprove.
Another thing you can do for easier manipulation of bikes over your head is a simple set of pulleys. Build two pulleys or simple eyehooks into the top beam and a hook with a bit of heft into a rope. Use a marine standard rope tie device to secure the rope. If you don't already know, learn the proper method for tying rope down too.
This is especially helpful if you are a bit short or the ceiling is a bit high. The place where I store my bikes has a 16 foot ceiling. I'm building the hooks right into the wall and putting a strip of wood down to secure the back tire.
Also, hanging bikes from the front tire isn't always the best since the fork gets stored up-side down. This isn't very good for open bath type forks. It can cause all kinds of problems. Put the hook around the handlebar, frame or seat so the fork stays pointing downwards. You can also hang it from the back wheel, but that can be awkward too.
PS. Is that a classical guitar in your gf's apartment? props for that!
nice workshop to!