Poor, hard on parts, need new cranks and not sure how to install a set?
So what happens when your sick of riding around all year on twisted and bent cranks? Well for a lot of us… absolutely nothing! As we all know, crank sets can be a pretty expensive investment on your bike. Well myself, personally I’m 17 years old and work in a bike shop, so needless to say I don’t have the largest budget. There are inexpensive cranks out there, to accommodate those of us who can't bust out a hockey sock full of cash, but you might as well just keep riding your current setup because they will end up twisted or you will end up tearing the pedal out of them anyway. I have found that some manufacturers make cranks way to soft. If they are too soft, pedal threads tear even on the smallest impacts, and if you manage to catch your pedal on a solid root or rock, it’s game over.![photo]()
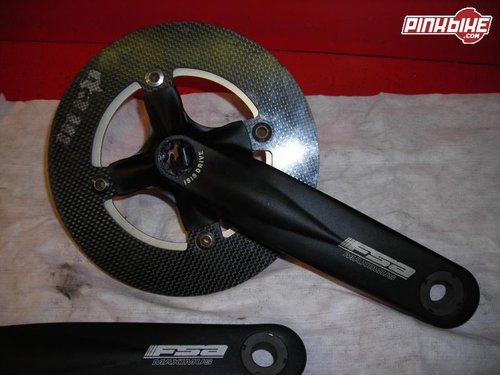
The FSA Maximus crank arms really caught my eye, mostly because of $100.00 retail price. Well actually there are two prices, $100.00 with no bash ring or chain rings. Bump the price up to $204.00 and you get a granny and middle, with a big polycarbonate bash ring. The cranks are forged from 6061 aluminum. One of the most impressive features includes the pedal inserts. Instead of most manufacturers using a little tiny steel thread insert to add a little bit of strength, FSA uses a huge chromoly insert. They manufacture them in two half’s and thread them in from each side until they meet in the middle.
The arm set comes in three lengths; 165mm, 170mm, and 175mm, for those of you that are picky like that. Weight isn’t a serious issue with these. They weigh in at about 950 grams with chain rings and bash ring, and 671 grams with no rings or bash rings. For an inexpensive and really burly crank set, that’s a pretty respectable weight.
So, if you’re not to sure how to install your new crank set, here is how:
![photo]()
Using an 8mm allen wrench, remove the crank bolt. Inspect to make sure that the thin washer between the crank bolt and crank shoulder is removed. (Your crank set may not have this)
![photo]()
Using a proper crank extraction tool, remove the crank arm from the bottom bracket spindle. Be sure that you are using an ISIS crank extracting tool. There is a difference between square taper bolt hole size, and ISIS bolt hole size, therefore the two tools have a different size extracting face.
![photo]()
Transfer your chain rings from your old setup to your new setup, including E plates or bash rings. Once you have installed your drive train components, its time to reinstall the crank arms. Make sure that you clean the bottom bracket spindle so that all dirt particles and old dirty grease are no longer there. Re-apply thick grease to either the spindle or ISIS splines in the crank arm. This is to prevent seizing and creaking. Using the same 8mm Allen wrench, torque the bolts until the crank arm bottoms on the bottom bracket shoulder. You should be able to feel the sudden increase in force required to keep tightening. (You may need to remove the crank arm and re-install it a second time to get it to fully seat)
The final step is installing the pedals. Make sure that you grease the pedal threads for the same reason as the bottom bracket spindle. Note that the two pedals have different threads. It’s really easy to remember, left hand pedal is left hand thread. (Counter clockwise to tighten) The right hand pedal is right hand thread. (Clockwise to tighten)
![photo]()
Ok now you have installed a new set of cranks to replace those older twisted ones you ran all season. Your bike will feel so much better for doing that.
To learn more about FSA products, just visit www.fullspeedahead.com
The FSA Maximus crank arms really caught my eye, mostly because of $100.00 retail price. Well actually there are two prices, $100.00 with no bash ring or chain rings. Bump the price up to $204.00 and you get a granny and middle, with a big polycarbonate bash ring. The cranks are forged from 6061 aluminum. One of the most impressive features includes the pedal inserts. Instead of most manufacturers using a little tiny steel thread insert to add a little bit of strength, FSA uses a huge chromoly insert. They manufacture them in two half’s and thread them in from each side until they meet in the middle.
The arm set comes in three lengths; 165mm, 170mm, and 175mm, for those of you that are picky like that. Weight isn’t a serious issue with these. They weigh in at about 950 grams with chain rings and bash ring, and 671 grams with no rings or bash rings. For an inexpensive and really burly crank set, that’s a pretty respectable weight.
So, if you’re not to sure how to install your new crank set, here is how:

Using an 8mm allen wrench, remove the crank bolt. Inspect to make sure that the thin washer between the crank bolt and crank shoulder is removed. (Your crank set may not have this)

Using a proper crank extraction tool, remove the crank arm from the bottom bracket spindle. Be sure that you are using an ISIS crank extracting tool. There is a difference between square taper bolt hole size, and ISIS bolt hole size, therefore the two tools have a different size extracting face.

Transfer your chain rings from your old setup to your new setup, including E plates or bash rings. Once you have installed your drive train components, its time to reinstall the crank arms. Make sure that you clean the bottom bracket spindle so that all dirt particles and old dirty grease are no longer there. Re-apply thick grease to either the spindle or ISIS splines in the crank arm. This is to prevent seizing and creaking. Using the same 8mm Allen wrench, torque the bolts until the crank arm bottoms on the bottom bracket shoulder. You should be able to feel the sudden increase in force required to keep tightening. (You may need to remove the crank arm and re-install it a second time to get it to fully seat)
The final step is installing the pedals. Make sure that you grease the pedal threads for the same reason as the bottom bracket spindle. Note that the two pedals have different threads. It’s really easy to remember, left hand pedal is left hand thread. (Counter clockwise to tighten) The right hand pedal is right hand thread. (Clockwise to tighten)

Ok now you have installed a new set of cranks to replace those older twisted ones you ran all season. Your bike will feel so much better for doing that.
To learn more about FSA products, just visit www.fullspeedahead.com
Author Info:

Must Read This Week
Sign Up for the Pinkbike Newsletter - All the Biggest, Most Interesting Stories in your Inbox
PB Newsletter Signup
I was just commenting I thought it was funny that someone basing an article on being poor and not being able to afford cranks had some crazy blinging excessive parts.
So here's my .02
I don't really have any more to add that hasn't been said here already (in the posts that actually addressed the question) more pics/vids, list of tools etc.
So I work in a shop and having a working knowledge of everything out there is almost impossible without studying manuals like homework. Needless to say the internet is a huge help and is used everyday and by far the most helpful manufacturer's site I have seen to date is Fox Shox's.
check this out
service.foxracingshox.com/consumers/index.htm
I just picked any fork but that's not the point. Their walkthroughs are near perfect. It starts off with a list of all the tools you'll need and has tons of big pics. If you're looking for a template for a how-to section it doesn't get much clearer than this.
I know this kid, he is actually poor as **** and spends what little cashmoney he has on nice reliable parts.
And good article, Cori.