Handmade Ski Bike
I was given the opportunity during my senior year of high school to design and build anything I wanted (obviously within reason), so I chose a downhill ski bike. With a bit of research and trial and error, I have managed to successfully cut, mill, grind, and weld my own ski bike.Living in the Bay Area makes it hard to get to snow easily, but the challenge and the potential award kept me working hard on my ski bike. To tell you the truth, it's kind of weird calling it a "bike" as a bicycle by definition has 2 wheels. I guess I could call this (and other contraptions like it) a "triski", but there is something funky about that...
Starting 6 months ago with a few rough sketches and ideas, I was able to whip together a set of scale drawings. Having never built anything like this before, everything was based on logic and hopes that it would work out. I had seen North Legion's ski bikes a couple years back, so I decided to base the rear ski assembly off their SMX bike. I really wanted to make it unique so I added a few twists of my own. The "Skewed Parallelogram Assembly" allows for the outer ski to carve harder than the inner one. In theory this would allow for a bit more of a "bite" on the edges without losing stability. While this was all great in theory, I had no tests to back it up. So with one shot at getting it correct, I fired up the lathe.
Over the course of the 6 months I tried to document my progress. While there are some gaps, I was able to cover most of the main assemblies. If you want to see more photos of the project, check out the link to the album at the bottom.
Initial Scale Drawings:
![photo]()
![photo]()
![photo]()
![photo]()
First Cuts:
![photo]()
![photo]()
Main Pivot Assembly:
![photo]()
![photo]()
Layout for Welding:
![photo]()
It all started to come together:
![photo]()
![photo]()
![photo]()
![photo]()
![photo]()
![photo]()
Ready for Assembling/Welding:
![photo]()
![photo]()
Painting:
![photo]()
![photo]()
![photo]()
![photo]()
![photo]()
![photo]()
![photo]()
![photo]()
Finished Product:
![photo]()
![photo]()
![photo]()
![photo]()
![photo]()
![photo]()
![photo]()
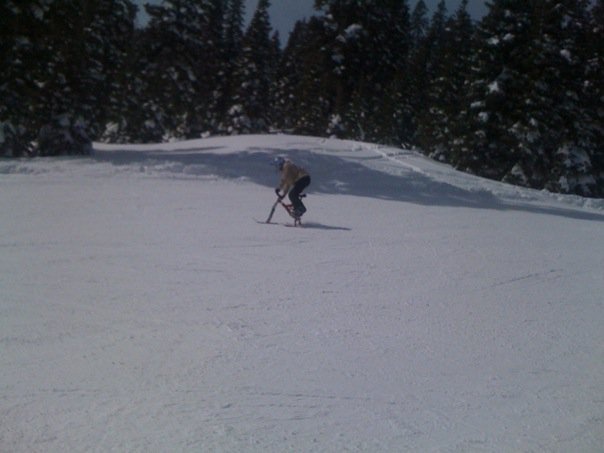
Some iPhone action shots:
![photo]()
![photo]()
Thank you Tam Bikes, Mikes Bikes, and Transition Bikes. There is no way I could have completed this without you!
Complete Photo Album.
transitionbikes.com
tambikes.com
mikesbikes.com
-Sam Pannepacker
Starting 6 months ago with a few rough sketches and ideas, I was able to whip together a set of scale drawings. Having never built anything like this before, everything was based on logic and hopes that it would work out. I had seen North Legion's ski bikes a couple years back, so I decided to base the rear ski assembly off their SMX bike. I really wanted to make it unique so I added a few twists of my own. The "Skewed Parallelogram Assembly" allows for the outer ski to carve harder than the inner one. In theory this would allow for a bit more of a "bite" on the edges without losing stability. While this was all great in theory, I had no tests to back it up. So with one shot at getting it correct, I fired up the lathe.
Over the course of the 6 months I tried to document my progress. While there are some gaps, I was able to cover most of the main assemblies. If you want to see more photos of the project, check out the link to the album at the bottom.
Initial Scale Drawings:

Frame and Swingarm

Main Pivot Blowup

Rear-Skewed Parallelogram

Main Pivot Caps and Sub-Pivot Covers (did not end up using the covers)
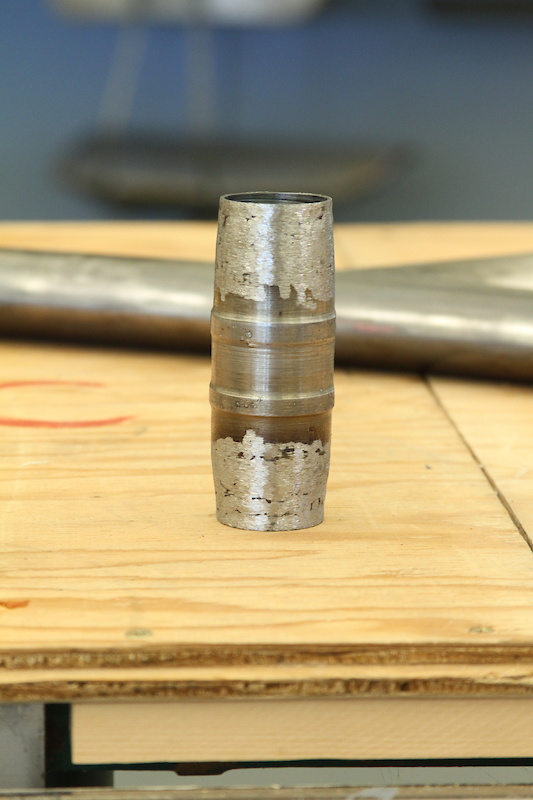
First Cuts:

Main Pivot Plates (before bending)

Main Pivot Plate and Rear Shock Mount Plate
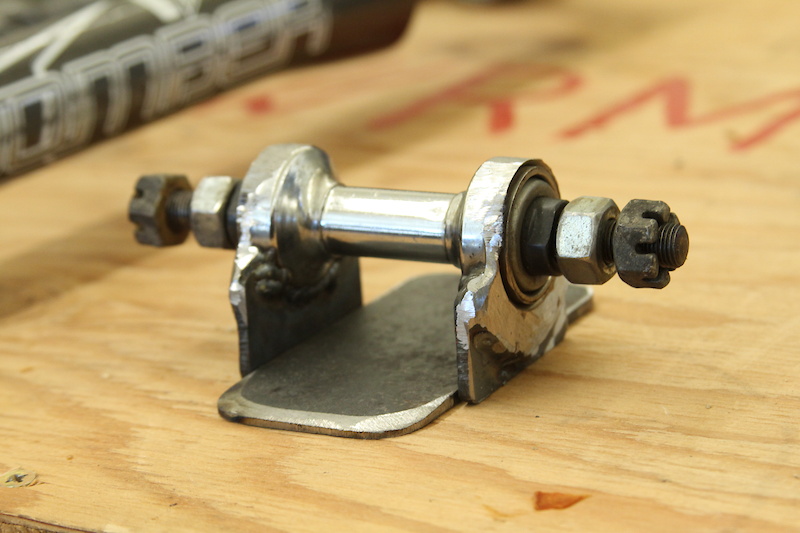
Main Pivot Assembly:
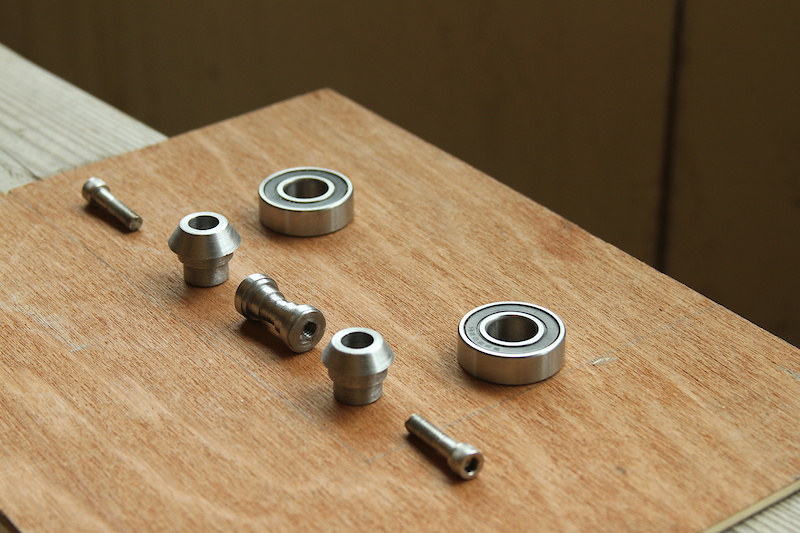
Main Pivot Caps and Hardware (milled from steel rod-stock)
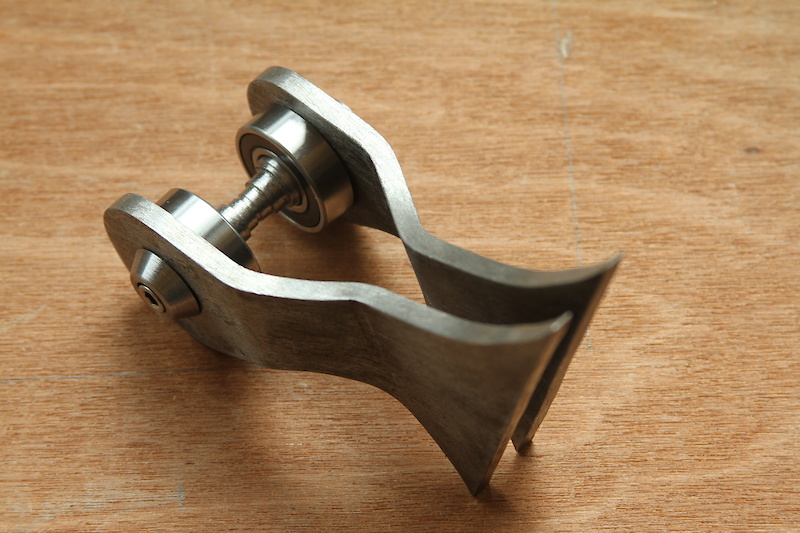
Main Pivot Plates (post bending) and Full Assembly
Layout for Welding:

Plates Clamped to Central Tubing
It all started to come together:

Shock Mount Plates Welded On
Headtube
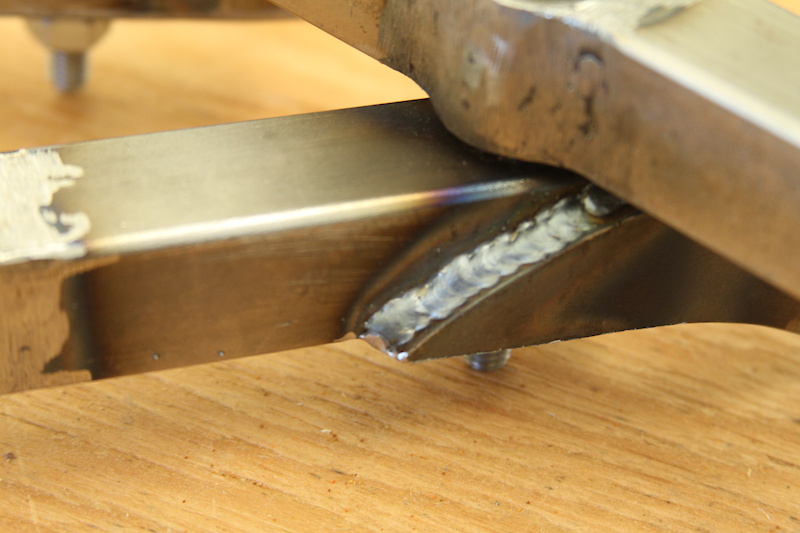
Some Solid Looking Welds

Rear Assembly Coming Together

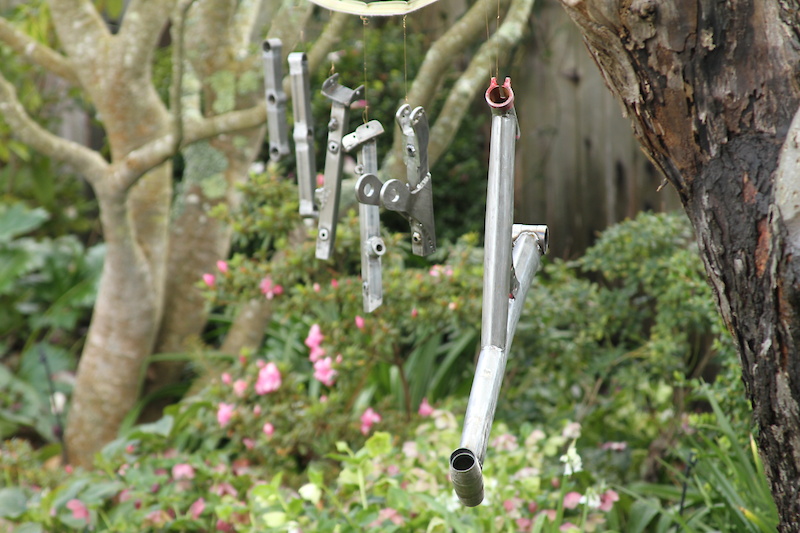
Rear Ski Interfaces/Pivots
Front Ski Interface/Pivots
Ready for Assembling/Welding:

All the Part Laid Out

I ended up using a different Fox Float than pictured here
Painting:

Getting Ready For Some Paint
Sanded and Prepped for Painting
Finished Main Swingarm

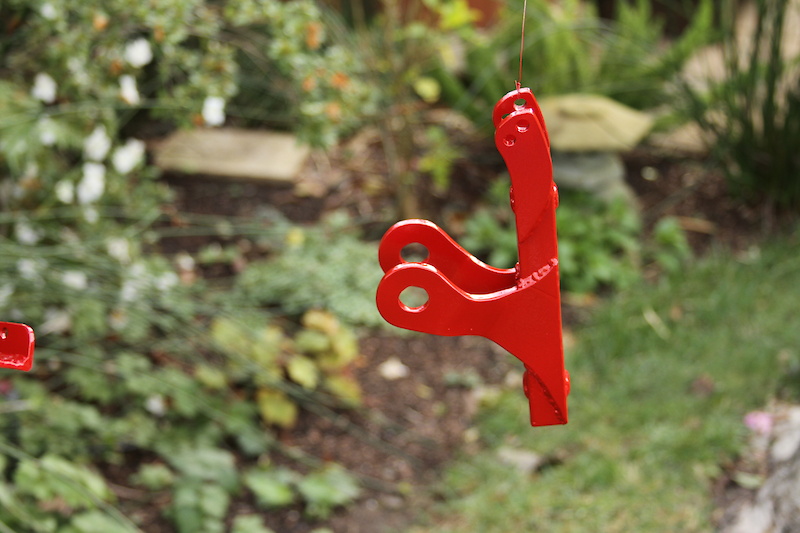
Parts of the Skewed Parallelogram

"Firetruck Red" With White Stripes and a Nice Gloss Coat

Small Hardware

5+ Hours Later it's Time to Let it All Dry

Drying Overnight
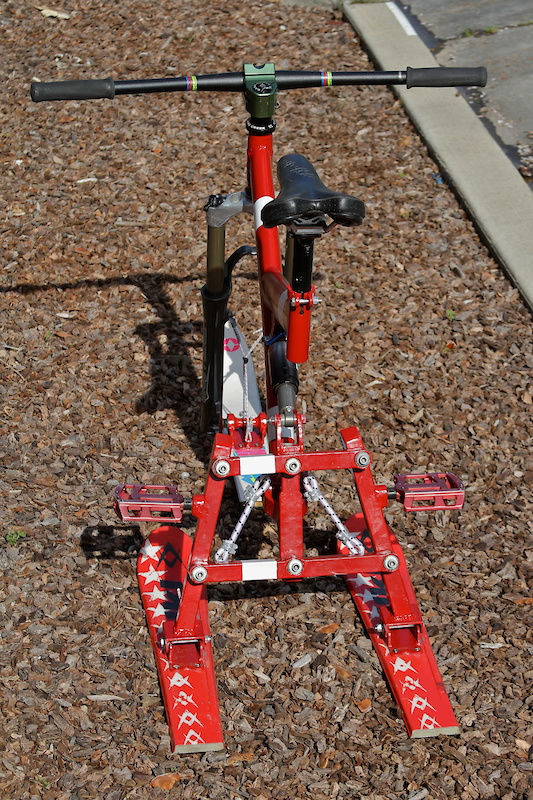
Finished Product:

While the parts initially were nothing special... I was impressed with how it turned out.
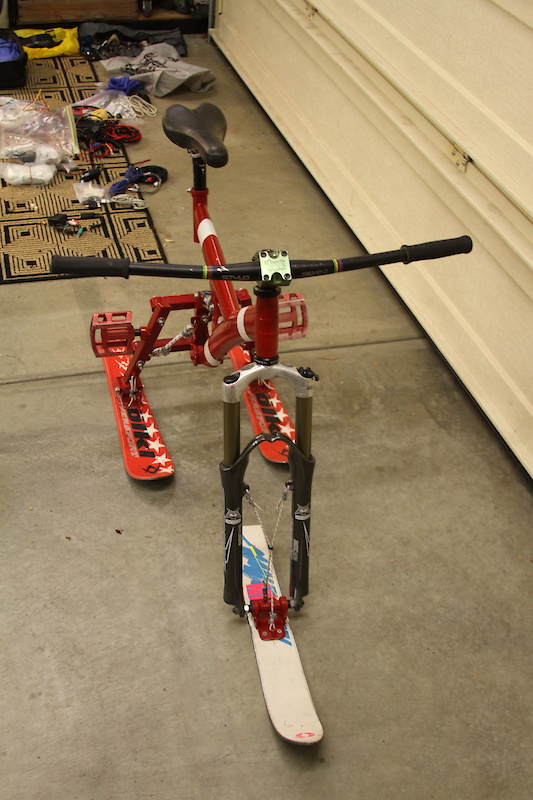
Transition Bikes pedals, stem, and saddle
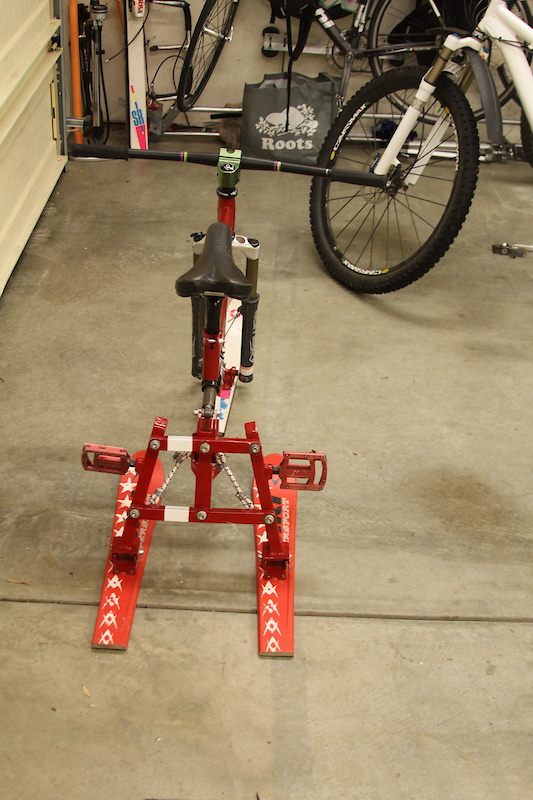
The pedals appear crooked, but it's just the angle
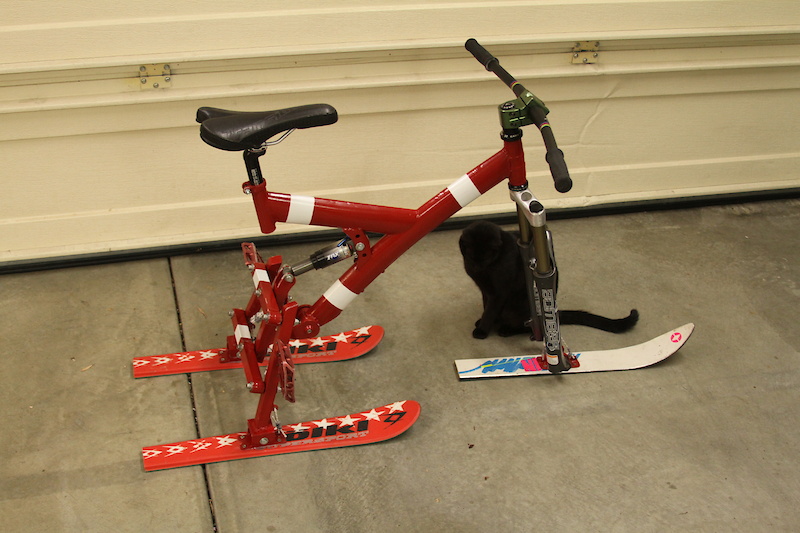
Marley doing the final check

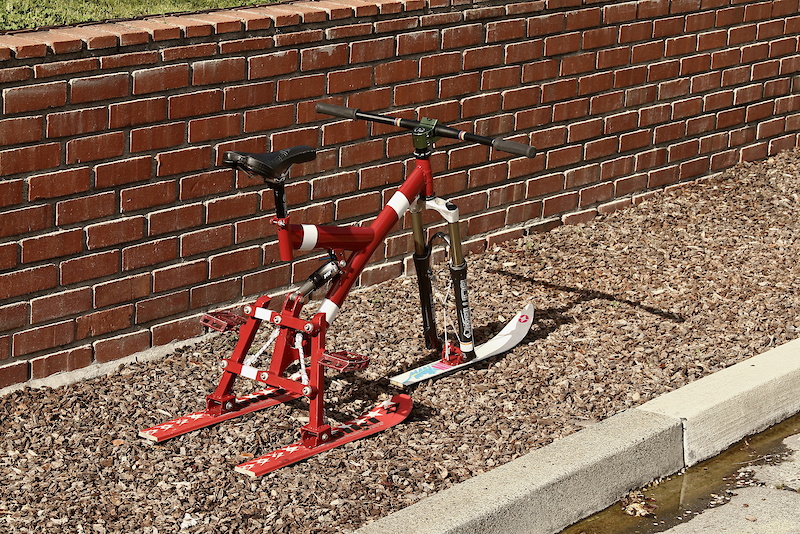
Some iPhone action shots:

Thank you Tam Bikes, Mikes Bikes, and Transition Bikes. There is no way I could have completed this without you!
Complete Photo Album.
transitionbikes.com
tambikes.com
mikesbikes.com
-Sam Pannepacker
Author Info:

Must Read This Week
Sign Up for the Pinkbike Newsletter - All the Biggest, Most Interesting Stories in your Inbox
PB Newsletter Signup
@GabrielDugas, i based the idea off their pivots, but added my own twist to it
Correct me if I am wrong though.... I think this suspension has the best placement of the pedals possible, unless they were mounted to the front frame and not the ski stays, but this would not allow the best riding positiion.
well you´re not wrong. but this rear suspension doesn´t work on this terrain.
this rear suspension can take the most power coming horizontal from the front, but as we are on snow there is no such power, because of the very low friction. well yes it can absorb vertical hits while standing on the pedals, because of the angle of the trapeze, but this absorbtion is so much lower than the absorbtion by the legs that this suspension does not work out.
got it? my technical englich is not that good, i think...
We actually built them for us and some friends.
If you want one, you can ask on my proflile.
how does it work with the trapezoidal construction?
i have a commercial snowbike (north legion smx) on my own...but its very heavy and i want to work on something similar like you did but a little diffent framebuilt. (i actually had also the trapeze form in mind)
keep it up man!
www.youtube.com/watch?v=f7EYKQ2cND8
www.youtube.com/watch?v=wQ5J7B5_D5Q&feature=related
but all inches - for that reason im never going to america
the parellelogram idea is sweet
ever seen koski though?
www.koskisnowsports.net
i have used both and find imperial to be not as accurate/not as easy to use
why dont they teach you? we get taught both but more so metric
12 inches = 25 mm =2.5 Cm
not that difficult really, and it is more accurate as it dispels 8ths and 16ths into solid numbers..
... still, I like imperial and metric the same, just wish the prints at work would pick one or the other... lol
1inch = 2.54 cm
i only really hate imperial as some of the american engineering is sub-standard to be fair
but american engineering is often still pretty shoddy
www.pinkbike.com/photo/6364648
lol hers mine
www.pinkbike.com/photo/5388563
Ok, if seriuosly, I would consider having pedals as low as possible.
Nice write up!
have u tested it with a bmx bar??
higher rise for better handling..
great work
peace
It's simple just buy a smx instead of making your own.
And a smx looks 100 times cooler. I promise you they are a lot cooler to ride!
I got one you see ;-)
check it out www.youtube.com/watch?v=f7EYKQ2cND8
www.youtube.com/watch?v=wQ5J7B5_D5Q&feature=related