RockShox Rear Shock Tuning Experience
After a bike's geometry, suspension setup has the biggest impact on a bike's performance on the trail. Companies go to great lengths to ensure their finished product has a dialed suspension 'tune' that offers the rider the best performance possible from their frame design, with certain shock tunes working best with certain rear suspension layouts. How the end user interprets these settings is somewhat variable based on external adjustments, but we're going to look beyond the basics to experience how shocks are specifically tuned from the factory to establish an appropriate damping adjustment range for each bike. In order to do this, we visited RockShox's suspension lab located in Whistler, B.C., and run by Shawn Cruikshanks, a man known as the 'Wizard' for his mechanical knowhow. Also joining us for the day were RockShox product manager Jeremiah Boobar and rear shock technician Jimmy Donahugh, both key players with an immense amount of practical knowledge concerning suspension dynamics.
Vivid Air
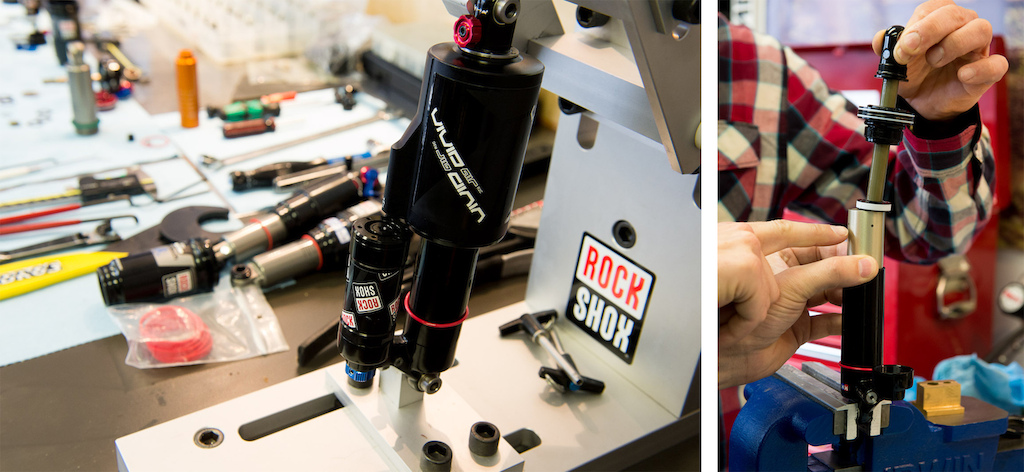
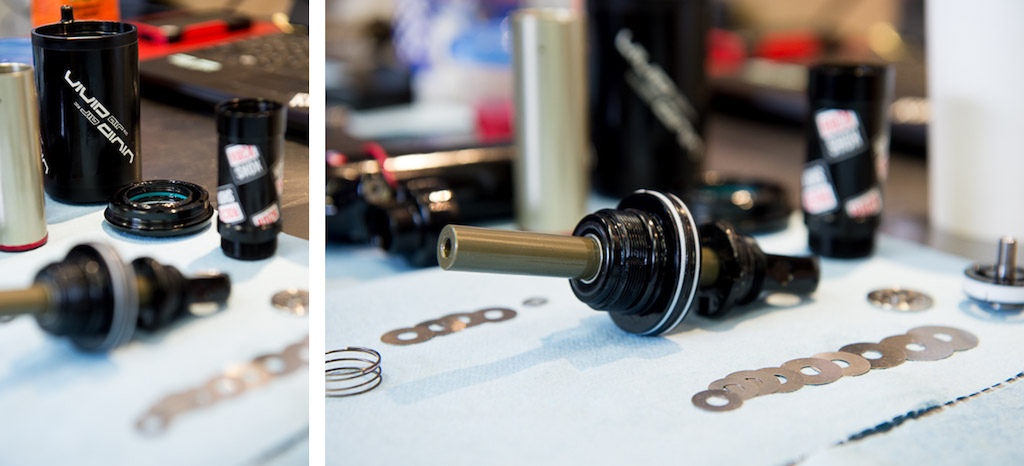
While the Vivid Air debuted in 2008, the seeds for the long-stroke air shock were planted a full eight years earlier when RockShox developed a radical, race-only shock that featured a four-way adjustable damper. RockShox's BlackBox riders swore by the prototype unit and its separately adjustable beginning and ending rebound and high and low speed compression settings via external dials. That technology was brought forward when the Vivid shock project was initiated, and was also employed on the air sprung version. Internally, the shock uses a clever tube-in-a-tube damper body (above, left ) that allows for extra volume at bottom out, letting RockShox better control the shock's deep stroke characteristics and counteract the progressive nature of the air spring. Much like any other high-end mountain bike shock, the Vivid employs a piston and shim layout to control its high-speed damping, while low-speed movements are tamed by small bleed holes. The different tunes offered by RockShox for the Vivid modify the shock’s compression shim stack only, since the rebound in the Vivid is managed by bleed adjustments and not shims.
 |
 Want to learn about suspension? Pay attention to what these three have to say. From left: rear shock specialist Jimmy Donahugh, RockShox product manager Jeremiah Boobar, and the 'Wizard', Shawn Cruikshanks. Shawn runs Fluid Function, a Whistler-based workshop that services SRAM, Truvativ, Avid, and RockShox products. Want to learn about suspension? Pay attention to what these three have to say. From left: rear shock specialist Jimmy Donahugh, RockShox product manager Jeremiah Boobar, and the 'Wizard', Shawn Cruikshanks. Shawn runs Fluid Function, a Whistler-based workshop that services SRAM, Truvativ, Avid, and RockShox products. |
 |
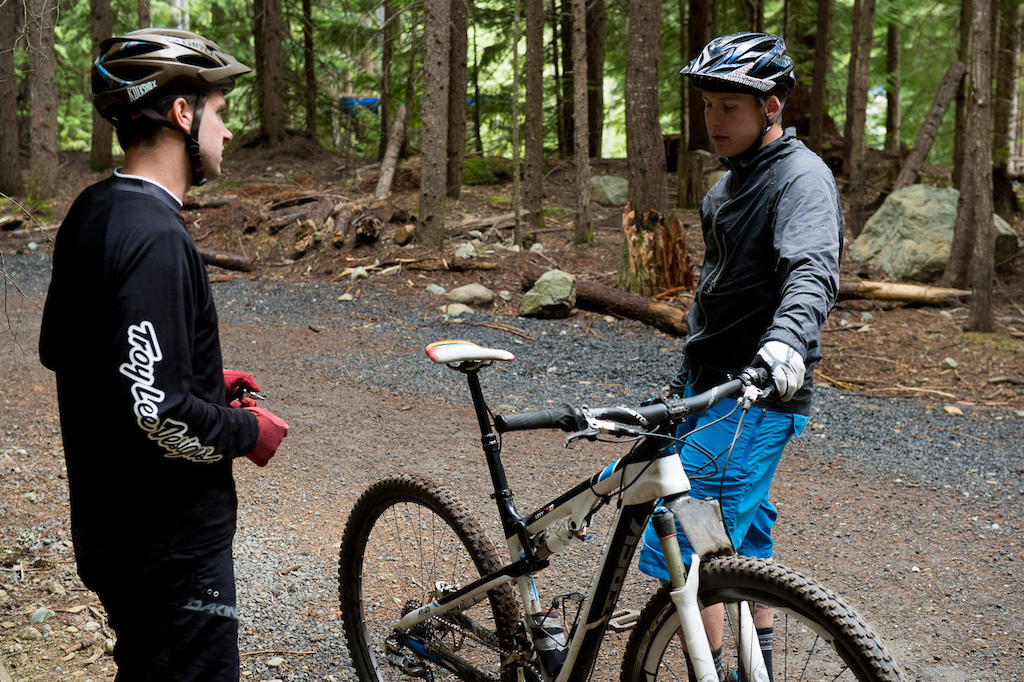
| With so much to cover, we needed a game plan before we hit the hill. RockShox's Tyler Morland, an ex-World Cup racer himself, would accompany us on our lift assisted run aboard the Vivid Air-equipped Cove STD, while Boobar would be our man during the Monarch RT3 assessment. |
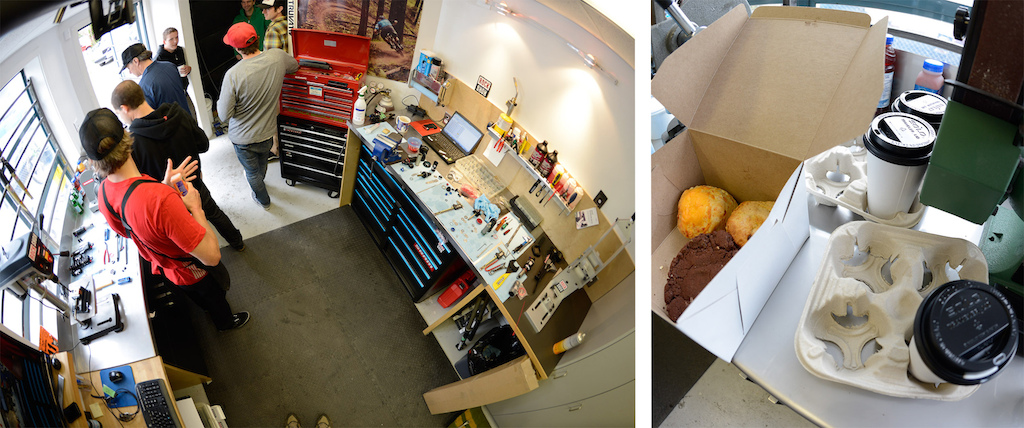 |
| RockShox's Whistler suspension lab may be small, but it's full of products that won't see the light of day for at least a season or two, not to mention killer food and coffee from the eatery just around the corner. |

The Right Shock for the Right Bike
The ability to take a rear shock or fork straight off the showroom floor and have it perform at a very high level right out of the gate, makes it easy to take for granted just how advanced and reliable today's suspension has become. It wasn't always like this, of course, with some growing pains in the past as bikes and suspension evolved. It's fair to say that only in the last few years has damper technology matured to the point where the majority of what's out there works quite well. That fact is especially important for those riders who fall into the set-it-and-forget-it camp; those who (hopefully) let their local shop set up their bike when they picked it up and haven't touched a dial since. That's fine, though, because there is a group of people who put in the hard work required to have your shock working well long before you thought that it might be a good idea to check its air pressure more than once every season.
This point was brought into focus for us a few months back when we received an aftermarket Vivid Air for testing, a shock that we had fond memories of from previous experiences, but also one that we suddenly found ourselves a bit underwhelmed with after installing it on our Cove STD test sled. It felt as if the shock was 70% there, but no amount of massaging could get it to perform to the level that we had come to expect from the Vivid - it seemed to have a very muted feel that we couldn't dial out. After some back and forth with RockShox we concluded that the shock's 'tune' wasn't ideally suited to the Cove's relatively low leverage suspension design, with the result being a decidedly over-damped feel at the rear of the bike. This over-damped feeling stole a lot of the STD's inherent playfulness. The next step would have been to swap out the shock for a different Vivid with the appropriate tune, but the mismatched combo gave us an opportunity to experience firsthand what it takes to dial-in a rear shock for a particular bike's needs.
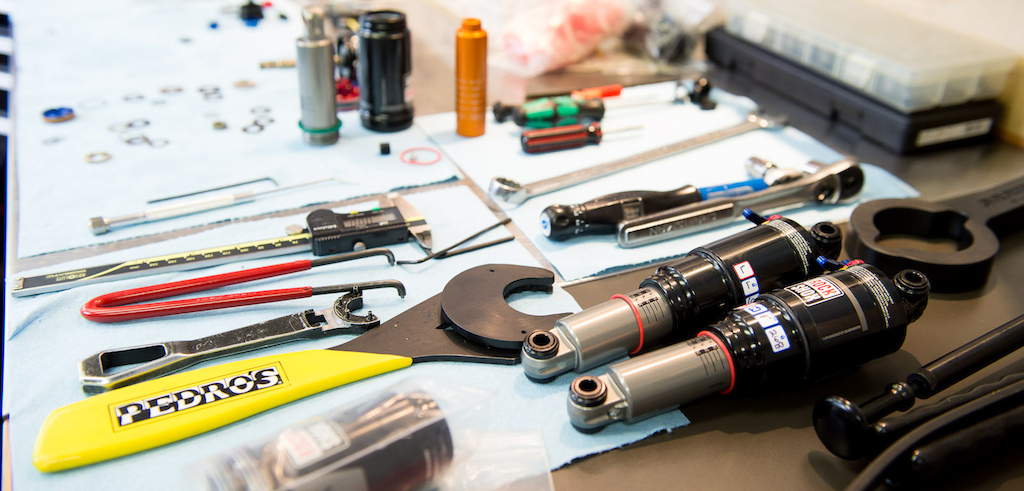 |
| The right tools for the job. RockShox's Whistler workshop is a suspension nerd's oil-soaked wet dream. |
 |
Vivid Air
While the Vivid Air debuted in 2008, the seeds for the long-stroke air shock were planted a full eight years earlier when RockShox developed a radical, race-only shock that featured a four-way adjustable damper. RockShox's BlackBox riders swore by the prototype unit and its separately adjustable beginning and ending rebound and high and low speed compression settings via external dials. That technology was brought forward when the Vivid shock project was initiated, and was also employed on the air sprung version. Internally, the shock uses a clever tube-in-a-tube damper body (above, left ) that allows for extra volume at bottom out, letting RockShox better control the shock's deep stroke characteristics and counteract the progressive nature of the air spring. Much like any other high-end mountain bike shock, the Vivid employs a piston and shim layout to control its high-speed damping, while low-speed movements are tamed by small bleed holes. The different tunes offered by RockShox for the Vivid modify the shock’s compression shim stack only, since the rebound in the Vivid is managed by bleed adjustments and not shims.
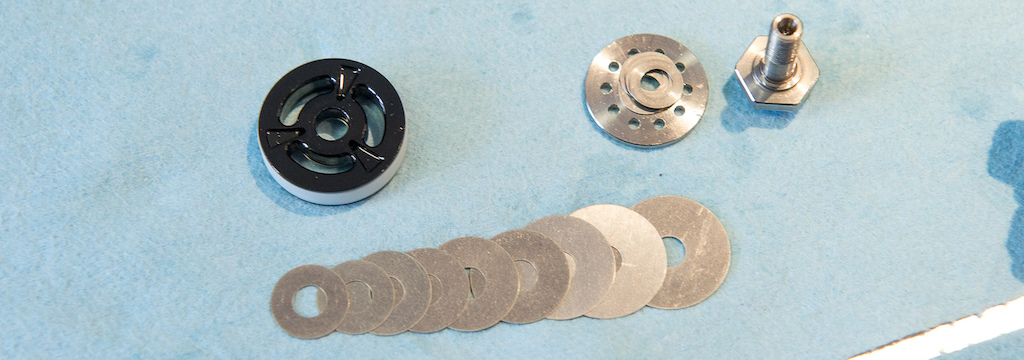 |
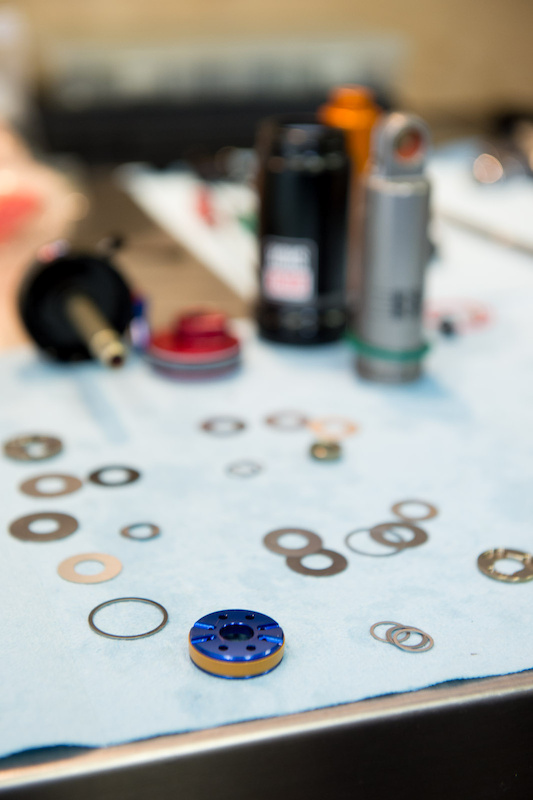
| The piston can be seen at the top left; the shim stack is laid out below it. Oil flows through the openings in the piston during high shaft speeds, forcing the shims to open and bend, slowing down the passage of the oil and creating damping. The piston bolt that holds it all together sits at the far right. |

Why are Different Tunes Needed?
To grasp what a tune is and how it affects a bike's performance, one must first understand how and why a bike's leverage curve comes into play. Simply put, leverage is the advantage gained by using a lever. Picture a large boulder that you have no hope of budging; by placing a long metal rod underneath it and pulling down on the opposite, longer end you are able to easily roll it over. The same theory applied to the rear suspension of a mountain bike allows them to have large amounts of rear wheel travel with a relatively short-stroke shock. First, the bike's leverage ratio is determined by dividing the amount of total rear wheel travel by the shock stroke, so a 6" travel bike that uses a 2" stroke shock has a 3:1 leverage ratio. It gets complicated when you consider that most bikes use a leverage ratio that varies as they go through their travel, referred to as the leverage curve, be it for better pedalling traits, bottoming resistance, or other reasons
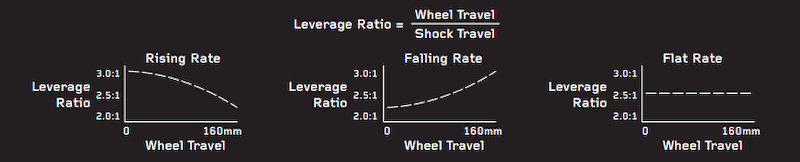
To grasp what a tune is and how it affects a bike's performance, one must first understand how and why a bike's leverage curve comes into play. Simply put, leverage is the advantage gained by using a lever. Picture a large boulder that you have no hope of budging; by placing a long metal rod underneath it and pulling down on the opposite, longer end you are able to easily roll it over. The same theory applied to the rear suspension of a mountain bike allows them to have large amounts of rear wheel travel with a relatively short-stroke shock. First, the bike's leverage ratio is determined by dividing the amount of total rear wheel travel by the shock stroke, so a 6" travel bike that uses a 2" stroke shock has a 3:1 leverage ratio. It gets complicated when you consider that most bikes use a leverage ratio that varies as they go through their travel, referred to as the leverage curve, be it for better pedalling traits, bottoming resistance, or other reasons

A suspension design's leverage curve plays a major role in which tune is used. A bicycle with a rising rate leverage curve produces a bike that is progressively harder to push through the shock stroke, making it hard to bottom out. If we go back to our rock and lever example, a rising rate would be similar to having the metal rod get shorter and shorter the further we pushed the rock. A falling rate (not a very common design currently) would be the opposite - the metal rod would get longer and longer, making it easier to push through the further you go. Unfortunately things are not quite this simple, because bicycle designers can manipulate every aspect of the leverage curve to generate pedaling efficiency, suppleness, bottom out and other factors. With so many variables, it is critical for the shock and frame designers to work together in order for the bike to perform at its best. While not as common as it once was, a mis-matched tune and frame design will result in a bike that maybe does one or two things decently but falls short in other facets and suffers as a whole.
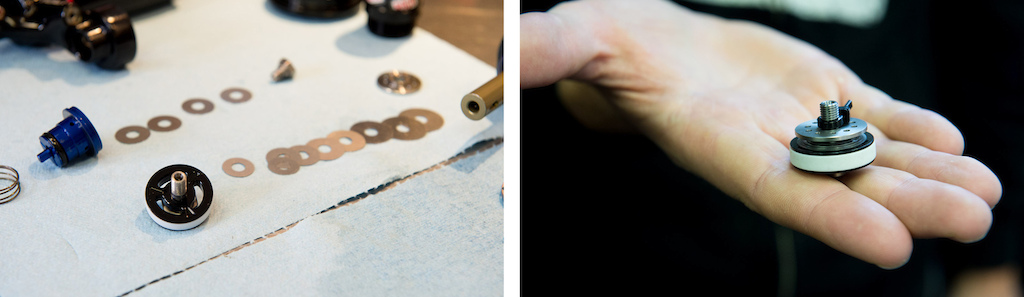 |
| The Vivid Air's internals (left ) spread out for inspection, and a fully assembled piston (right ). The white ring encircling the piston is the 'glide ring' that prevents oil from bypassing its intended path through the bleed holes and the piston. |
What is a Tune? The word 'tune' is usually used when talking about a shock's damping characteristics that are partly controlled by a combination of shims (thin, flexible steel discs ) arranged on the top and bottom of the piston. Typically shocks have an oil path that avoids the main piston to control low-speed damping at slow shaft speeds (shaft speed being how fast the shock is being compressed, not the speed of the bike ). This ''bypass'' commonly has an adjuster that controls the size of the bypass hole, thus controlling the amount of low-speed damping. When the shock is forced to compress quickly, known as a high-speed movement, the oil flows too fast for all of it to pass through the small diameter low speed bypass bleed holes, so it then looks for an additional path, which is through the piston. The size of the piston ports (holes in the piston ) determine how much oil can flow through and push on the shims. The shims are stacked on both sides of the piston in what is known as a 'shim stack', blocking the oil flow through the openings. It's how easily and far these shims flex to allow oil to pass by that controls much of the shock's damping, both on the compression and rebound stroke. Different shock tunes generally refer to how the shim stacks are laid out on the piston, with a different number of shims, shim diameters, and shim thickness all contributing to how the shock will react to compression and rebound forces. The science behind a shim stack can become quite complicated, but the simplest way to think about it is that a stiffer shim stack (be it from more, thicker, or even preloaded shims) will restrict more oil flow, thereby creating more damping, while a softer shim stack will offer less damping. This is true for both the compression and rebound shim stacks that are located on each side of the piston. | More than Shims The layout of the shock's shims, along with the size of the low-speed bleed holes, controls the damping, but a shock's spring rate (how much weight is required to compress it a given amount, often expressed in lb/ft ) is another factor that comes into play when talking about tuning. An air shock's spring rate can be adjusted by not only changing the air pressure, but also by altering the volume of the shock's air chamber. Air shocks are inherently progressive, meaning that they require more force to compress as they go deeper into their stroke, due to the the volume of their air chamber shrinking as they are compressed. On the other hand, a coil sprung shock is, for the most part, linear throughout its stroke. An air shock's air chamber volume can be used to tune how the shock performs, with one example being the use of a small volume air can (giving it much more 'ramp up' through its stroke ) to combat a bike's falling rate suspension design, or by using volume-reducing spacers in a large volume air can to fine-tune the spring rate to your needs. To that end, there are even rear suspension layouts designed exclusively around an air shock's progressive spring rate. |
 |
| After years of tuning rear shocks for different suspension designs, RockShox has a solid database of what setup works well, along with a few thousand shims to make it all happen. |
Taking it to the Dirt
RockShox rear shocks are used as stock equipment on many different designs, with each one requiring an evaluation to determine which shock tune will best suit the bike's leverage curve, intended use, and the type of rider that will most likely end up aboard the bike. Manufacturers work with RockShox on this front, not just relaying those three points in order for engineers at RockShox to come up with a tune to match the bike, but often attending tuning sessions with RockShox's Jeremiah Boobar and Jimmy Donahugh to experience how the different shock tunes impact the bike's performance. Yes, RockShox has a huge database of which tune suits which design, and one might assume that running some calculations would tell them everything they need to know, but it actually comes down to seat-of-the-pants feel rather than what the computer says. That feel is exactly what we would be looking for as RockShox put us through a condensed version of the process used when determining which tune to put into service on a new design.
Our day with RockShox would be spent splitting our time between two completely different bikes and disciplines: the new Monarch RT3 rear shock and its different tuning options would be put to the test aboard our 4" travel Trek SuperFly on Whistler's Lost Lake trails, while different variations of the Vivid Air R2C shock would be evaluated aboard the 7.75" travel Cove STD in the bike park. It was time to jump headfirst into the process.
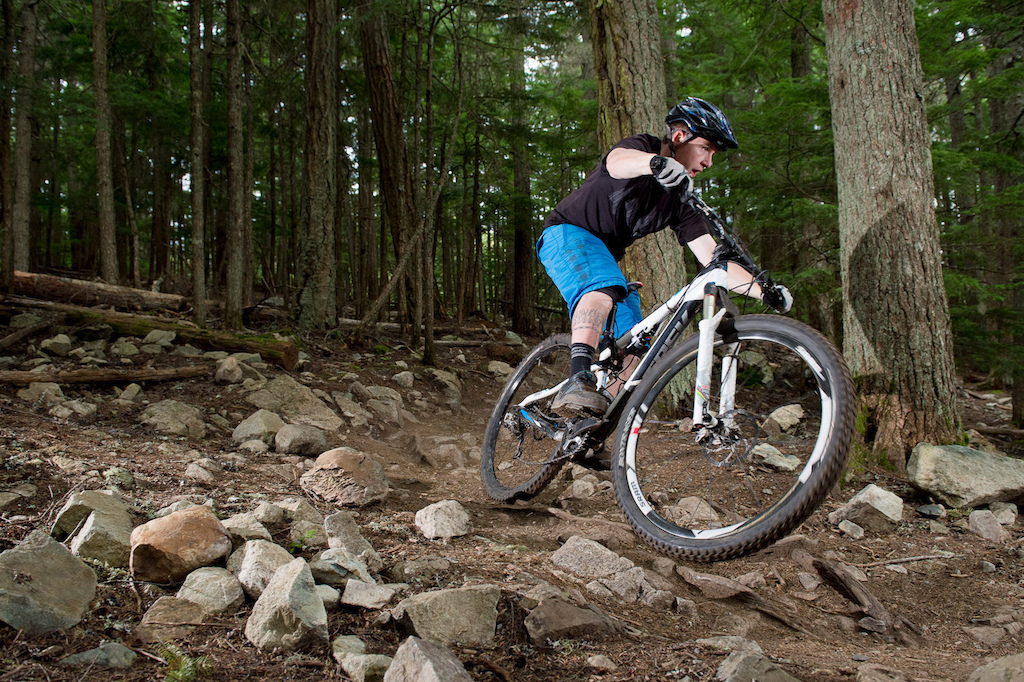 |
| The key to gathering feedback is to ride at a good pace, but not so fast that you're on the limit of control. It was easy to find ourselves concentrating more on simply staying on line than what the bike is doing, a sure sign that it was time to reign it in a touch. |
Consistency Matters
Evaluating setup changes, be it concerning suspension, geometry, or anything else, should be done on a short loop or run that allows the rider to take consistent lines and ride hard without needing to tap into their reserves. The goal is to be able to push hard, but not so hard that you're concentrating on keeping it upright instead of what the bike is doing underneath you. We headed out with Boobar to Whistler's well-known Lost Lake trails, a network that offers short and repeatable loops littered with rocks and roots - a perfect location for gathering feedback on the short-travel bike we'd be riding. Each lap would consist of a short climb up to the trailhead, allowing us the chance to experience the

'13 Monarch RT3's firmer lockout feel, followed by a short, rocky descent that could be ridden in a predictable manner to let us experience the different damper setups within each shock. In Boobar's backpack were a few different Monarch RT3 rear shocks, as well as the tools needed to make the swap quickly so that there would be only a few minutes between each run.
Round One - The first few laps had two purposes: one, we needed to recon the trail so that we could take a consistent line during each run; and two, to put a lap in on the stock Monarch shock that we've been using for many miles during the current riding season in order to compare it against the other shocks on the same terrain. Only then could we properly evaluate what was happening underneath us.
Round Two - Next up, Boobar dropped 'old faithful' out of the bike and replaced it with the first of our new, modified Monarch RT3 units. After carefully setting the correct amount of sag we headed out for our test lap. One of our few complaints with last year's Monarch was the shock's mild lockout setting when the Floodgate switch was set to the stiffest position, a feature that we honestly found to add
very little additional firmness to the ride. The new RT3's updated Floodgate was noticeably stiffer at the firmest setting, a change that will make sense for riders who spend time on gravel road climbs in order to access the singletrack. The shock's middle Floodgate setting offers a happy middle ground that we still found quite useable on the trail, and it was obvious that the stiffer compression setting made for a bike that would carry more speed across smooth ground where a rider is looking to hold momentum. We did three laps on this shock, but even after all that we admittedly found very little difference in performance between the original shock and the new RT3 when it was set to full open, but that would change drastically after our next shock swap.
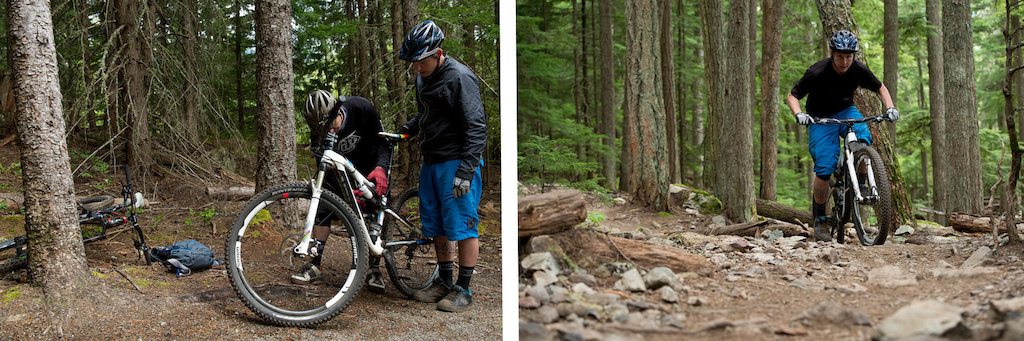 |
| Swapping between the different shocks took mere minutes to do at the bottom of the trail, making it easy to feel immediate differences in back-to-back comparisons. |
Round Three - It was now time to introduce the most aggressively valved shock, although we didn't know it at the time due to the blind test format for the day. It only took about one hundred feet of rough descent for us to pull over and note to Boobar how much more feedback we were being fed through the bike - the difference was night and day. While we wanted to label the third shock a dud after our first lap, Boobar knew better than to dismiss it that fast. After climbing back up to the trailhead we lowered the air pressure slightly to allow for more sag, and therefore a moderately more forgiving feel on small to medium-sized impacts. The change did just that, bringing the feel closer to that of shock number two when both were set to full open, but the firmer compression valving offered more support when the shock was sagged to its dynamic ride point. The shock was still slightly harsher on top than we would prefer, although we'd put money on it being a great performer under a large or powerful rider. Certainly worthy of a few more laps on our brief test track.
Going to the extreme end of the scale with the third shock not only showed us how the different aspects of shock tuning relate to one another, but also established a strong impression of just how drastic of an effect going to the maximum can have. Testing wasn't yet completed yet, with Boobar suggesting that we take a second look at shock number two, the one that we had said offered nor real change in performance, as well as the stock shock that we began the day with. The thinking is that to know what it is you're looking for, you first must find what you don't want. That proved to be true, with shock number two now feeling much more to our liking, and with a very noticeable change in damping from both the stock shock and the third unit that felt a touch harsh. Three more laps at the quickest pace of the day while swapping between number two and the stock unit showed that we preferred the slightly firmer compression tune found in the custom RT3 that let us get the most from any transition we could find on the trail - it turned the SuperFly into a pumping machine without feeling harsh.
 |
| There was a lot to take in, even if we only had a brief sampling of what goes into deciding which tune to use on a new production bike |
Time for More Travel
The second part of the day involved us investigating our original reason for jumping headfirst into the RockShox tuning experience: our Cove STD and its need for a different tune within its Vivid Air shock. We should make it clear at this point that the STD doesn't require an abnormal shock tune whatsoever; it uses a standard, 'low-leverage' setup that is readily available from RockShox. The original issue arose simply because we fitted the wrong shock to the bike. Think back to our primer earlier in the article that explained the correlation between a bike's leverage curve and the shock tune that best matches it, and you'll understand why the STD, a relatively low-leverage ratio bike, wasn't working at its best. We first fitted the green bike with a 'low-tune' Vivid Air with this in mind, the shock that seemed to make the most sense for the bike. Setup-wise, RockShox's standard '6-3-3' settings were used (from fully open: 6 clicks on the beginning stroke rebound dial, 3 clicks on the ending stroke rebound dial, and 3 clicks on the compression dial ), and we sat into bang-on 30% sag with 170psi pumped into the shock.
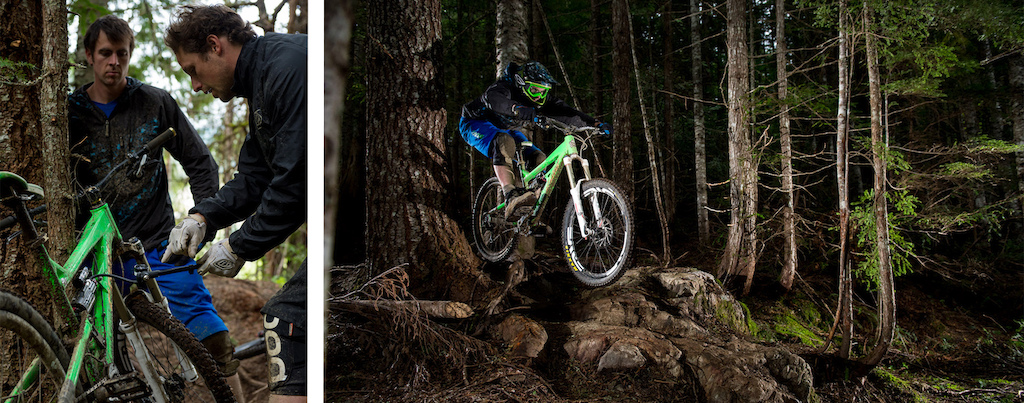 |
| Shifting from little bikes to big bikes, two radically different Vivid Air R2C shocks were bolted to our Cove STD for testing. |
Round One - Just as we did when testing the shorter stroke Monarch RT3, a brief lap was chosen that would allow proper evaluation in a short period of time. The lower-mountain run still needed to present a challenge to the rider and bike, though, so the route had to include a proper variation of terrain - high-speed stutter bumps, tight, technical, rooty trails, and even some smooth jump lines. As expected, the low-tune Vivid Air showed itself to be well-suited to the STD's rear end, and a dramatic improvement over the mis-matched shock that we had been using. The STD's much appreciated playful nature returned, making the bike a joy to ride when fun trumps outright speed, but it also did well to tame high-speed trail chatter at the same time. Our only gripe boiled down to a lack of bottoming resistance, although a few clicks of the shock's compression dial made short work of this while also highlighting the Vivid's tuning range. Within a handful of runs we were confident that the low-tune model offered a huge improvement in all aspects of performance.
 |
| Otherwise identical, the two Vivid Air shocks differed only in the make-up of their shim stack. The contrast between them was staggering on the trail. |
Round Two - Now that we thought we knew what we liked, it was time to head off in a different direction. A medium-tune Vivid Air was bolted to the bike, the same setup that we weren't happy with originally. Again, we began the session with the recommended 6-3-3 settings that always serve as a good starting point, as well as 30% sag. The difference between the two shocks boiled down to the shim stack configuration: a low-tune vs. med-tune comparison that would flesh out the personality differences between the two setups. It was immediately apparent on high-speed stutter bumps that the shock felt slow to react to the terrain, muting the impacts somewhat, but simply not able to react fast enough. Our reaction was to back off the compression adjustment to full open, allowing for maximum oil flow in an effort to get the shock moving through its stroke easier. While this improved matters somewhat, it still couldn't hold a candle to the performance of the low-tune Vivid Air, this despite many runs trying to dial-in the feel that we were looking for. The differences between the two was blatantly obvious, with the only way to get the two tunes to feel at all related being to fully close the compression on the low tune and fully open compression for the high tune, although even that couldn't bridge the drastic performance differences between them.
Pinkbike's take:
 | Our time spent with RockShox was eye opening, despite the day being an abbreviated account of an actual tuning session with a manufacturer. While we were aware that a rear shock must often be tuned to best suit a bike's suspension design, being privy to the selection and development process shed light on just how much a bike can be improved with the correct setup. At the end of the day it is the frame manufacturer that makes the final call on the tune that they spec on the production bike, but RockShox supplies them with the ingredients and expertise needed to make that call. The experience highlighted the massive impact that a shock's tune has on a bike's performance - the wrong setup can make a great bike perform well below expectations and vice versa, but when both factors are dialled is when you're really aboard a winner. - Mike Levy |
www.rockshox.com
Photos by Ian Hylands
Author Info:

Must Read This Week
One thing the article didn't stress is the importance of matching the rear suspension to the front fork, which is crucial to the bike having a balanced feel. I've seen riders get fancy custom tunes on their fork, yet it feels completely out of sync with the rear shock, so you gotta think about the whole enchilada. And the shock maintenance is the salsa.
How would they work that one out if i just posted it to them ?
Have you tried just adjusting the rebound your self with the dials ? or are you allready at the limit ?
Having access to a damper dyno (youtube it, simply awesome), I tuned the high/low speed rebound/compression to have an optimal set up for each trail. Believe it or not; the performance difference was awesome.
I find damper tuning extremely interesting and I wish this article has some more detail on it.
Not only gravity racers want decent performance fork. Trails riders too! Damned be weight weenies that want lockouts on trail forks. As a friend of mine says "moar shimz!!!