Technical Tuesday: Setting Up Your Front Derailleur
Tech Tuesday has returned from its short Eurobike delay, with episode #15 explaining the ins and outs of front derailleur set up. Inside you can watch a video that will guide you through this sometimes tricky process.
Read on...While many of you reading this will have bikes that use only one ring and a chain guide, there are plenty of riders out there that spend most of their time on bikes that are equipped with two or three front chainrings. And if you don't have a front derailleur on your current ride, there is a good chance that you will have a bike equipped with one down the road. Despite only needing to move the chain across two or three chainrings, front derailleurs can be notoriously tricky to setup, more so than your rear derailleur that must move the chain over many more positions. The video below will guide you through the set up process, watch it and then have a go on your own bike!
A note on mounting types...
There are more than just a few different types of front derailleurs and your bike will require the correct model in order to work properly. The most common mounting method is the hinged band type that comes in varying sizes to fit different seat tube diameters. Common sizes are 28.6 (mainly used on steel frames), 31.8, and 34.9 mm, and shims can also be used to fit larger sizes on smaller seat tubes. Have a look at your bike's online spec to see the size you need or use calipers to measure the seat tube diameter to find out what your bike requires. More and more bikes are now incorporating a direct mount system where the derailleur is bolted onto either a tab on the seat tube (otherwise known as braze-on) or to the swing arm of certain full suspension bikes. Attaching it to the swing arm allows the derailleur cage to track the chain throughout the bike's travel which can result in more consistent shifting. Once more common, but now not used as often, is the E-type mounting. With E-type the front derailleur is attached to a plate that is sandwiched between the frame and bottom bracket cup, much like many chain guides used to mount before ISCG tabs became more common. E-types can be more difficult to setup due to their often limited adjustments, but they are the only option for certain bike designs. Now that your head is spinning with different mounting types it is time to add in cage sizes - triple ring cranks that use large big rings may require longer front derailleur cages, cable pull direction - does the cable pull from the bottom or from the top, as well as high mount or low mount - does the cage hang down below the mounting band/tab, or is it positioned above... Confused yet? There is a good chance that the online spec for your bike lists the required front derailleur type, and if not your local shop will be able to figure it out for you. The only saving grace is that they all follow the same basic principles for set up. Derailleur cage height and angle, limit screw adjustments, and cable tension are the adjustments that you'll be using to dial in your front shifting.
![photo]()
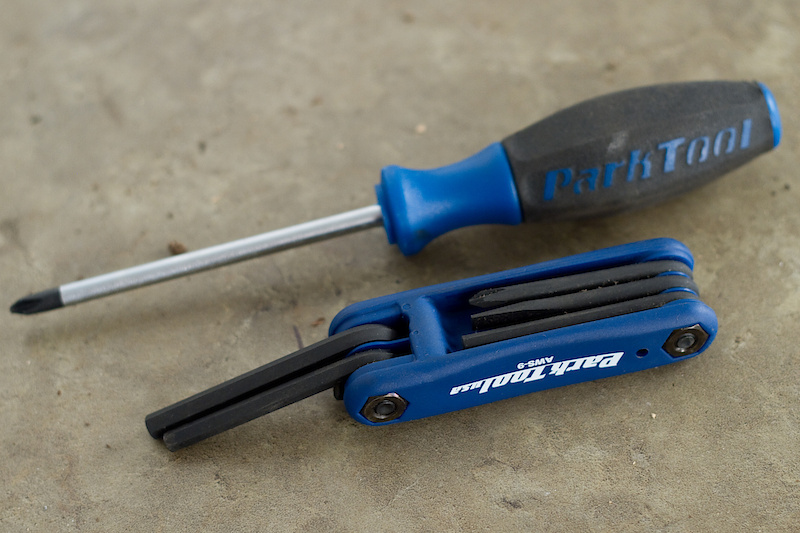
Tools needed: Folding allen key set (or separate allen keys depending on sizes needed), phillips screw driver
Watch the video to learn how to set up your front derailleur
Past Tech Tuesdays:
Technical Tuesday #1 - How to change a tube.
Technical Tuesday #2 - How to set up your SRAM rear derailleur
Technical Tuesday #3 - How to remove and install pedals
Technical Tuesday #4 - How To Bleed Your Avid Elixir Brakes
Technical Tuesday #5 - How To Check And Adjust Your Headset
Technical Tuesday #6 - How To Fix A Broken Chain
Technical Tuesday #7 - Tubeless Conversion
Technical Tuesday #8 - Chain Wear
Technical Tuesday #9 - SRAM Shift Cable Replacement
Technical Tuesday #10 - Removing And Installing a Headset
Technical Tuesday #11 - Chain Lube Explained
Technical Tuesday #12 - RockShox Totem and Lyric Mission Control Damper Mod
Technical Tuesday #13 - Shimano XT Crank and Bottom Bracket Installation
Technical Tuesday #14 - Straightening Your Derailleur Hanger
Have you found this tutorial helpful? Share any of your hints or tips below!
Visit Parktool.com to see their entire lineup of tools and lubes.
Read on...While many of you reading this will have bikes that use only one ring and a chain guide, there are plenty of riders out there that spend most of their time on bikes that are equipped with two or three front chainrings. And if you don't have a front derailleur on your current ride, there is a good chance that you will have a bike equipped with one down the road. Despite only needing to move the chain across two or three chainrings, front derailleurs can be notoriously tricky to setup, more so than your rear derailleur that must move the chain over many more positions. The video below will guide you through the set up process, watch it and then have a go on your own bike!
A note on mounting types...
There are more than just a few different types of front derailleurs and your bike will require the correct model in order to work properly. The most common mounting method is the hinged band type that comes in varying sizes to fit different seat tube diameters. Common sizes are 28.6 (mainly used on steel frames), 31.8, and 34.9 mm, and shims can also be used to fit larger sizes on smaller seat tubes. Have a look at your bike's online spec to see the size you need or use calipers to measure the seat tube diameter to find out what your bike requires. More and more bikes are now incorporating a direct mount system where the derailleur is bolted onto either a tab on the seat tube (otherwise known as braze-on) or to the swing arm of certain full suspension bikes. Attaching it to the swing arm allows the derailleur cage to track the chain throughout the bike's travel which can result in more consistent shifting. Once more common, but now not used as often, is the E-type mounting. With E-type the front derailleur is attached to a plate that is sandwiched between the frame and bottom bracket cup, much like many chain guides used to mount before ISCG tabs became more common. E-types can be more difficult to setup due to their often limited adjustments, but they are the only option for certain bike designs. Now that your head is spinning with different mounting types it is time to add in cage sizes - triple ring cranks that use large big rings may require longer front derailleur cages, cable pull direction - does the cable pull from the bottom or from the top, as well as high mount or low mount - does the cage hang down below the mounting band/tab, or is it positioned above... Confused yet? There is a good chance that the online spec for your bike lists the required front derailleur type, and if not your local shop will be able to figure it out for you. The only saving grace is that they all follow the same basic principles for set up. Derailleur cage height and angle, limit screw adjustments, and cable tension are the adjustments that you'll be using to dial in your front shifting.
Tools needed: Folding allen key set (or separate allen keys depending on sizes needed), phillips screw driver

Past Tech Tuesdays:
Technical Tuesday #1 - How to change a tube.
Technical Tuesday #2 - How to set up your SRAM rear derailleur
Technical Tuesday #3 - How to remove and install pedals
Technical Tuesday #4 - How To Bleed Your Avid Elixir Brakes
Technical Tuesday #5 - How To Check And Adjust Your Headset
Technical Tuesday #6 - How To Fix A Broken Chain
Technical Tuesday #7 - Tubeless Conversion
Technical Tuesday #8 - Chain Wear
Technical Tuesday #9 - SRAM Shift Cable Replacement
Technical Tuesday #10 - Removing And Installing a Headset
Technical Tuesday #11 - Chain Lube Explained
Technical Tuesday #12 - RockShox Totem and Lyric Mission Control Damper Mod
Technical Tuesday #13 - Shimano XT Crank and Bottom Bracket Installation
Technical Tuesday #14 - Straightening Your Derailleur Hanger
Have you found this tutorial helpful? Share any of your hints or tips below!
Visit Parktool.com to see their entire lineup of tools and lubes.
Author Info:

Must Read This Week
Sign Up for the Pinkbike Newsletter - All the Biggest, Most Interesting Stories in your Inbox
PB Newsletter Signup
and who needs more than one front ring anyway??
www.pinkbike.com/photo/5615284