Three Levels of Yoga to Relieve Lower Back Pain - Monthly Yoga With Abi
I wrote my first article for Pinkbike on how yoga can help to relieve lower back pain almost two years ago. It got over 100k views in the first week which blew me away. I was shocked at how many of you guys were suffering. The recommendations I've given since have had such a high success rate that I wanted to review the stretches and exercises I’ve found to be most effective. For those of you who've nailed the sequence I broke down in the original article, you might find this one a little less challenging – in response to a number of requests I received to provide a more accessible alternative – but it's always good to mix things up.
The causes of lower back pain
To clarify, I’m referring to lower back pain caused by stress sustained over a long period of time. How you got here is going to be different for each of you but the resulting pattern of muscular imbalances is going to be roughly the same.
As with all my articles, there are two basic points to remember:
1. Your body is an efficiency machine. It adapts to the position you put it in for most of the time.
2. Everything in your body is connected, so muscular imbalances have a domino effect.
Sitting for long periods of time on your bike, at a desk, whilst driving, commuting, eating or with your feet up in front of the TV leads to the following set of muscular imbalances:
- Short hip flexors (the psoas and iliacus) pull the pelvis forward causing lordosis (overarching of the lumbar spine) and compression (tightening) at the lower back
- Lack of mobility in the hips pulls the pelvis out of alignment and places stress on the lumbar spine
- Tight hamstrings and groin (adductor muscles) force you to round your back as you bend forward, increasing tension at the lower back
- A weak core and glutes forces the lower back to overwork to compensate
- A lack of mobility in the thoracic spine places stress on the lower back and can also lead to neck and shoulder pain
Lower back pain is likely to be exacerbated if you do weight-bearing exercise or sports that involve running, jumping or fast, dynamic movements which stress the lower back without stretching and releasing tight muscles.
Evaluate your level of pain
The stretches and 15-minute yoga routine I’m going to outline in this article are designed to relieve tightness in the lower back and correct muscular imbalances that are often present with back pain. They may not be suitable for more severe conditions including muscle spasms, disk injuries or spondylolisthesis.
If you're injured, please check with your doctor or physical therapist that it's safe for you to do these exercises.
PHASE 1: Stretch tight muscles
If you’re in intense pain, I recommend that you start by gently loosening up tight muscles in the area. If there is potential nerve or disc damage, you should avoid forward bends, backbends, twists and seated poses as they may aggravate your condition, so here are six supported reclining poses you can do as often as you need them. Hold each one for a minimum of 3 minutes, ideally in the evening when your muscles are warm and stretchy. You can start with just one a day and gradually build up to the full sequence.
Breathe in and out through your nose, aiming to make your exhalations twice the length of your inhalations. Count in for 4 and out for 8.
1. Legs Up The Wall
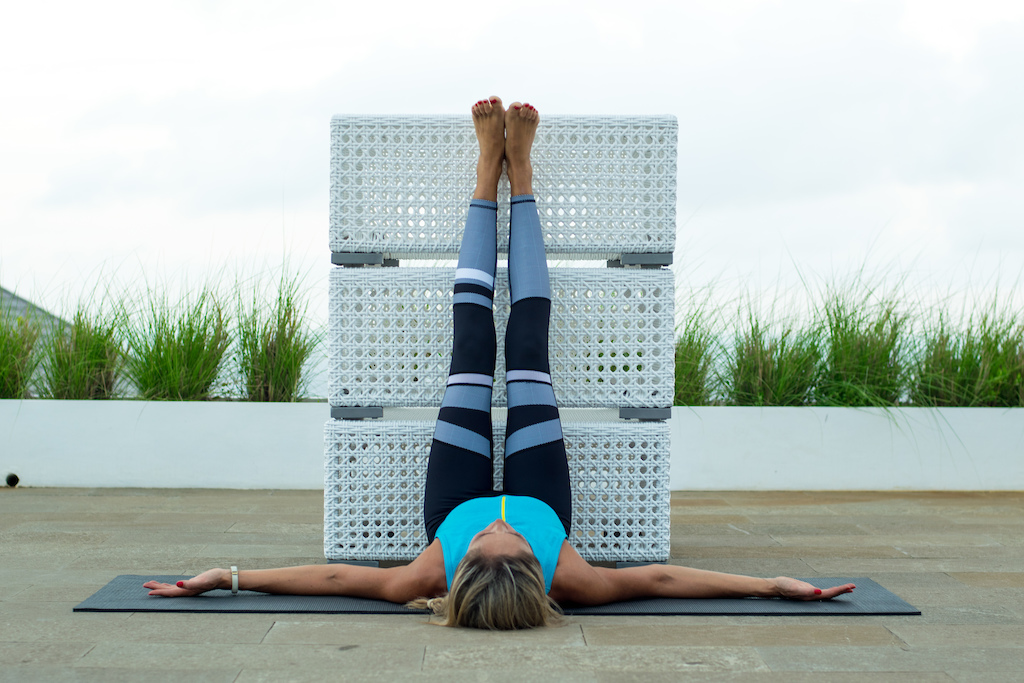
- Sit right up close to a wall.
- Swing your legs up to vertical and come down onto your back.
- Bring your arms out by your sides, palms facing up.
- Relax fully into the pose.
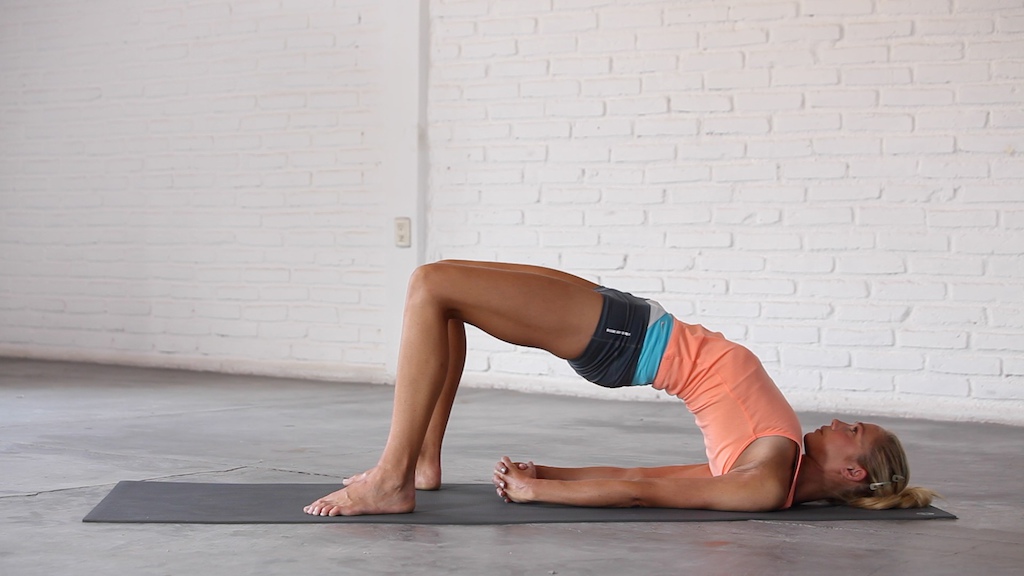
2. Supported Bridge
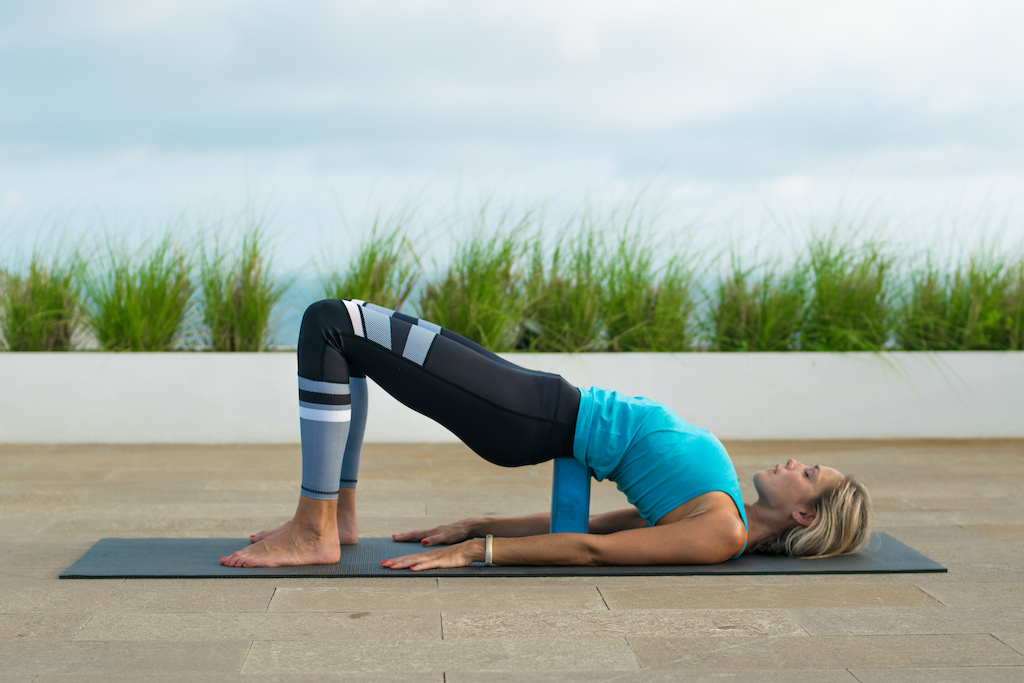
- Lie on your back with your knees bent and your feet flat on the mat, hip-width apart. Check that your toes point straight ahead.
- Rest your arms by your sides, palms facing down. Walk your feet back until your fingertips graze your heels.
- Lift your hips all the way up and put a block at the base of your spine. Yoga blocks have 3 different heights, so only go as high as is comfortable and feels therapeutic.
- Breathe deep into your belly to release your psoas.
3. Reclining Hand-To-Toe
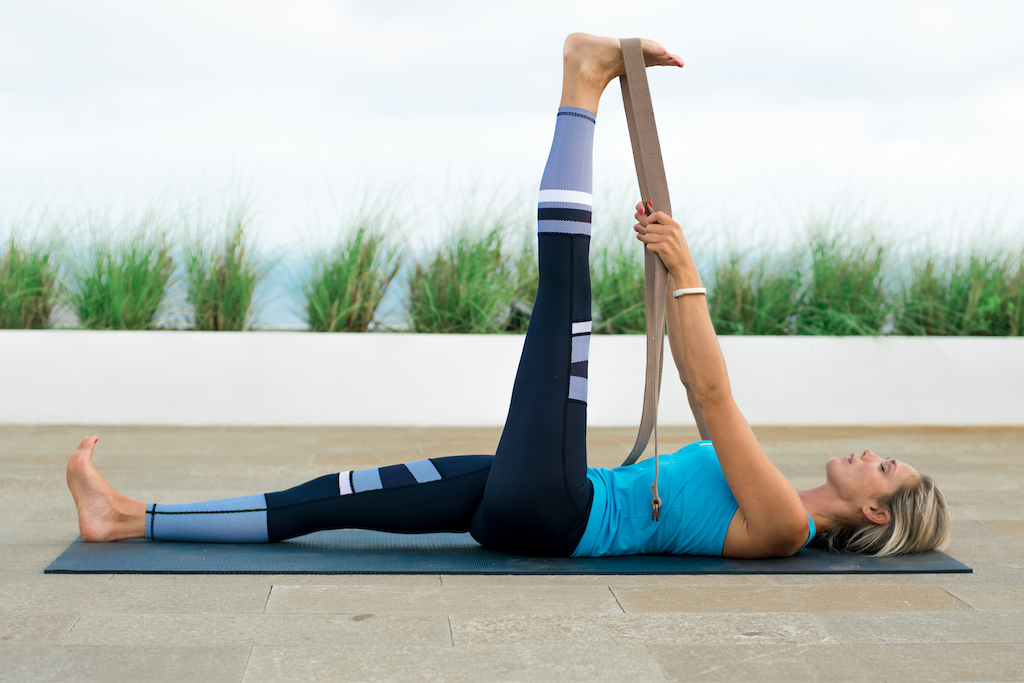
- This is a hamstring and calf stretch.
- Lie flat on your back.
- Bring your left knee into your chest, loop a strap, belt or towel around the arch of your foot and then straighten your leg as much as is possible up to the sky.
- Keep your left foot flexed and press through your heel.
- If you find yourself straining in the pose, you can bend your bottom leg and bring the sole of your right foot flat to the mat.
- Relax. Use the weight of your arms and gravity to increase the intensity of the stretch.
- When you're ready, release the pose and switch sides.
4. Dead Pigeon
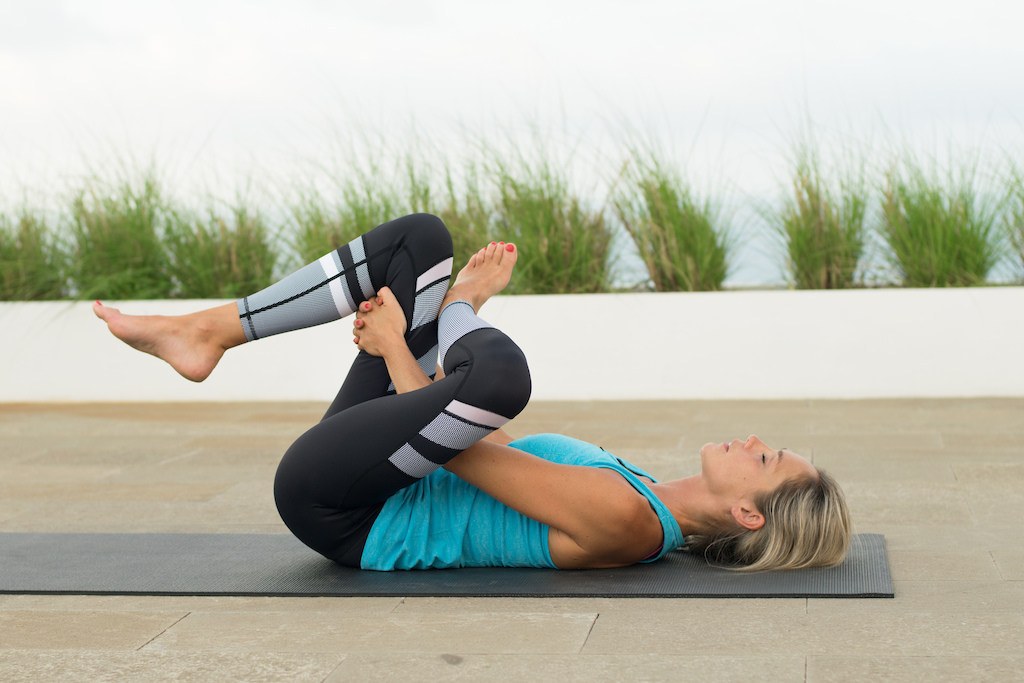
- This pose stretches the glutes and outer hips.
- Lie on your back with your knees bent, feet flat on the mat.
- Rest your left ankle on your right knee.
- Thread your left hand through the triangle between your legs and hold the back of your right thigh with both hands. Gently pull your leg in towards you.
- Relax your neck and shoulders.
- You can interlace your fingers around your shin to increase the intensity.
- When you're ready, release the pose and switch sides.
5. Reclining Butterfly
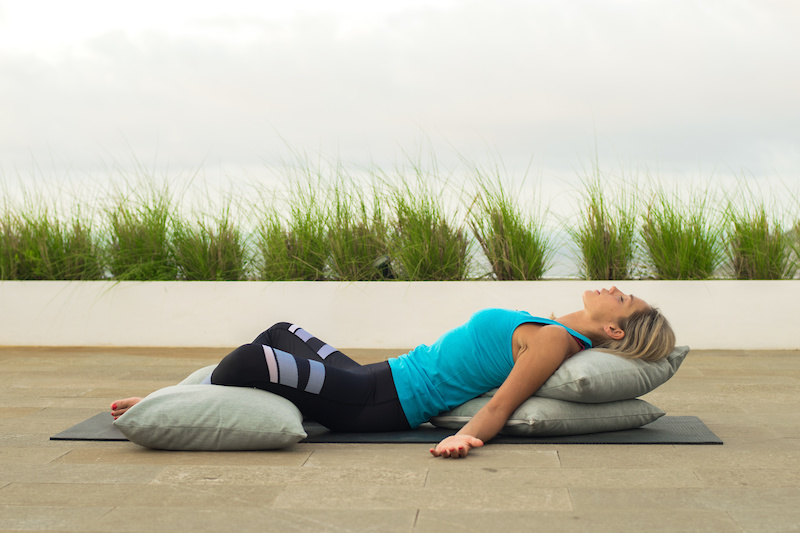
- This pose releases tight hips.
- Sit on your mat, bring the soles of your feet together and let your knees fall open in the shape of a diamond.
- Place several cushions or a couple of pillows behind you and lie back onto them.
- Let your arms fall out to the sides.
- Completely relax into the pose, allowing gravity to release tightness in your hips.
- Supporting your knees on cushions will increase the intensity of the pose.
6. Reclining Spinal Twist
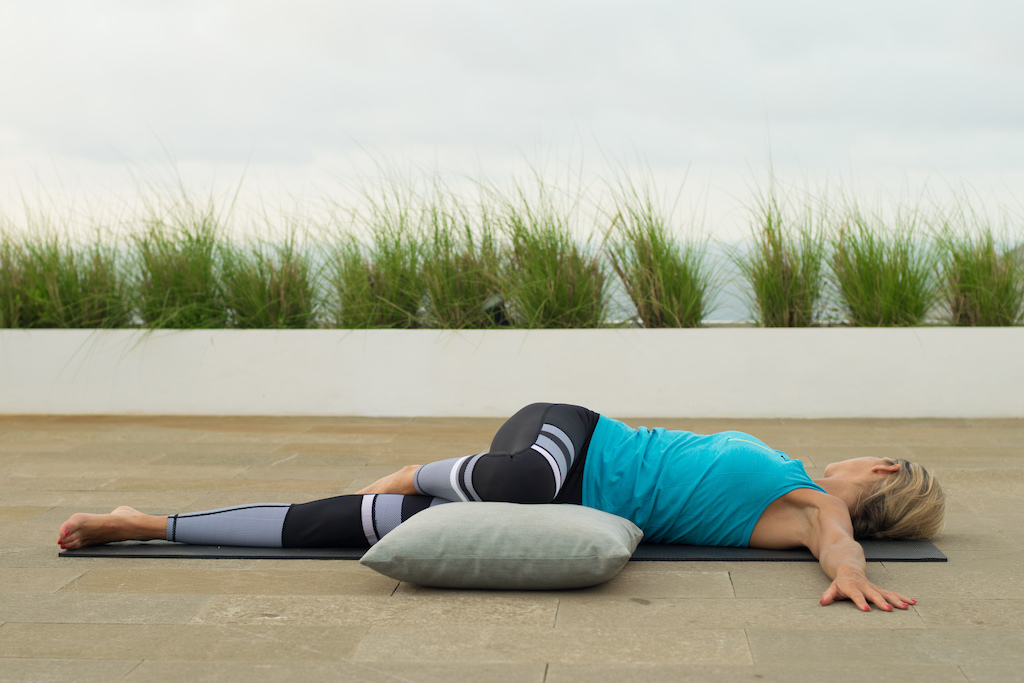
- This pose releases tension at the lower back.
- Lie flat on your back and squeeze your right knee into your chest.
- Bring both arms out in a T, palms facing down.
- Hook your right foot behind your left inner thigh and gently guide your right knee across your body down towards the mat, as far as is comfortable.
- If your knee doesn’t come all the way down, you can support it on a cushion or two.
- Look to the right and let go of tension in your neck and shoulders.
- When you're ready, take a deep breath in. Exhale, come back to centre and switch sides.
PHASE 2: Strengthen weak muscles
When you feel that you’re out of the danger zone, you can introduce some strengthening exercises. Try to do them every day or as often as you can, ideally in the morning when your energy and motivation levels are high. These exercises strengthen the lower back (erector spinae), abs, hips, glutes and obliques which are typically weak if you sit for much of the day. These muscles work together to support your lumbar spine, allowing you to generate maximum power through your arms and legs.
Hold them for 5-10 breaths, in and out through your nose, or as long as you can without compromising your form. It's crucial that you contract your core muscles and don't just hang out in the poses. The objective is to strengthen all the muscles that work together to support your lower back.
1. Plank
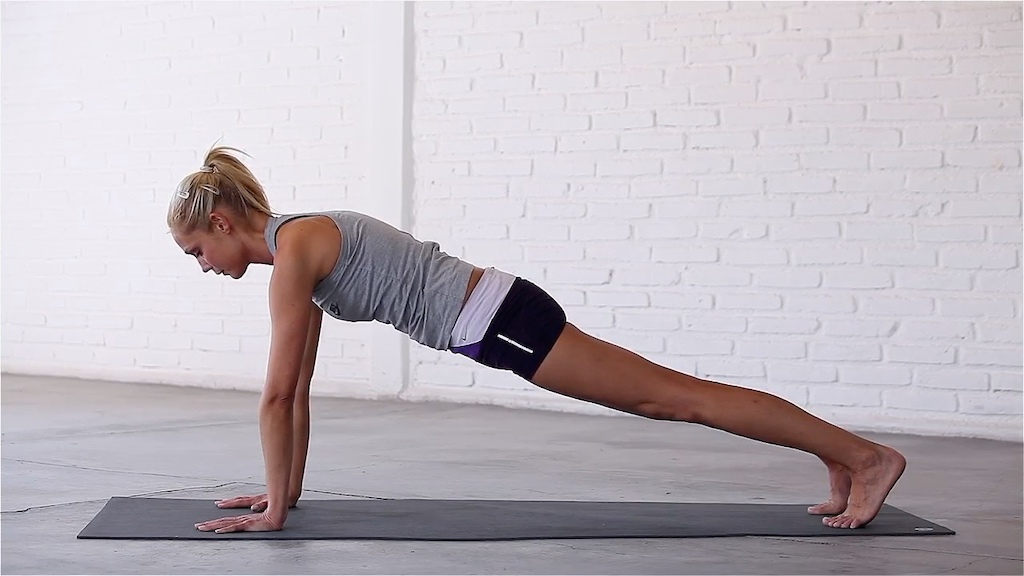
- From all fours, walk your hands forward, tuck your toes and come up into Plank.
- Spread your fingers wide and press your hands evenly into the mat. Check that your shoulders are directly over your wrists and your feet are hip-width apart.
- Try to create a straight line all the way from your heels, to your hips, to the back of your head. Engage your core and press back through your heels to straighten your legs.
- Look down at the mat to complete the alignment.
2. Side Plank
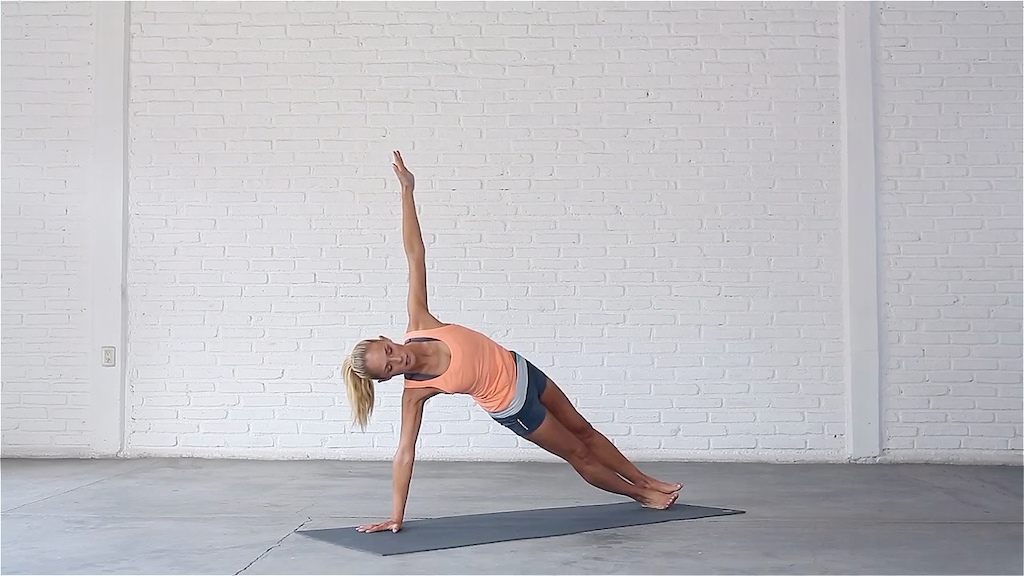
- From Plank, shift your weight onto your right hand and come to the outside edge of your right foot. Open your body to the left stacking your left foot on top of the right and bring your left hand to your hip.
- Make sure your right wrist is directly below your right shoulder and straighten your left arm up to the sky.
- Your ankles, hips and shoulders should all be in a straight line.
- When you're ready to come down, take a deep breath in. Exhale, come back to Plank and switch sides.
3. Locust
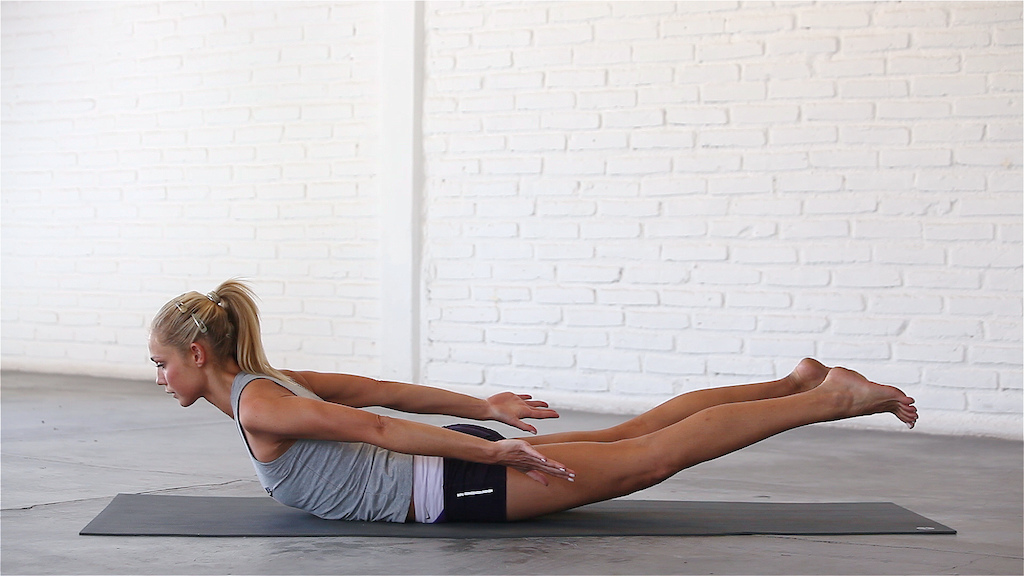
- Lie face down on the mat with your feet hip-width apart and your arms resting by your sides, palms facing up.
- Inhale, lift your chest, hands, arms and feet off the mat. Exhale, draw your shoulders back and push through the balls of your feet, looking straight down at the mat so you don't compress your neck.
- When you're ready, take a deep breath in. Exhale, come down onto the mat.
- Rest your left cheek on the mat and rock your hips from side to side to release your lower back.
- Push back to Child's pose for a few breaths.
4. Bridge
- Lie on your back with your knees bent and your feet flat on the mat, hip-width apart. Check that your toes point straight ahead.
- Rest your arms by your sides, palms facing down. Walk your feet back until your fingertips graze your heels.
- Screw your feet into the mat and lift your hips all the way up. Check that your knees point straight ahead and do not fall out to the sides or in towards each other.
- Roll your shoulder blades underneath you and come up to your edge. Interlace your fingers if you can.
- Contract your glutes to stabilise your hips.
- When you're ready to come down, take a deep breath in. Exhale, lower slowly down onto the mat.
- Bring one hand to your belly and one hand to your chest. Walk your feet to the edges of the mat and drop both knees slowly to the right, and to the left. Windscreen wiping your knees a few times to release your lower back.
PHASE 3: Increase mobility in tight joints
This 15-minute sequence is designed to increase thoracic spine (mid-back) and hip mobility, stretch your hip flexors, quads, hip rotators, glutes, hamstrings, and adductors (groin) and strengthen your lower back and abs. You can start to practice it whenever you're ready but if you feel significant discomfort in a particular pose this may be a signal that you do not yet have sufficient flexibility in that set of muscles. Only go as far into each stretch as feels comfortable.
We finish with a short diaphragmatic breathing exercise that is designed to relax tension throughout your body and calm down your central nervous system.
Practice this sequence in the evening after a ride and ideally 3-5 times a week until the pain starts to ease off. Remember to pay attention to your breathing throughout, keeping your breaths long, slow and deep.

Prevention is the ultimate principle of wisdom
If you’re young and pain-free or only feeling the odd niggle, remember that it’s much easier to prevent back pain than it is to heal it. Keep your back loose and healthy by putting in the time with your flexibility and mobility training now. Practicing this 15-minute sequence once or twice a week may be enough to keep you limber and supple so you can ride harder, for longer, and hopefully sustain fewer injuries along the way.
Other things you can do
1. Try not to sit for more than 30 minutes at a time. Take breaks to go for a walk or do some simple stretches.
2. Be aware of your posture throughout the day, standing or sitting up tall whilst keeping your neck and shoulders relaxed.
3. Foam roll or lacrosse ball your upper and lower back, rib cage, glutes, quads and hip flexors to improve soft tissue and joint mobility.
4. Mix up your yoga routines (and all of your training) so you continue to make progress and don’t sustain repetitive strain injuries.
5. Incorporate recovery sessions. This could include yoga, breathing, massage, sauna, ice baths (my new current obsession) or just taking time off work to play and have fun.
6. Warm up and cool down before and after rides.
7. Prioritise sleep to optimise muscle tissue repair, especially on days when you’re pushing your body to the max.
8. Consider supplementing with fish oil, turmeric, and magnesium. You'll find more info on www.examine.com
As always, you can email me at abi@yoga15.com if you have any questions.
You can find this routine and all 115 videos in the Yoga 15 series available to download or to watch on subscription here: vimeo.com/ondemand/theyoga15method
Previous Yoga with Abi:
Stretches to Relieve a Tight Chest and Stiff Shoulders
The Most Effective Style of Yoga to Increase Your Flexibility
Easy 15-Minute Yoga Routine To Loosen Up Tight Joints
How To Release Tight Quads And Increase Your Power
How To Release Chronically Tight Hamstrings
A Challenging One-Hour Yoga Flow Class
Take Control of Your Mind and Push Your Personal Limits
Yoga To Relieve Pain In Between The Shoulder Blades
15-Minute Routine To Unlock Tight Hips
15-Minute Yoga Routine To Build Core Strength
Short Yoga Routine To Help With Lower Back Pain in Bikers
15-Minute Yoga Routine To Enhance Balance and Agilityl
15-Minute Post-Ride Yoga Routine
8 Quick Yoga Stretches To Do At Work
MENTIONS: @yoga15app
Author Info:

Must Read This Week
Sign Up for the Pinkbike Newsletter - All the Biggest, Most Interesting Stories in your Inbox
PB Newsletter Signup
I went to work for two weeks after doing two days of heavy lifting and never complained, thinking the pain I felt was no big deal. Lifted some stuff again, more pinching and pain. Decided enough was enough, started off to the doctor, and he gave me the standard medicine and some advice, and sent me to a specialist, a very reputable (and huge) spine center nearby. Short version? Myelopathic impacted hernia, L5-S1 (sacrum), and it is shifting daily, so my spine is literally a ticking clock. I have, according to the Dr, 6 months max before the vertebrae shifts and settles enough to completely cut off, or "impact" the nerve and render my left leg (and maybe more, talking to guys here...) immobile and useless.
Your spine is EVERYTHING.
Without it, you can't stand, walk, jump, hold your kids, hug your wife... nothing.
Take care of yourselves, guys and gals. You only get one "you", and maybe not forever!
(The fact that I don't have sufficient insurance coverage to get worked on is a different topic, and not for this time, but I digress...)
Sorry, just the thought of someone not getting medical care because of costs really irks me. Also sorry to hear about your personal situation. Hoping you have a good out come some how.
Well, like I said, it's not the place for it, but it can be fixed.
But yeah, thanks. If I can get it fixed, I'll get a Jeffsy and be back at it!
before I was hurt, I was doing Abi's yoga all the time! Even got my wife on it!
Why work harder if a promotion means less benefits from the gov't?
edit - sorry, I hate politics but I couldnt resist.
Yet a decent amount (minority) of people still want to do away with our public health.
I started doing Abi's yoga more or less regularly two years ago after her video on pinkbike. Unfortunately, I paused for a couple of month exactly around the time when we moved to our new house (mainly being to lazy to fit in my Yoga routine in between work and planning to move and finally moving to our new house). Kind of unsurprisingly, after we had moved to our new house (which involved quite some heavy work and lifting), I suffered from severe lower back pain - went to the doctor who helped me to get rid of the biggest blocking with something like "assisted Reclining Spinal Twist", but this also only helped when combined with regular (!) yoga about 3-4 times a week. Since then I made it a habbit to do it in the evenings before going to bed. It also helped a lot to get rid of the pain in the shoulders which I had when sitting too long in front of the desk.
And finally riding on the bike also feels much better if you don't start off with back pain already - and you really notice that yoga strains muscles which tend to be less used during biking.
What I like about Abi's kind of Yoga is that it is efficient, targets folks like us which at least think to have stayed young (not the typical clips you find on youtube for elder people etc) and it doesn't have the spiritual fuzz around like some other Yoga classes. But still it's different from other exercises due to flow of the routines (stretching followed by strength, not to forget relaxing at the beginning and end etc) and the focus on breathing correctly.
So, @Abi: thanks again! Please keep up the good work, really like the articles here on pinkbike, but also the app and all the videos you make.
I barely cased a double last year, and my whole back locked up for a few weeks.. I wish I would've started earlier and only had to maintain, rather than build flexibility!
Thanks for the targeted/free tips!
So I've done a couple of little sessions of Yoga yesterday and the day before. I can definitely feel the tightness trying to hold each pose! I'm looking forward to the day I notice a change in that.
Just wondered, about the "post-ride" oriented stuff; what sort of time between the end of the ride and doing the Yoga should I leave? Obviously I normally have a drive home from the trails, followed by bike cleaning and getting in the shower (For more whimsical ideas!) and a rest/cuppa. Is it still going to be as effective say 3 or so hours after I stopped riding?
Thanks again!
I've got to say my girlfriend is a big fan of your style. She has commenced her teacher training as Ashtanga Yoga teacher and will give her first lesson this weekend. She's now working from a book by David Swenson. Looking at those pictures there, your exercises look very nice and doable. Thank you for that
Unfortunately I can't hang yet, the broken collarbone is holding me back. But I'll definitely do it again when I'm cleared for that. I've only had two yoga workshops. One was aireal yoga, the other was acro-yoga. I'm loving the fun element in there.
After a fractured spine and lots of back pain which ruined sleeping and then my entire day I'm back to full strength and even better mobility. It started working in about two days.
Never a day passes without doing at least one routine and my entire body feels better for it.
I've said thanks before Abi and I'll say it again. Thanks a million.
If you've not tried it people, get into it if you can. It worked wonders for me.
www.yoga15.com/blog/restorative-sequence-for-athletic-recovery
I'd be curious to hear which poses give you the most relief, especially for back pain.
The dead pigeon pose looks great but it destroys my knees!
Mastering Manual and bunnyhop is one of the best things to do for injury prevention. Done right forces your body move right
I understand you want to help to relax, but I personally would prefer a more lively tone of your voice.