Tech Tuesday - FSA Orbit Option Install
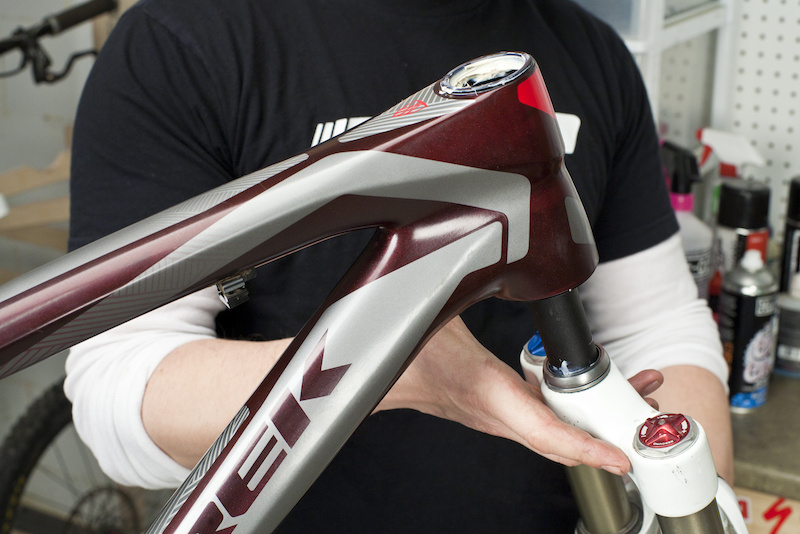
Angle adjusting headsets are a great tool for fine tuning how your bike handles, especially when you consider that trails and terrain can vary so much all around the world. And while we're willing to bet that many frame designers have taken great pains to craft their bike's handling to what they feel is perfection (and the last thing they want are people tinkering with it), there is no denying that tuning the geometry can sometimes be key to getting the most from your machine. There are a few different headset options out there that allow you to do just that, including FSA's recently released Orbit Option that we show you how to install below. The Orbit Option, like all other angle tweaking headsets, employs eccentric bearing bores in both the upper and lower headset cups. This allows the steerer tube to sit at an angle within the head tube, creating either a slacker or steeper head angle depending on how you've assembled it, but it also requires perfect alignment when installing.
![FSA Orbit Option headset]()
![FSA Orbit Option headset]()
![FSA Orbit Option install]()
![FSA Orbit Option headset]()
![FSA Orbit Option headset]()
![FSA Orbit Option headset]()
![FSA Orbit Option headset]()
![FSA Orbit Option install]()
![FSA Orbit Option install]()
![FSA Orbit Option headset]()
![FSA Orbit Option headset]()
![FSA Orbit Option install]()
![FSA Orbit Option install]()
Past Tech Tuesdays:
Visit Parktool.com to see their entire lineup of tools and lubes
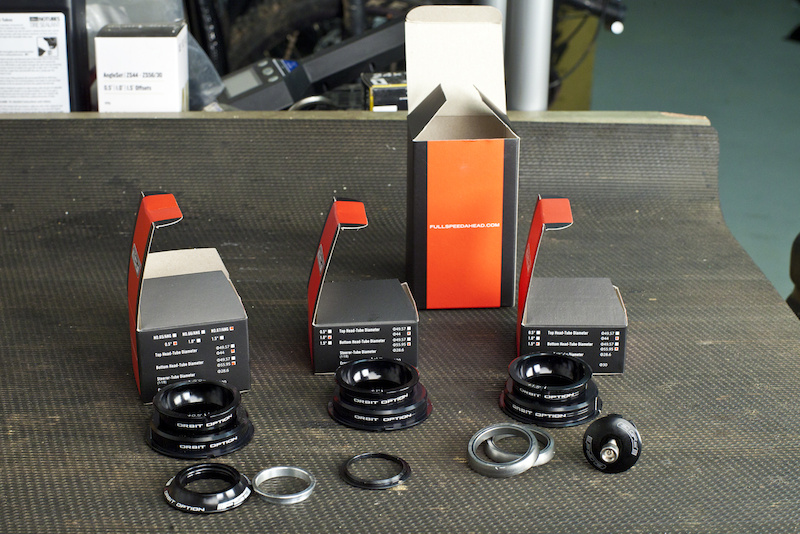
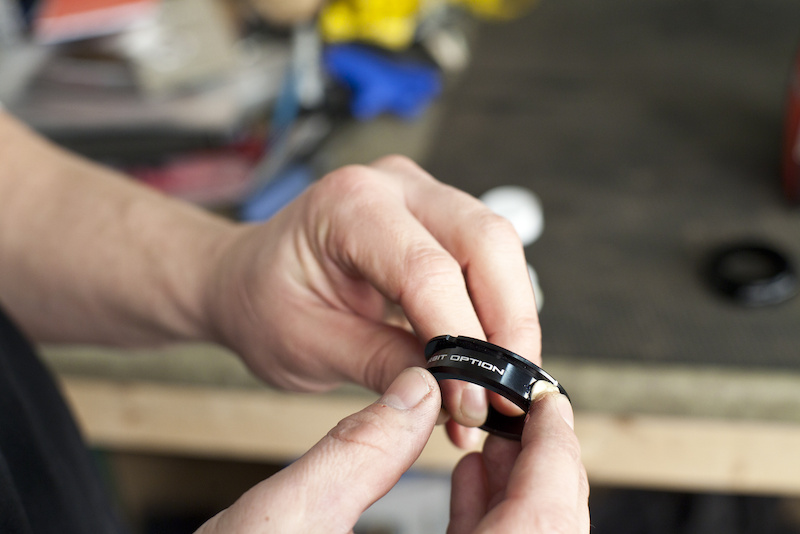
FSA's Orbit Option headset includes three different cup combinations that allow you to choose from 0.5, 1.0, and 1.5 degree adjustments in either direction.
Some helpful pointers • FSA offers the Orbit Option in three different models to fit different head tubes: 55mm full length OD head tube, 50mm/55mm tapered, and 50mm/62mm tapered. Measure the internal diameter of your bike's head tube before both ordering and installing the Orbit Option. Note that it is only compatible with straight 1 1/8th fork steerers. • Don't even think about install the Orbit Option, or any other headset for that matter, without using copious amounts of grease where required to limit the chance of noise or contamination. • Any binding or ''popping'' sounds that you hear after installation mean that some of the headset's components are not aligned correctly. Remove the headset and try again. • A proper headset press is mandatory for this job due to the exacting tolerances required for proper alignment. |
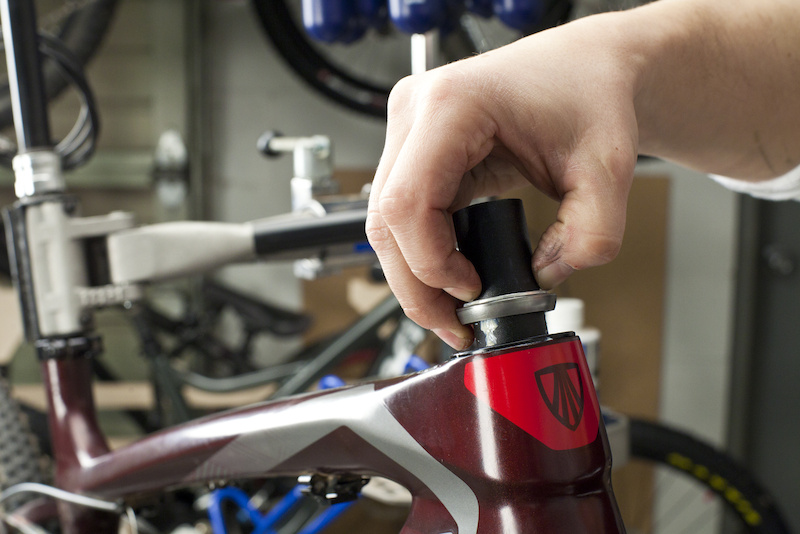
Step 1 - Proper preparation is key for a successful installation. Aluminum frames should have their head tube reamed and faced (many have this done from the factory), and carbon frames should be checked for any excess material that may be present in the head tube. The goal is to have the head tube's inside surface smooth while also ensuring that their opposing faces are perfectly square to each other. This is important for to prevent noise and binding once the headset is installed.
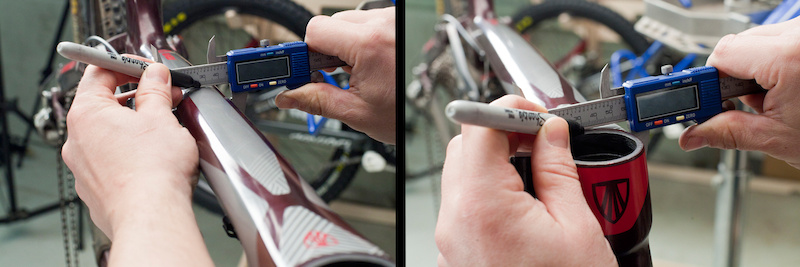
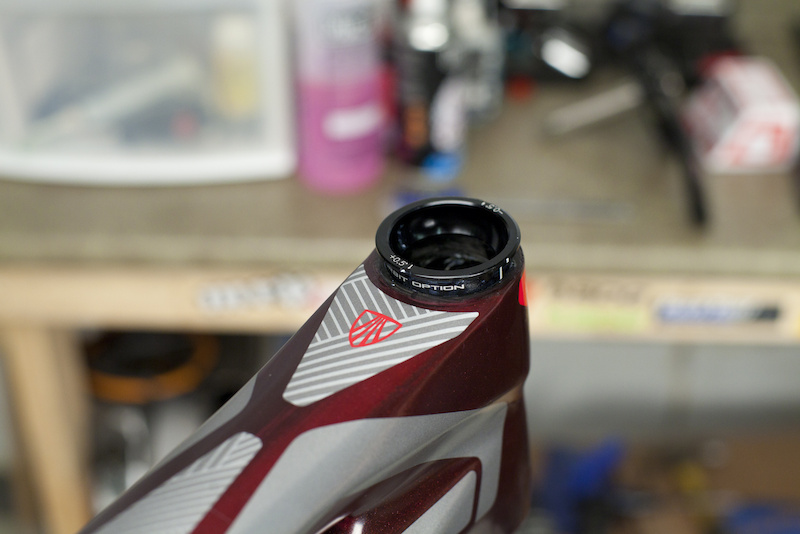
Step 2 - Finding the correct alignment for both headset cups is the most important step of the installation process. Both the upper and lower headset cups employ eccentric bearing bores in order to achieve the angle adjustment, but this means that they also must be perfectly aligned with each other when pressed into the head tube. The easiest way to accomplish this is to find the exact center point of the head tube, and then line that up with the alignment markings on both cups.
Use a caliper to find the center line of your bike's top tube by closing down the jaws on each side of the tube, using a felt to mark the center point. Do this at two or three points along its length, including just aft of the head tube.
Use a caliper to find the center line of your bike's top tube by closing down the jaws on each side of the tube, using a felt to mark the center point. Do this at two or three points along its length, including just aft of the head tube.
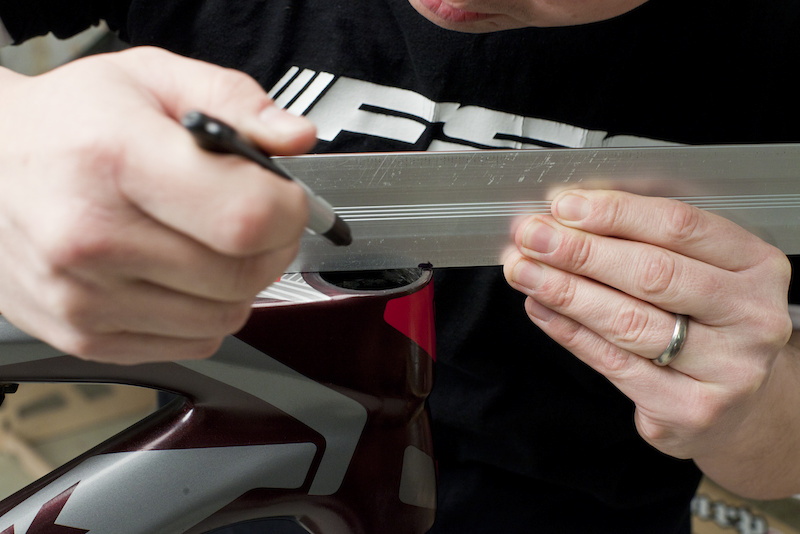
Step 3 -Those center point marks can now be lined up with a ruler or straight edge, showing you the exact center point of your bike's head tube. Repeat this process on the underside of the down tube as well.
Step 4 -Apply a coating of grease to the mating surfaces of each cup to ease installation.
Note that the angle markings on the upper and lower cups must oppose each other in order to attain the required offset - a slacker head tube angle would require the upper cup to have its negative setting forward, combined with the lower cup's negative setting facing the the rear of the bike. You would simply reverse the orientation if you desire a steeper head angle. The Orbit Option includes enough headset cups to choose from three different head angle settings, but each cup must be paired with its matching partner (0.5 upper with 0.5 lower, for example)
Note that the angle markings on the upper and lower cups must oppose each other in order to attain the required offset - a slacker head tube angle would require the upper cup to have its negative setting forward, combined with the lower cup's negative setting facing the the rear of the bike. You would simply reverse the orientation if you desire a steeper head angle. The Orbit Option includes enough headset cups to choose from three different head angle settings, but each cup must be paired with its matching partner (0.5 upper with 0.5 lower, for example)
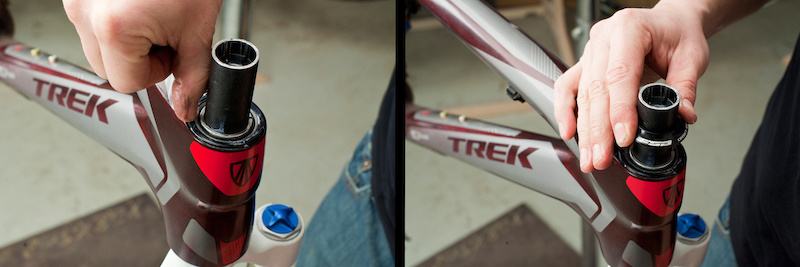
Step 5 -Carefully postion the upper cup so that its centering marks are perfectly lined up with center line of the head tube.
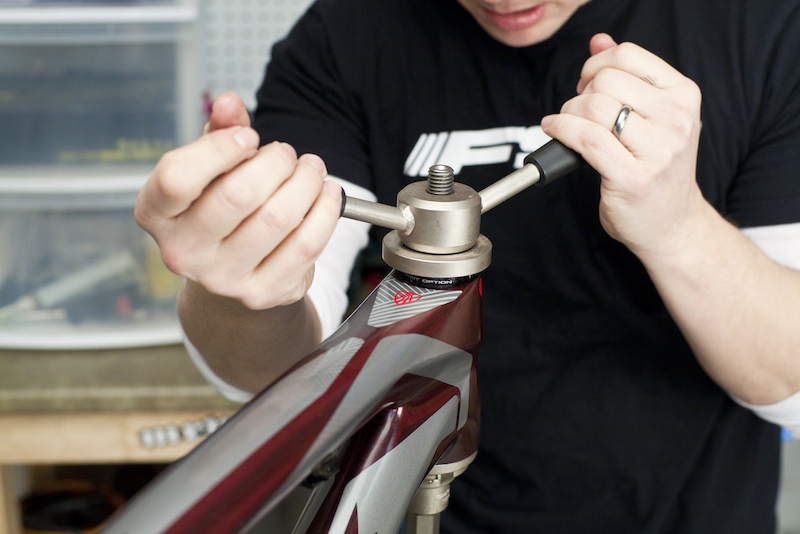
Step 6 -Slowly begin to press the upper headset cup in, stopping after it first enters the head tube to ensure that it is perfectly square and straight. It isn't uncommon for a headset cup to rotate slightly before it is deep enough in the head tube to prevent it from shifting - take your time and inspect the alignment with each full turn of the headset press' handle. If it shifts at all, even the slightest amount, you'll have to remove the cup and start over.

Step 7 -It's now time to install the lower headset cup by using the same technique as the upper. Align the cup's center marks with the center of your head tube and slowly beging to press it it. Again, be careful to watch for it shifting as you begin to press it into the head tube. Inspect both the upper and lower cups to be sure that they are sitting flush with the face of the head tube, and that neither have rotated, before moving on to the next step.
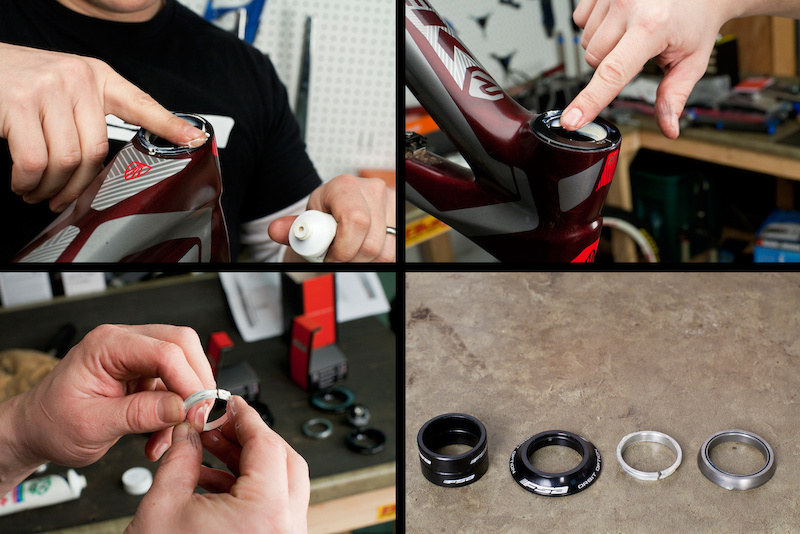
Step 8 -Grease is your friend during this assembly. Apply a generous amount to the mating surfaces of each bearing and both headset cups - never install them dry. A thin coating should also be spread onto the crown race and compression ring to keep water contamination and noise to a minimum down the road. Layout the headset parts in the order to be installed on a clean surface that is within arm's reach of your bike, and then stack the upper bearing and compression ring as they sit once installed.
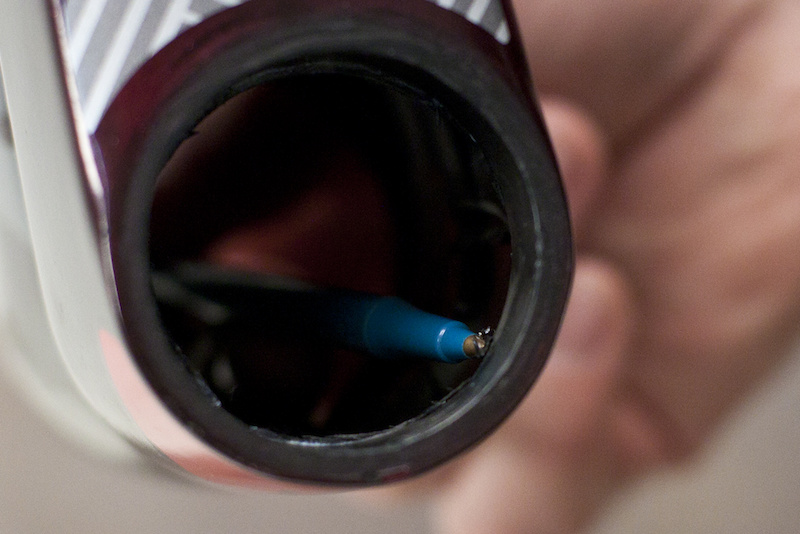
Step 9 - With the greased lower bearing pushed down onto the crown race, slide the fork's steerer up through the head tube. Hold it firmly in place, preventing the fork and bearing from lowering out of the head tube.
Step 10 -Slide the upper bearing and compression ring down the fork's steerer tube as a single unit, pushing both down into the upper cup in one smooth motion while still holding the fork up into the head tube.
Step 11 -Use your thumb to push down on the compression ring and bearing, ensuring that both are fully seated into the upper cup before sliding the headset's cover down over top. A dab of grease on the cover's O-ring will allow you to slide it down the steerer easier, as well as lessen the chance of tearing the rubber O-ring.
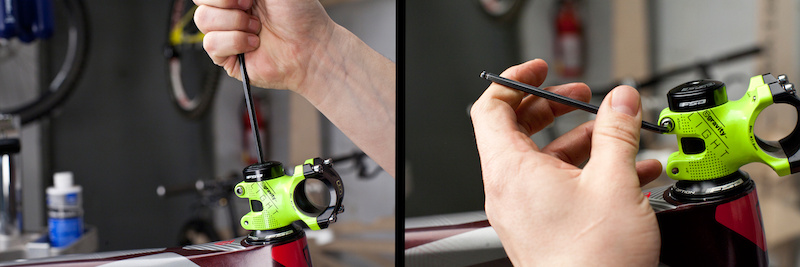
Step 12 -Install the stem, as well as any required spacers, and lightly tighten the headset - don't fully tighten at this point. Take a few minutes to inspect your installation: make sure that the cups are fully pressed into the head tube by looking for gaps under the outer lip of each, and check the upper cup and headset cover for equal gaps around their entire circumference. Finish tightening the headset only when you are positive that everything has been installed and aligned correctly, and then rotate handbar to check for any binding or ''popping'' noises that would signal a mis-alignment within the headset, requiring it to be removed and reinstalled.
Past Tech Tuesdays:
Visit Parktool.com to see their entire lineup of tools and lubes
Author Info:

Must Read This Week
Sign Up for the Pinkbike Newsletter - All the Biggest, Most Interesting Stories in your Inbox
PB Newsletter Signup
Fixed bearing angle headset or nothing - This design just does not work unless your super light or want to retighten every dh run - And its PRO mechanics that cant get it working, not just home mechs.
Does popping actually do anything negative or is it just an annoying sound?
You are lucky with your angleset - i expect longer headtubes get it worse / more extreme angles. Either way i wont run one!
I replaced the split ring over the top bearing with a different/thicker compression ring from an old headset. I noticed the original ring wasn't tight enough against the steering tube. This was done on a 2015 giant glory advanced.
If your spring rate front/rear is not even, you are wasting your money. For example, if your front end compresses more than your rear in corners, landings and g-outs, your head angle will steepen and no angleset will compensate for that terrible setup.
Running different bagged tires front and rear can affect head angle by the same amount as an angle adjusting headset.
Those of you with Giant Glories, do not go by the website/advertised/quoted head angle - that is the steepest it can go with Fox 40 slammed. Do you ride with your crowns slammed? Measure it. Properly. Inclinometer on the stanchions is the only way.
Also, understand the reasons why before slackening your head angle. Are you understeering around the corners? Will slackening your head angle help that, or make it worse?
Research first. Installation second... perhaps.
Do you know it is't possible to mount a angle adjusting headsets on a RADON JEALOUS AL 10.0 HD? www.radon-bikes.de/en/mountainbike/hardtail/jealous-al/jealous-al-100-hd-2020
It's a FSA, IS41/IS52 mounted so it should be possible right?
Thanks,
Km
www.ofanaim.net/has.html