Tech Tuesday - Removing Bike Rack Rattle
Kill the klunk: While there are a few great bike racks available, not many incorporate any type of anti-rattle system into their design. Having your bike rack, especially one that's fully loaded, shake and rattle as you drive has to be one of the more annoying things in life. Not only does it make your vehicle sound as if it's about to fall apart, it also seems to get worse and worse over time. There are a few different ways to eliminate that clatter, but we're fans if the threaded insert design that the Curt unit shown here employs. There is a downside to going this route, as opposed to a clamp-type system, in that you can no longer use a locking hitch pin, making the rack more vulnerable to theft. It should also be kept in mind that this setup forces the threaded hitch pin to shoulder much of the load from the rack, rather that letting the receiver to do the work. Do you spend a lot of time of rough roads with a loaded rack? This mod may not be for you.
![Tech Tuesday]()
![Tech Tuesday]()
![Tech Tuesday]()
![Tech Tuesday]()
![Tech Tuesday]()
![Tech Tuesday]()
![Tech Tuesday]()
![Tech Tuesday]()
![Tech Tuesday]()
Do you have a trick or tip to add? Put 'em down below!
Past Tech Tuesdays:
Visit Parktool.com to see their entire lineup of tools and lubes
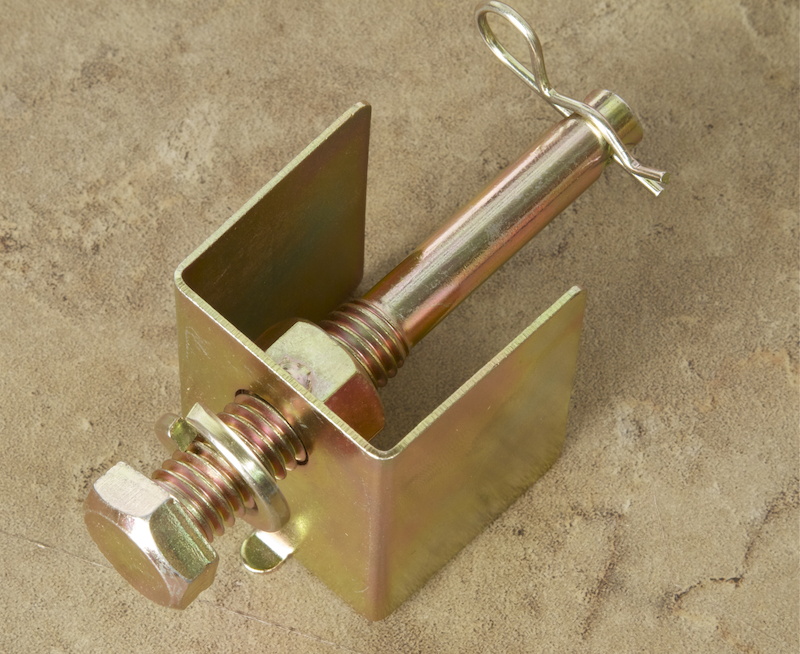
The Curt anti-rattle kit includes an insert that fits inside the rack bar, a threaded hitch pin (bolt) and a safety cotter pin. When the insert is installed into the rack bar, threading the hitch pin into place sucks the rack up against the inside wall of the receiver.

What's needed: anti-rattle kit, socket wrench (our's needed a 3/4'' socket), Loc-tite
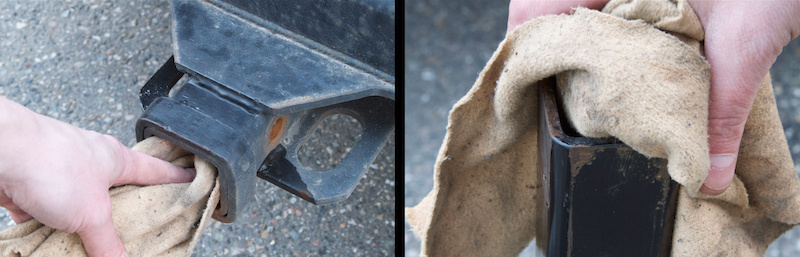
Step 1 - Start by removing the rack from your vehicle and giving both the hitch and receiver a good cleaning. You can use a spray of WD-40 and some steel wool to remove any rust that may be present.
Step 2 - The Curt anti-rattle kit that we installed includes a locking washer on the bolt, but a dab of medium strength Loc-tite on the threads is still something that we'd recommend doing. Keep in mind that you won't likely check the hitch bolt often, and while the cotter pin on the opposite side should keep the bolt from falling out if it does come loose, a bit of Loc-tite can only help matters.
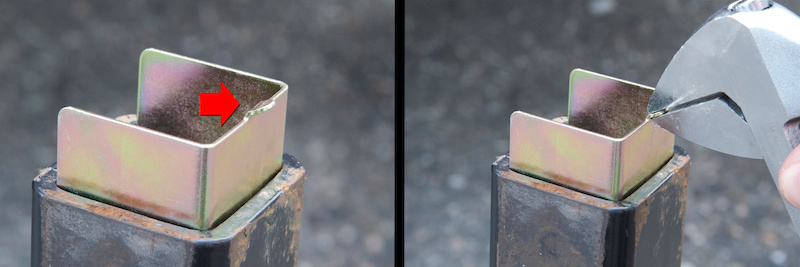
Step 3 - Our Curt anti-rattle unit uses a small tab to keep it from falling into the rack bar, but it also keeps the insert from sliding deep enough to allow the holes to match up. You'll likely find this issue on all bike racks, but it can be easily fixed. We used a large crescent wrench to bend the tab back flush with the rest of the insert, letting us push it deep enough into the rack bar.
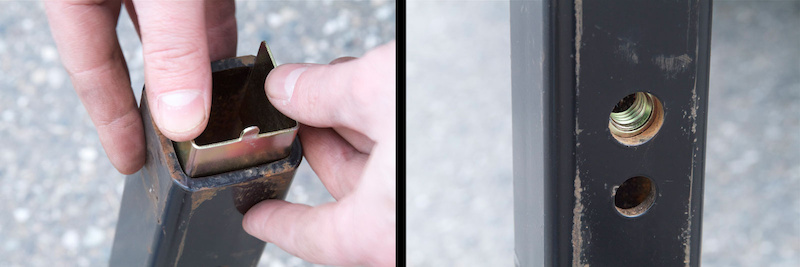
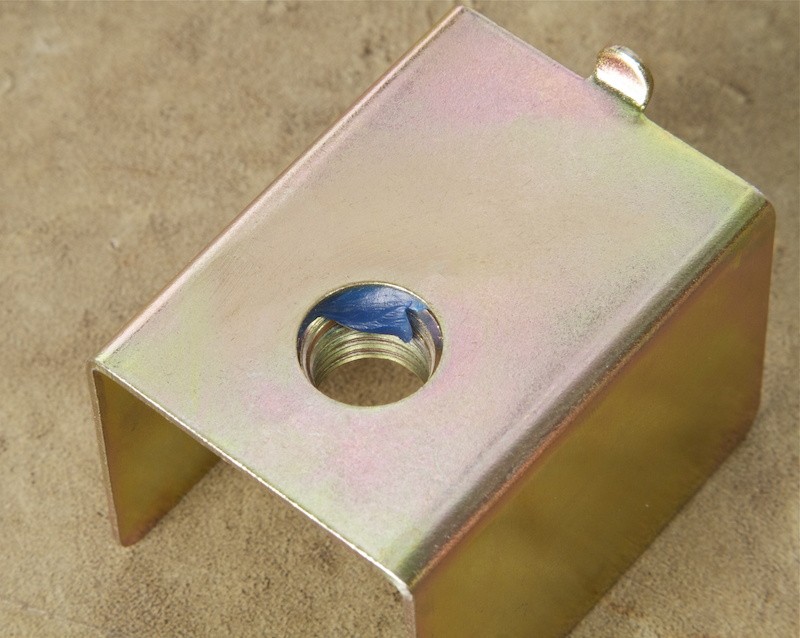
Step 4 - The next step is to slide the insert into the rack bar. Push it deep enough that the threaded nut in the insert lines up perfectly with the hole in the rack bar. Misalignment will make it difficult to thread the pin in, possibly damaging the threads. If the insert fits in loosely a dab of thick grease can be used to keep it from shifting when reinstalling the rack on your vehicle.
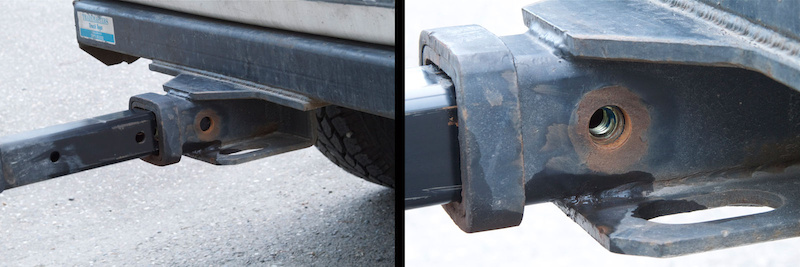
Step 5 - Slide your rack back into the receiver, being sure to align the pin hole with the hole on the receiver unit.
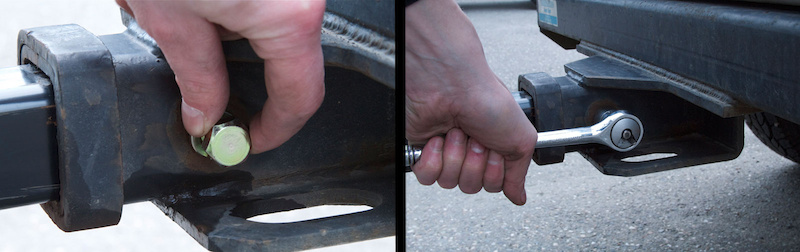
Step 6 - Thread the bolt into the anti-rattle insert, making sure that the locking washer is in place under the bolt's head. Use a socket wrench to finish tightening the bolt; a regular wrench will likely not fit well around the receiver. Test the installation by giving the rack a few good shakes - it shouldn't rattle at all. Re-check the bolt after to be sure that it's tight.

Step 7 - Install the cotter pin and you're done! It is a good idea to check the bolt again after a few days to see if the rack and hardware have settled with use.
Past Tech Tuesdays:
Visit Parktool.com to see their entire lineup of tools and lubes
Author Info:

Must Read This Week
PS: Great rack
Swagman makes several. Other than that nice write up.
[URL=http://entertainment.webshots.com/photo/2214519370066781137mOkhoq][IMG]http://inlinethumb48.webshots.com/38639/2214519370066781137S600x600Q85.jpg[/IMG][/URL]
Locks on bike racks aren't worth 10 cents anyway...
I use a locking pin and don't worry about the rattle unless I'm driving more than 100kms... Then I pinch the rack to the receiver with a $2.50 u-bolt from the exhaust parts section.
I bought his from MEC. cheap ,secure . I use this with my north shore rack , no problems
or just keep a small wedge of wood
I skipped both of those and just bought a truck.