Ask Pinkbike: CushCore vs. Tubes, Fork Setup, Sticky Brake Pistons, & 12-speed Chain Length

Here at Pinkbike, we get inundated with all kinds of questions, ranging from the basic "Can I have stickers?" to more in-depth, soul-searching types of queries like if you should pop the question or what to name your first child. Ask Pinkbike is an occasional column where we'll be hand-picking and answering questions that have been keeping readers up at night, although we'll likely steer clear of those last two and keep it more tech-oriented.
DH Wheels: Tubes or No Tubes? CushCore or Not?
Question: @Michvin asks in the Downhill forum: Got my first DH bike and started overthinking. First knee-jerk was to go tubeless CushCore, but now I don't know... Should I? Magic Mary + Big Betty. Thanks!
 | I have always been a strong believer of the thinking that if you were to flat with a tubeless setup, you would have flatted a tube, barring that a dented rim causes the tubeless system to lose air, which is a different type of failure. Given that reason and the time I have spent on both systems, tubeless is also lighter and some riders claim to notice the tire being more supple. Some drawbacks to setting up tubeless wheels are getting the tire to seat on a dented rim (a pro for choosing carbon rims), air leaking from the rim tape, low air flow while seating from a clogged valve, and the mess of tubeless sealant. As for CushCore inserts, they offer benefits in the eyes of some riders, such as rim protection, the ability to run lower tire pressure while supporting the sidewall against tire roll, and increased damping. They are not a guarantee against denting wheels and do not deter sidewall tears. It can take some practice to install and remove them without throwing a tantrum, but following the instructions will set you on the right track. Both pros and amateurs sit on either side of the fence when it comes to the tire insert debate and ultimately you have to choose what works best for you, whether that may be saving ride time warding off flat tires or the preference of a lighter wheel. Depending on your riding style and the terrain you frequent most often, you may want to start your own experimentation with inserts before your rims become too dented to seat tubeless tires on. From there, you could remove the insert and note the differences. The price tag for engineered foam may seem high, but you could be saving money in the long run, in addition to performance benefits, and if they don't find them beneficial, you can resell them. Pinkbike's Henry Quinney did an in-depth analysis of nine inserts here, if you wish to dive into the characteristics of each one on test. |
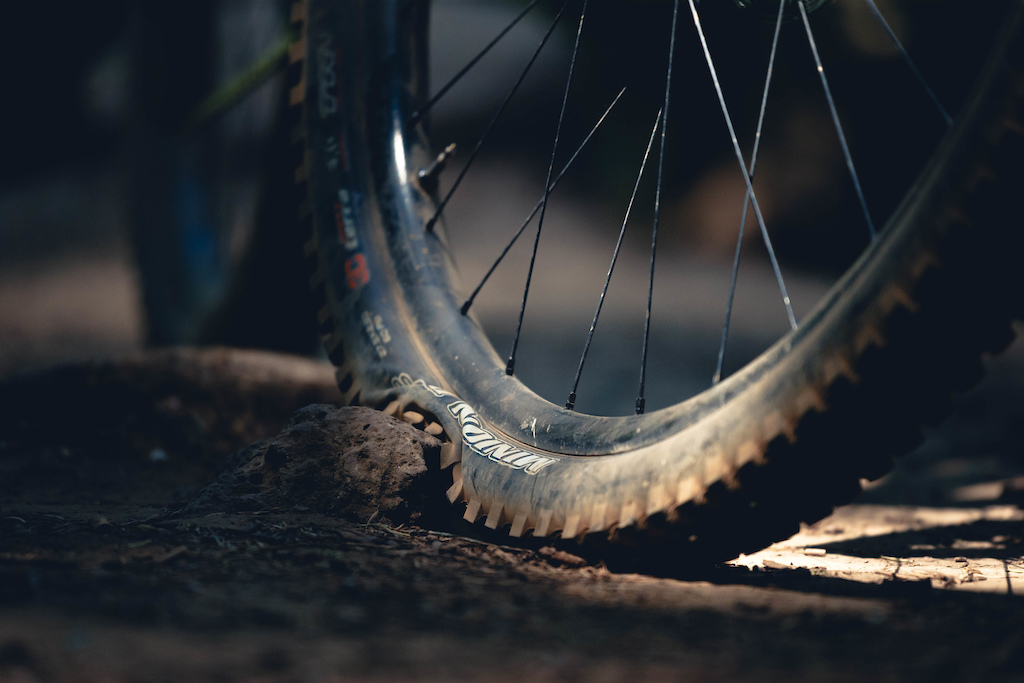
Tire inserts offer sidewall stability and rim protection, but they aren't the golden ticket to keeping air in your tires.
RockShox Pike Fork Setup Help
Question: @mca896 asks in the All Mountain, Enduro & Cross-Country forum: The last few rides I've been trying to pay more attention to what my fork is doing to see if I can tune it to improve handling. It is a 2015 Pike RC. I had it set up completely stock, meaning no tokens (as far as I am aware), about 70 PSI, and LS compression fully open. I am happy with the rebound setting. I am 162-165 lbs. fully kitted, depending on how much food and drink I've consumed that day.
I was feeling like there was very poor small bump compliance, and also poor bottoming resistance. I tried decreasing my air pressure to 65 PSI and this improved the small bump compliance some. I added three clicks of LS compression. My question is will the tokens alone allow me to run lower air pressure while adding bottom out resistance? I would like to stay around this 65 PSI (maybe even lower) without having to add much compression damping. I always used to think good enough was good enough but now I'm thinking I can tune this to be better than good enough?
| Decoding suspension settings to find the optimum balance doesn't always have to be a game of chance. Most suspension manufacturers' setup guides are a great place to start, like SRAM's explanation of the suspension controls. Since we are talking about a fork that could be nearing six years of use, it may be worthwhile to get a full overhaul scheduled. If this hasn't been completed before and the performance is poor, there could be a chance that the damper is blown or needs service. The suspension tech will be able to service the lowers while checking things out and refresh the fork for the silkiest operation. Jumping back to setup, your previous air pressures are within the suggested RockShox brackets, but always resort back to the sag measurements, which can change depending the bike setup. The general rule is 15-20% sag for the fork and around 30% for the rear shock. Remember, the entire bike needs to balanced, which applies to suspension controls too. Rebound can also have a compounding effect on small bump performance. If it is too slow, the suspension will not recover between successive bumps, which may be the cause of the complaint you have. It's best to adjust one parameter at a time to understand the changes it has on the system, so if you want to open the rebound control for faster return to full travel or add a volume spacer, it's best to use the same pressure as before. Depending on the travel, you may need to add more than one token to notice any apparent ramp up - too many volume spacers can feel like the fork is bottoming too early. |
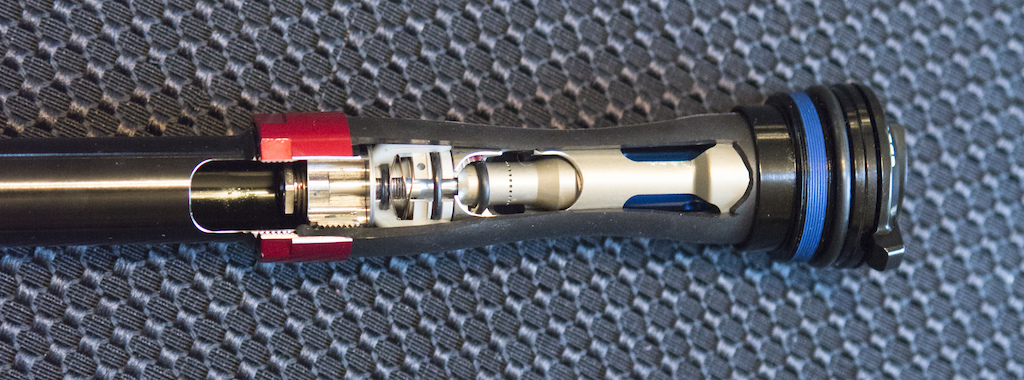
Just because they're hidden away in an oil bath doesn't mean that dampers last forever.
Magura MT7 Brake Drag
Question: @spudmaster asks in the Mechanics' Lounge forum: Got some new Magura MT7 brakes that I've been trying to set up for the last couple of days now but whatever I do I can't seem to stop the brakes from dragging. It's not just a little bit of drag, it's constant drag for the full rotation of the wheel! The brakes aren't over filled with mineral oil, the pistons will fully retract when pushed back in but they don't seem to retract enough under normal operation. With the pads removed to check the pistons, they don't seem to move out properly when then lever is pressed, one or two always seem to remain in the caliper and requires holding the other pistons back to get it to move.
It's not consistently the same piston and the brakes haven't been used yet so aren't dirty and shouldn't have sticky pistons. Despite the drag the lever feels solid so I don't think its a bleed issue but no amount of aligning or adjusting will get rid of the drag. At this point I'm wondering if there is an issue with the brakes, faulty seal preventing the pistons from retracting properly perhaps? Anyone got any ideas or tips I should try. Never had an issue like this before when setting up previous brakes I've owned.
| Having been down this road myself, sticky pistons can be so downright frustrating that I've removed the brake pads for a long climb in order to avoid the constant chirp as they graze the rotor with every rotation of the wheel. Step one to solving this problem is to make sure that the rotor is dead straight. Any wiggle can throw off the reference for the later steps. When performing any operation where brake fluid may be present, remove the pads and set them in a safe place, then unbolt the caliper from the mount. Install a bleed block between two opposing pistons and squeeze the lever slowly to expose the other two pistons, being careful not to fully displace them - a second set of hands can help to hold everything here, since you may need to manipulate the pistons with a soft lever. Using isopropyl alcohol, clean all the way around the exposed pistons with a lint-free rag. Add a couple drops of Magura's Royal Blood mineral fluid to the exposed surface of the piston and work the piston in and out with the soft tool and the brake lever. Continue this for the next three pistons by alternating the bleed block. When the process is finished, make sure the caliper is clean and dry of any mineral fluid, then proceed to reinstall it on the mount. Center the caliper on the rotor, not the free space between the pads. If the pads are not centered, gently manipulate them with the soft lever to position them evenly. This will give the best brake performance, making the pads heat up evenly and give the crispest brake lever action. |
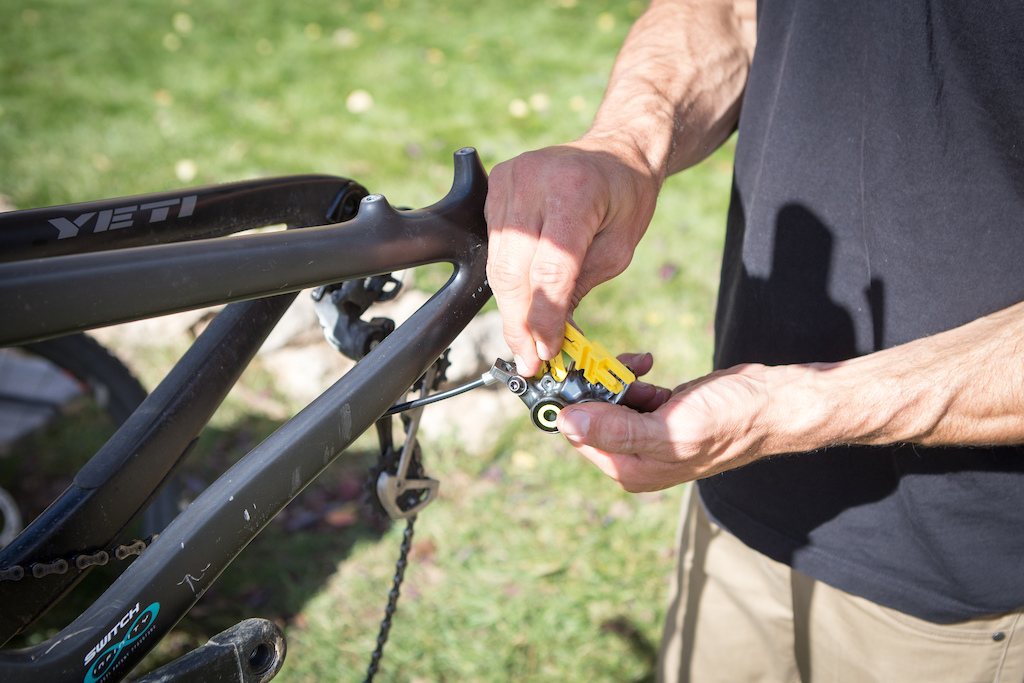
Brake pistons collect a lot of nasty brake dust and grime. They deserve a regular cleaning for the best performance.
GX Eagle Chain Length Correct?
Question: @mikebowden asks in the Mechanics' Lounge forum: Hi there, This might be a dumb question, but I am new to how sensitive 12 speed drivetrains are to setup! I'm having difficulty getting my GX Eagle to shift cleanly through the cassette, and I wanted a sanity check on the chain length! Pictures are taken unsagged, but there isn't much chain growth (2021 Sentinel). How does it look? Before I break the chain to check, does anyone have any thoughts? Thanks!
| Measure twice, cut once, right? You can always make a SRAM chain shorter, but you cannot reuse the pins that are already pressed into the chain. Adding length must be done with a SRAM PowerLock master link. There are two baselines for measuring SRAM Eagle 12-speed chains: hardtails or full suspension bikes. Both methods start by wrapping the chain around the front chainring and the largest cog on the cassette, bypassing the derailleur altogether. For full suspension bikes, release all of the air from the rear shock or remove it altogether and cycle the suspension to the end of the travel. From here, one outer and one inner piece of chain should overlap from the opposing inner link. You'll need to connect two inner pieces of the chain with the PowerLock master link, so it's best to err on the longer side of the measurement when deciding where to cut. Hardtails require two outer and two inner sections. SRAM also has two B-tension chain gap tools available, depending on the size of the cassette range, to lineup the exact clocking of the derailleur on the hanger. This should be adjusted under the rider's sag. |
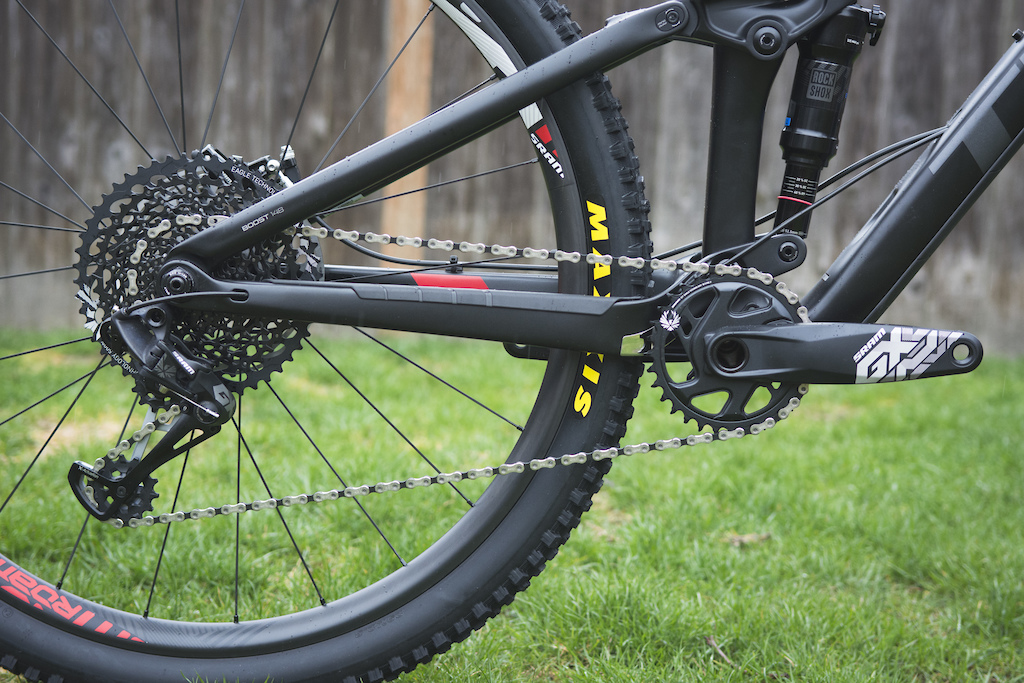
SRAM Eagle 12-speed drivetrains require a full suspension bikes' rear wheel travel to be bottomed out to set the correct chain length - an overlap of one inner and one outer link, wrapped around the largest cog and chainring, without being routed through the derailleur.
Author Info:

 Member since Mar 16, 2001
Must Read This Week
Sign Up for the Pinkbike Newsletter - All the Biggest, Most Interesting Stories in your Inbox
PB Newsletter Signup
feed chain correctly through derailleur, and around 10t and the chainring. pull ends together and not the two pins that over lap. remove one more link than that(making sure you are left with two male ends obviously. if its close, cut it longer). install the quick link and see if there is tension on the derailluer. of it's slack, remove one more link.
you are now done in about 3 min
Take chain out of pack
Install chain
Has worked for me the last two chains. Never dropped a chain and gears change nice and crisp.
You running like a 1x12 with a 34T sprocket on a frame with 450mm chainstays?
It's solvable by replacing the shimstack with a softer one: www.mtbr.com/threads/rock-shox-pike-rc-light-tune.1049304/page-2#post-14104106
Also could send an email to a group like suspension syndicate if you want to talk to a shop. They supply EXT stuff but they work on everything.
suspensionsyndicate.com
This should be noted in every advice to that Charger 1 damper!
I had an old Pike RC Charger1 and it was bad. The RCT3 Charger1 works well though.
I've got them on one bike, because hype. But I won't fall for that again.
"no babes, I need these 5 sets of $1700 carbon wheels so that I always have the right tire in all conditions! swear babes......babes!? why are you putting clothes in a bag....??"
Less than a tire without inserts inflated to 30 PSI. The whole point (or one of them) of Cushcore and similar inserts is that your sidewalls are physically supported for most of their height. Under lateral loading the sidewall joins the entire width of the insert in resisting rolling. which makes for a much stiffer overall tire system.
There are downsides to inserts, but squirmy tires are not one of them.
Cushcore pro in my hardtail and have been running Tannus tubeless in my full suspension. I also put the CushCore XC in my son's wheels. I will take the weight penalty over the potential for flats.
I can run lower pressures (with 19.5 front and 21.5 reason being my go to ), allowing the tires to grip amazingly well, Haven't had a sidewall cut since converting two years ago. I did recently get a pinch flat right on the bead on a rocky trail with the Tannus set but I was running too low of PSI for that trail and thought I would take a chance (Around 19psi in the rear) had to plug it and go back to the higher psi. Rode the CushCore Pro flat once due to a slow leak and no pump and it was sluggish but doable for a ride out.
As for the installation, they are more work, especially the first couple of times you do it but now, not much longer than a standard tire change. The Tannus is noticeably easier than the CushCore pro but similar to the XC. I agree with those about it being messy job but so is a tubeless tire change.
.
Make sure the tire is warm when attempting it first, making it more flexible. DH casing tires are gonna be a bitch, I have found, regardless of temp.
Get a big bucket or round garbage can to lay the wheel on flat
Get a CushCore bead dropper, This will help speed things up dramatically and save your hands.
Make sure the beads are truly pushed into the center well of the rim.when attempting to rermove or put on.
Start at one side and move both hands around opposite sides of the rim, pushing and rolling the bead and insert itn.
Practice makes perfect.
Cheaper and lighter than cushcore as well! + I've found the tannus doesn't have quite the distinct bottom out feeling or drag that cushcore does.
I also know that you don't need a stiff sidewall to prevent folding. That's the fundamental design of steel belted radials in car/motorcycle tires. Lots of motos run radials with sidewalls designed to flex. The stiff belt package keeps the tread from folding...which is really what you want to keep its shape (to maintain the contact patch) not the sidewalls. We use bias ply tires in MTB though but increasing all around carcass stiffness also reinforces that tread area we want to keep from folding. So inserts make the tire feel more supported and it is to some degree but it's more efficient weight-wise to reinforce the carcass.
Switching to Shimano and Tektro bolts solved the issue.
I didn't strip it. Definitely just used some ugga duggas but not too many. It's an alloy bolt and receiver, so it feels plenty snug and tight. I'm going to try and bleed it again later today and if it starts leaking again I'll hit up Magura.
Definitely hit them up, their customer service is absolutely amazing.
1- High speed compression was overdamped in those forks, making it feel harsh and generally speaking, to suck. You can read in forums about it.
2- Low speed compression knob does nothing at all in the first half of the clicks from open, is not until a few clicks in that it starts having an effect. Worth knowing.
I serviced the damper removing one of the shims of the HSC and the fork improved a lot. So as Henry says the service alone will have a big effect in sensitivity if it was in need, and if you can get the HSC issue looked at, all the better.
Also, eventually I changed it for a Mattoc pro and was mind blown by the difference soo...
@Freakyjon: Obviously ProCore is with tubes
1. Install tire and air up to seat the beads. 2. Remove all air and pull one side of the tire off the rim. 3. Install the insert on the rim. 4 re install the tire bead on the rim, pushing the bead of the tire under the insert while working around the wheel to keep it in the channel of the rim and keep going back around with the lever to push and keep the tire’s bead under the insert. By this point there should be enough slack in the tire to get it mounted on the rim.
By installing the tire first and seating the bead it creates way more space in the channel of the rim to get that second bead of the tire on with the insert installed.
Three weeks later, DT sent me a new replacement wheel and after immediately slapping a Cushcore insert in there...I haven't looked back (or down)
I don’t think they are a worth while trade off for a trail, or light enduro bike… but I can see the benefits if you aren’t pedaling much, or need to run lower pressures on a trail hard tail perhaps.
83psi -7 rebound +2 LSC +2 HSC.
I weigh in at ~170 lbs and its so flippin good I cant even explain it
Higher pressure can definitely cause your tire to bounce uncontrollably on real chunky DH trails too.