Tech Tuesday – How to Bleed Formula Disc Brakes
Formula Brakes have been creeping up the status ladder as more riders discover that the unconventional looking Italian disc brakes are unmatched for stopping power, light weight and beautiful construction. Tech Tuesday walks you through the bleeding process for most of Formula’s disc brakes. The process also applies to its RX, Oro, The One, R-1 and Mega models.
Brake Bleeding Tips:
• As with all disc brakes, it’s best to remove the wheels and the brake pads BEFORE you get started so that there is no possibility that brake fluid, (or the barbeque sauce on your fingers) will contaminate the braking surfaces.
• Next, and we are adamant about this, DOT automotive brake fluid is caustic to paint and dangerous to your eyes and skin, so wear gloves and eye protection when handling brake fluid and bleeding brakes.
• Finally, Formula advises that you bleed its brakes off the bike. This good practice, because it allows you to secure the master cylinder/lever assembly and caliper in a position where the bleed ports are facing upwards. Formula recommends a simple fixture made from an old handlebar and a XC bar-end to hold the parts in position. I use a board and simply screw the parts into position with drywall screws. Today, however, we will do the job on the bike because some frames have hose routings that will not allow you to remove the caliper without disassembling the system.
![What you need to bleed Formula RX disc brakes]()
How to Bleed Formula Brakes
![Remove brake pads and put pad retainer screw and c-clip in a safe place]()
![Insert caliper spacer]()
![Locate bleed ports]()
![Fill half way and then bleed air from syringes]()
![Remove plug and insert syringe fitting]()
![Remove bleed plug and screw in syringe]()
![Bleeding the RX Front brake]()
![Close the RX brake lever with a rubber band and pull a vacuum to free remaining air.]()
![Unscrew the syringe and replace the RX bleed port plug.]()
![Release brake lever and fill bleed hole with fluid]()
![Clean system with alcohol and assemble brake pads with fresh gloves or clean hands]()
![Once the brakes are installed and the wheels are on pump the levers until they come up hard.]()
Past Tech Tuesdays:
Visit Parktool.com to see their entire lineup of tools and lubes
Brake Bleeding Tips:
• As with all disc brakes, it’s best to remove the wheels and the brake pads BEFORE you get started so that there is no possibility that brake fluid, (or the barbeque sauce on your fingers) will contaminate the braking surfaces.
• Next, and we are adamant about this, DOT automotive brake fluid is caustic to paint and dangerous to your eyes and skin, so wear gloves and eye protection when handling brake fluid and bleeding brakes.
• Finally, Formula advises that you bleed its brakes off the bike. This good practice, because it allows you to secure the master cylinder/lever assembly and caliper in a position where the bleed ports are facing upwards. Formula recommends a simple fixture made from an old handlebar and a XC bar-end to hold the parts in position. I use a board and simply screw the parts into position with drywall screws. Today, however, we will do the job on the bike because some frames have hose routings that will not allow you to remove the caliper without disassembling the system.
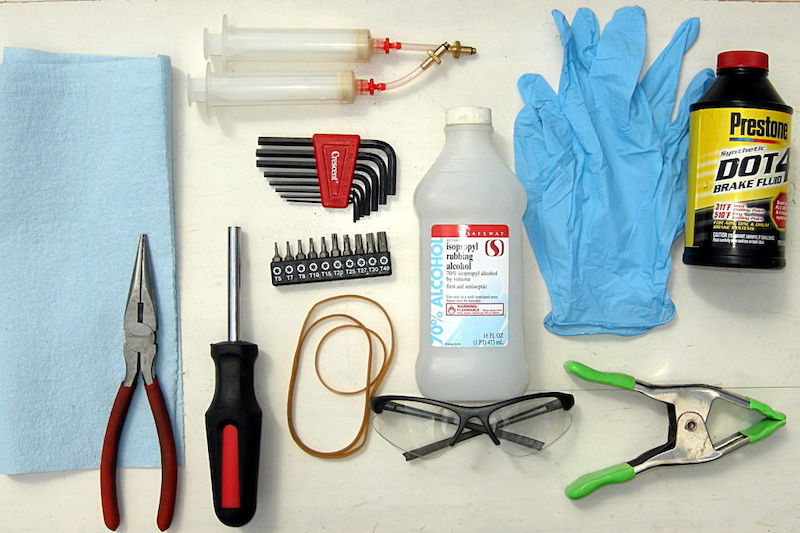
What You'll Need:
- Strong rubber bands
- Spring clamps or duct tape
- Lint free towels
- Isopropyl alcohol
- DOT 4 or 5.1 brake fluid
- Formula or Avid bleed kit
- Brake caliper spacer (not in pic)
- Torx drivers
- 5mm, 2.5mm Allen wrenches
- Eye protection
- Nitrile Gloves
- Bike stand (not necessary, but very handy)
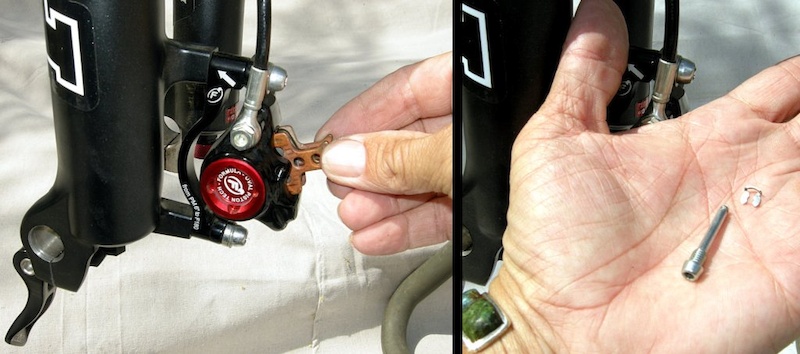
Step One -Remove the wheels. Remove the spring clip from the brake pad retainer screw and then, with a Torx T20 driver, unscrew the retainer. Slide the brake pads out and place all the bits in a clean, secure location.
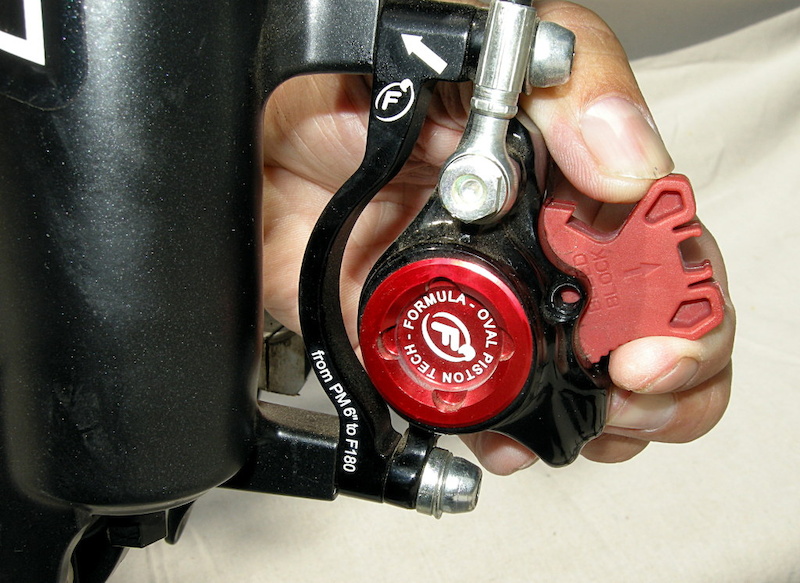
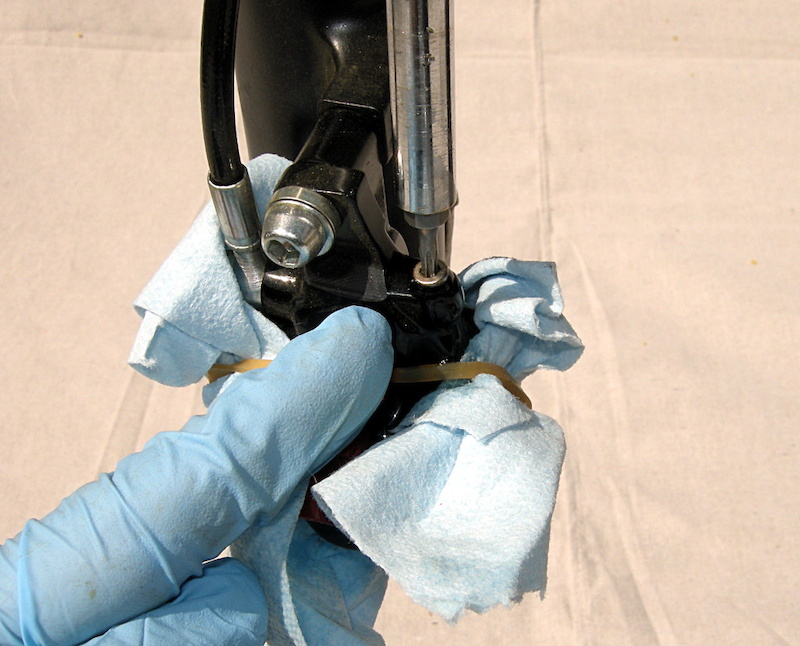
Step Two -Slide a clean caliper spacer into the brake pad slot and secure with a rubber band if necessary.
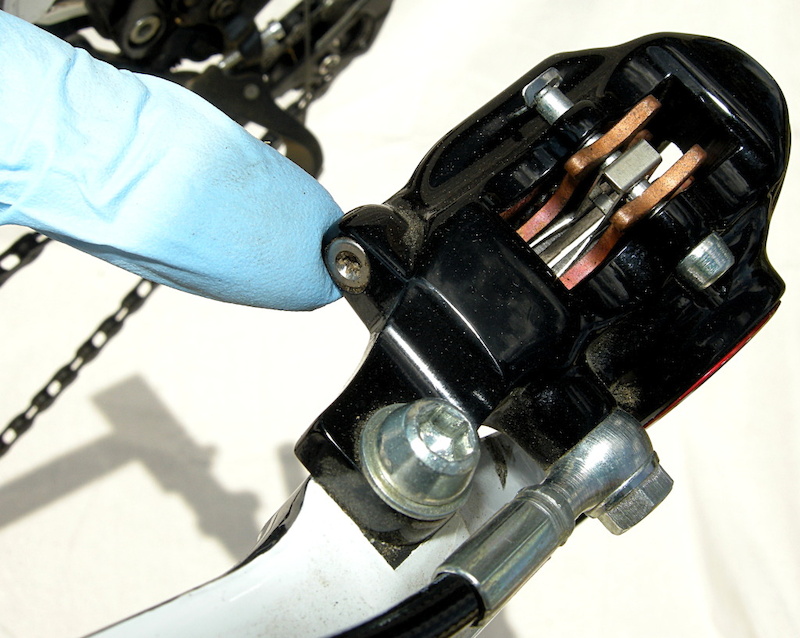
Step Three - Locate the bleed screw ports on the caliper bodies. The ports will need to be pointing upwards and elevated to the highest level in order to ensure that air bubbles inside the caliper will evacuate properly. The front caliper can be left in place, but the rear caliper will need to be removed and clamped or taped in position to the swingarm.

Step Four - Fill two syringes about half way with DOT 4 brake fluid. With the hoses upward and the fittings covered with a towel, evacuate any air from the fluid. Set the syringes aside with the hoses tilted upwards in a secure place.
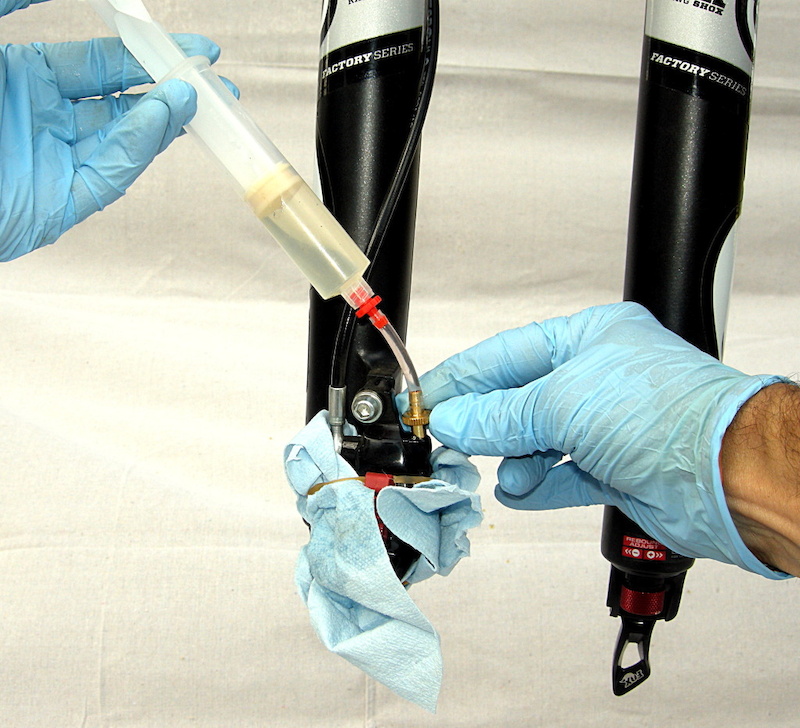
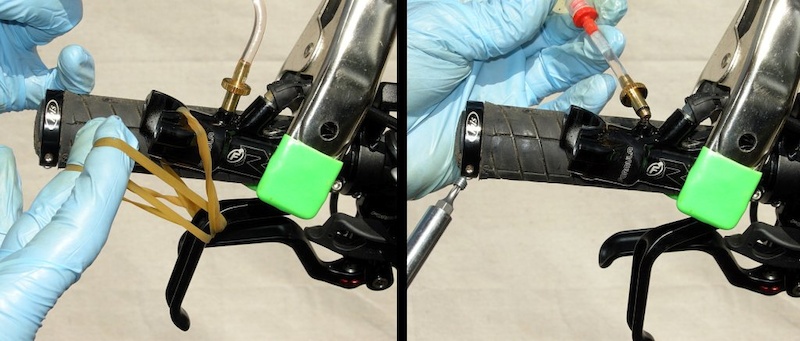
Step Five - Wrap a towel around the caliper and secure it with a rubber band or similar to catch spilled brake fluid. Unscrew the bleed cap and be sure not to lose or damage the O-ring beneath it. Screw in one of the bleed syringes.
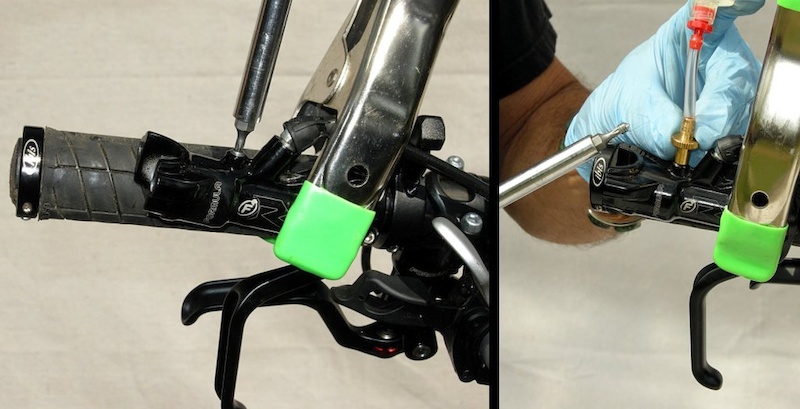
Step Six - Remove the brake lever and clamp or tape it to the handlebar grip so the bleed port points upward (Formula's R1 bleed port is already in position and the lever need not be removed from the handlebar). Unscrew the bleed port and then screw in the other syringe.
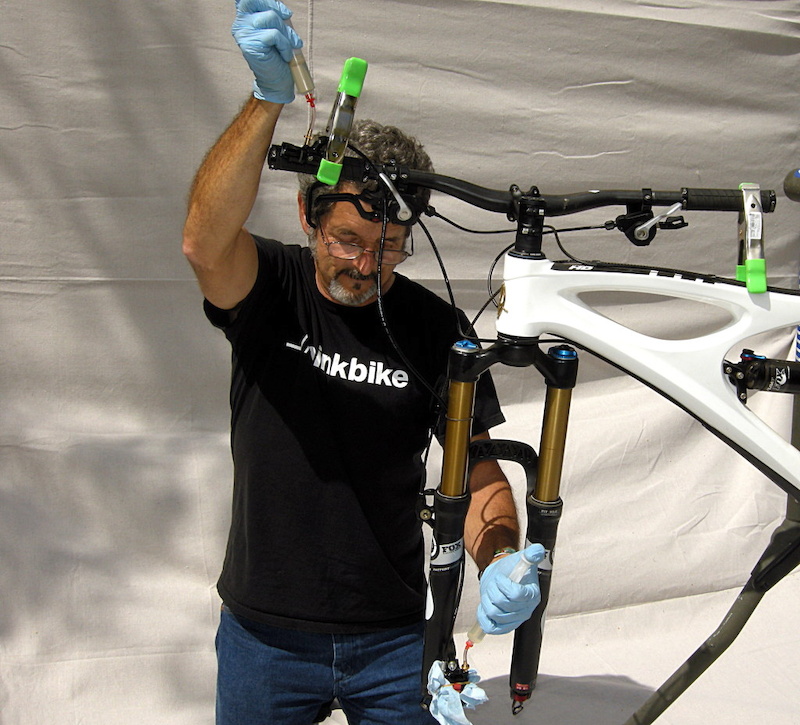
Step Seven - Push brake fluid from the caliper side through to the brake lever side. It helps to pull the opposite syringe slightly to assist the process. Keep the syringes upright so air bubbles rise to the top and are not re-injected into the system. Repeat this action back and forth from the brake lever to the caliper four times, or until air bubbles no longer escape from the system.
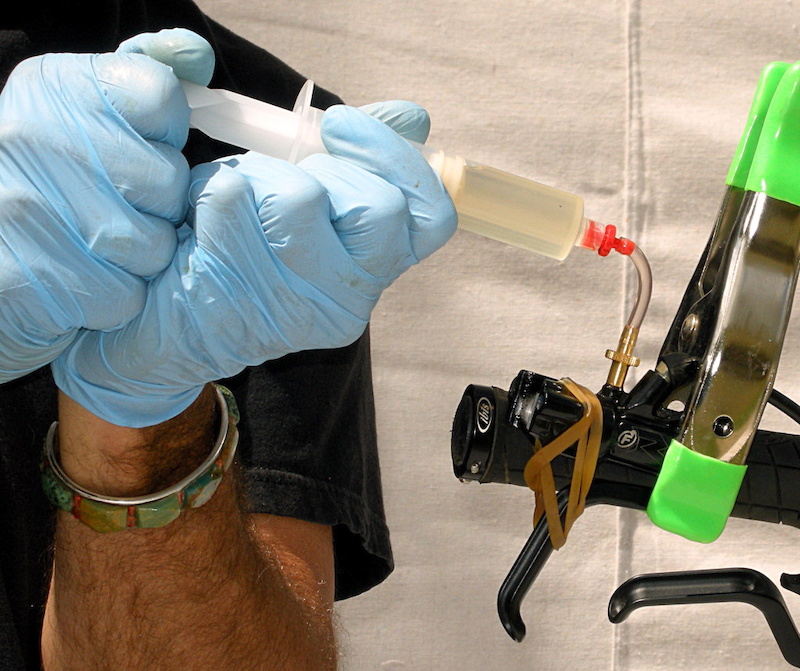
Step Eight - This is probably the most important step. To check for any trapped air in the caliper and lever, close the brake lever and secure it with a rubber band. Now, pull the syringe to draw a vacuum and then push gently to replenish fluid. Repeat this action a few times at the lever and at the caliper.
Step Nine - Remove the syringe at the caliper and replace the bleed-port plug.
Tip: Look inside the bleed plug hole to check the fluid level. Add fluid with the syringe until the level reaches almost to the top of the threads to ensure the plug will not introduce air into the system.
Tip: Look inside the bleed plug hole to check the fluid level. Add fluid with the syringe until the level reaches almost to the top of the threads to ensure the plug will not introduce air into the system.
Step Ten - Pressurize the brake-lever syringe slightly while you release the rubber band holding the lever. Remove the syringe, check the fluid level as above, add fluid as necessary and then replace the bleed plug.
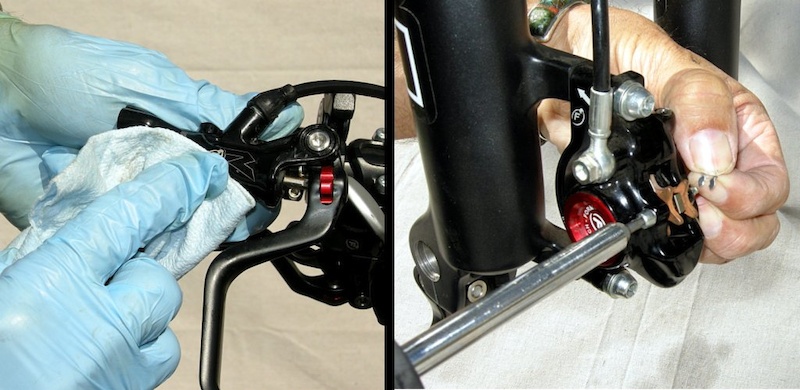
Step Eleven - Clean the entire system with alcohol and a clean towel. Remove the brake pad spacers. Before you install the brake pads and rear wheel, either switch to clean Nitrile gloves, or use clean hands to avoid contaminating the braking surfaces. Install the brake pads and replace the wheels

Step Twelve -Step Install the brake levers and calipers. Pump the brake pads up to the rotors with a few lever strokes. The levers should feel firm. No? Repeat the process beginning with step eight and try again.
Tip: If the brakes still feel spongy after you have properly bled them, you may have damaged a bleed-port O-ring and are introducing air or losing fluid through the port. Replace the O-ring seals. Be sure to go for a short shake-down ride to test your brakes before you commit to a serious ride.
Tip: If the brakes still feel spongy after you have properly bled them, you may have damaged a bleed-port O-ring and are introducing air or losing fluid through the port. Replace the O-ring seals. Be sure to go for a short shake-down ride to test your brakes before you commit to a serious ride.
Past Tech Tuesdays:
Visit Parktool.com to see their entire lineup of tools and lubes
Author Info:

Must Read This Week
What a nightmare. I miss my old Shimanos!
Anyhow, it worked, as awkward as it was compared to the simplicity of a shimano bleed. Thanks much for this tip it was super helpful.
singletrackworld.com/forum/topic/bleeding-brakes-how-to-an-idiots-guide
Even if I bleed Hope brakes, I still put some DOT in the Avid bleed kit seringe and degas it ^^
How about a wheel building video?
*cough *cough shimano uses mineral oil ftw
www.pinkbike.com/news/tech-tuesday-bleeding-avid-brakes-2010.html
I though Formula have no "bleed block" or "caliper spacer" but compatible with Avid's?
I always bleed following this vid that makes my Oro Bianco very firm.
But I'm struggling to get freestroke shorter.
Although overfilling fluid causes some damages on internal system of lever, is there any tips for that?
Edit: I'm complaining about the issue of poor syringe quality and not your process really. If you have syringes that won't leak you are golden.
Step two: Throw away the Formula brakes
Step three: Fit Shimano brake
Step four: Ride for years problem free!!
www.formula-italy.com/en/product/rx/10
So sick!
I want that.
Oh wait. I'm way too cheap to buy some
Yay for mech disc brakes!